![How to Fix USB-C Port Not Working on MacBook [12 Ways]](https://media.techietech.tech/2023/05/How-to-Fix-USB-C-Port-Not-Working-on-MacBook-12-Ways.jpg)
There’s a lot you can do with the USB-C port on your MacBook Pro or MacBook Air. You can use the USB-C port to charge your MacBook, and transfer data. It also allows you to connect your MacBook to external displays and devices. But what if the USB-C port on your MacBook becomes faulty restricting you from doing all that? Well, we’re not kidding, we have come across multiple reports where the USB-C ports on their MacBooks are not working.
Since you are here, we assume you are also experiencing USB-C not working problems on your MacBook Air or MacBook Pro. First of all, let me tell you it is a
pretty common problem and is fixable with a few workarounds. So, you can stop worrying about the damage. But before we move ahead with the solutions, we need to talk about the possible reasons behind the problem i.e. why the Mac USB-C port is not working.
What causes the USB-C port to stop working on MacBook?
For those wondering why is my Mac USB-C port not working, it could be due to different hardware or software issues. But the most common reasons behind the USB-C port not working on MacBook Air are listed below:
- Dust and debris accumulation inside the port
- Faulty third-party apps interfering with the working of the port
- A defective charging cable or adapter can be mistaken as a USB-C port not working issue on MacBook, too
- Software bugs or glitches
- A burnt-out port
Now that you are aware of possible reasons why the USB-C port stopped working on your MacBook, let’s jump right into the list of troubleshooting methods to fix the issue.
Disclaimer: Proceed at your own risk, TechieTechTech will not be responsible if anything goes wrong with your device.
Top 12 ways to fix USB-C port not working problem on MacBook
Method #1: Clean the USB Type-C port
Inspecting the suspected port is the first and foremost thing that we recommend doing when you experience a USB-C port not working issue on your MacBook. Sometimes it is just a matter of dust and debris getting inside the USB-C port and nothing more. Therefore, it is important to look closely at the suspected port. Use the flashlight on your phone and take a closer look at the USB-C port.
Do you see any dust or debris or any discoloration? If you see any charring on the circuit board, that’s a probable sign why your Mac not recognizing a USB device. The charring suggests a burnt-out port that should be replaced professionally. We strongly recommend you take it to Apple Store than any third-party repair center.
In contrast, if you only see dust particles or lint inside the port while examining the faulty USB-C port of your MacBook Air, just clean the port using a can of compressed air
or an air duster gun. You can easily get it from your nearby retail store or buy it online. As you know USB-C ports are recessed, so it could be tricky to get a clear look at the contact points. Therefore, we recommend you stay in a well-lit area, also we suggest using a magnifying glass if available. Or, you can use the iPhone’s camera with the flash turned on. After you have cleaned the faulty port, don’t forget to test it out using a USB-C device to check whether the USB-C port not working on MacBook Pro is fixed or not. If the issue persists, try the other methods listed below.
Also read: Best Monitors for M2 MacBook Air in 2023: How to pick the Top External Monitors [Buying Guide]
Method #2: Change the USB Type-c cable or USB Type-c hub
If you’ve figured out that there is no dust and debris inside the port, we suggest you use a different
Type-C cable or USB-C Hub/Adapter with your MacBook. It is possible that the cable or adapter may have become faulty due to prolonged use or rough handling. That’s why you might confuse it with the USB-C port not working issue on MacBook Air. Therefore, we always recommend our readers use the MFi-certified Type-C cables for data transferring on their Mac. That’s not all, for charging your MacBook, we strongly recommend you use the USB Type-C cable included in the box. Pro tip: if you work with multiple USB-C gadgets, make sure to check out some of the best USB-C adapters/hubs for your MacBook Air.
Also read: Best Docking Stations for M2 MacBook Air to Buy in 2023
Method #3: Reboot Your MacBook
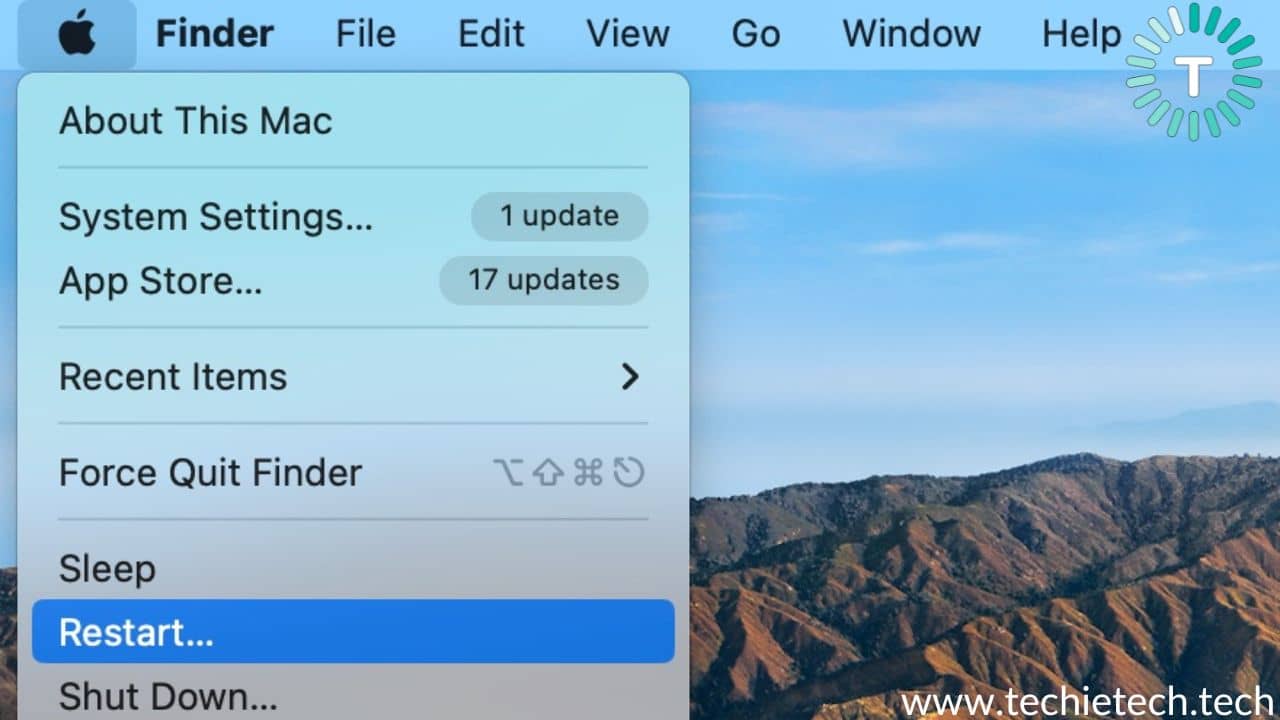
This might sound stupid to many, but a simple reboot can fix the issue of the USB-C port not working on MacBook Pro 2017 or even the 2023 versions. A normal reboot can fix minor issues or software glitches that could be triggering issues where your Mac is not recognizing the USB-C device. You can simply restart a MacBook by clicking on the
Apple Logo in the top left corner, then from the drop-down, click on Restart.
Also read: Best Charging Stations for iPhone, Apple Watch, MacBook in 2023
Method #4: Reset the USB ports on MacBook
If rebooting didn’t help fix MacBook’s USB-C port not working issue, another method you should try is resetting the USB-C ports. Resetting USB-C ports on MacBook Pro and Air is quite simple if you follow the steps given below:
Disclaimer: We recommend you back up your device and stay cautious while executing this command. Messing around with this command could lead to a system crash or erratic behaviors.
Step 1: First, press the Command + Space bar to open the Spotlight Search,
Step 2: Now, type “Terminal” in the Search box and press Return,
Step 3: Lastly, copy the command – “sudo kextunload IOUSBMassStorageClass.kext” and paste it in the Terminal console, then press Return.
You can re-enable the USB-C port by resettling SMC as mentioned below.
Also read: MacBook Pro/MacBook Air not charging? Here’s our guide on how to fix it (13 ways)
Method #5: Reset SMC
If you can’t fix the MacBook Pro USB-C port not working issue after resetting the USB-C port, then resetting SMC (System Management Controller) might come in handy for you.
For the uninitiated, the SMC is a chip on the logicboard that manages all the power-related functions including thermal management, battery charging, USB-C port functionality, and more. Therefore, resetting it might help you fix the problem where both USB-C ports are not working on MacBook Air or Pro. This process usually reactivates the USB-C ports of MacBook Pro and Air, so why don’t you give it a try?
Here’s how to reset SMC on your MacBook (Intel-based or Apple Silicon-based).
Since Apple Silicon Macs don’t have an SMC (System Management Controller) chip or a T2 chip, you can’t reset SMC on them. In fact, it is now built into the normal reboot sequence. Therefore, restarting your Mac is enough to reset the SMC.
Here’s the list of MacBooks powered by Apple Silicon:
- 14-inch MacBook Pro (M2 Pro chip, 2023)
- 16-inch MacBook Pro (M2 Pro chip, 2023)
- 13-inch MacBook Pro (M2 chip, 2022)
- 14-inch MacBook Pro (M1 chip, 2021)
- 16-inch MacBook Pro (M1 Pro chip, 2021)
- 13-inch MacBook Pro (M1 chip, 2020)
- 13.3-inch MacBook Air (M1 chip, 2020)
- 13.6-inch MacBook Air (M2 chip, 2022)
For Apple Silicon MacBooks:
Step 1: Click on the Apple Logo
Step 2: From the drop-down menu, click on Shutdown
Step 3: Then, close the lid once your Mac is shut down,
Step 4: Wait for at least a minute, then turn on your Mac by pressing the power key from the keyboard.
That’s all you have to do. Now, you can check whether the USB-C ports not working issue on your MacBook Pro M1 is fixed or not. You can connect any USB-C device to the port and see if it is working.
If you have any of the following Intel-based Macs with T2 security chip, make sure to follow the step-by-step instructions given below:
Here’s the list of MacBooks with T2 security chip:
- 13-inch MacBook Air (2020)
- 13-inch MacBook Air (2019)
- 13-inch MacBook Air (2018)
- 13-inch MacBook Pro (2020, 2 x Thunderbolt 3 ports)
- 13-inch, MacBook Pro (2020, 4 x Thunderbolt 3 ports)
- 16-inch MacBook Pro (2019)
- 13-inch MacBook Pro (2019, 2 x Thunderbolt 3 ports)
- 15-inch MacBook Pro (2019)
- 13-inch MacBook Pro (2019, 4 x Thunderbolt 3 ports)
- 15-inch MacBook Pro (2018)
- 13-inch MacBook Pro (2018, 4 x Thunderbolt 3 ports)
For Intel-based MacBooks with T2 security chip:
Step 1: First, click on the Apple logo, then click on Shut down your Mac,
Step 2: Then, press and hold the power button for 10 seconds, then restart,
Step 3: If you are unable to fix the issue, Shut down the Mac again using Step #1,
Step 4: Now, press and hold the left Option key, left Control key, and right Shift key for about seven seconds,
Step 5: Keep pressing the aforementioned keys, while you press and hold the Power button for seven seconds,
Step 6: Lastly, restart your Mac after a few seconds from the time you release all keys.
Note: These steps apply to MacBooks, including the Apple T2 security chip introduced in late 2017.
Also read: MacBook Keyboard not working? Here’s our guide on how to fix your Mac Keyboard in 2020
Method #6: Reset NVRAM
The NVRAM in your MacBook usually stores data related to display, volume, startup disk selection, time zone, and more. Therefore, resetting it might come in handy for you to resolve the USB-C port not working on your MacBook Pro.
For those uninitiated, the Apple Silicon MacBook resets NVRAM on its own, therefore you don’t have to do anything. However, if you have an Intel-based Mac, you can reset NVRAM to fix the USB-C port not working on the MacBook Pro problem.
How to reset NVRAM on an Intel-based MacBook Pro:
Disclaimer: Resetting the NVRAM will wipe all the current settings on your Mac and restores the default setting on your Mac. This includes display resolution, time zone, volume, and more. However, executing this method doesn’t delete any data from your storage drive.
Step 1: First, shut down your MacBook Pro,
Step 2: Next, power on your Mac and press and hold the “Option + Command + P + R” keys simultaneously,
Step 3: After about 20 seconds, release the keys. During the process, your MacBook may appear like it is restarting as you can hear the startup sound or see the Apple logo multiple times.
Step 4: Once your MacBook restarts, you can change the system settings that were reset during the process.
Also read: AirPods not connecting to MacBook? Here are 13 ways to fix it
Method #7: Check USB info in the system report
If you have tried all the solutions above and still wondering why is one of my USB-C ports not working on MacBook Pro, we recommend checking the USB info. You can access this information from the system report on your MacBook Pro. If there’s internal hardware damage, it will be reflected in this report.
How to check USB info in the system report:
Step 1: From the top left corner, click on the Apple logo,
Step 2: Now, click on About This Mac,
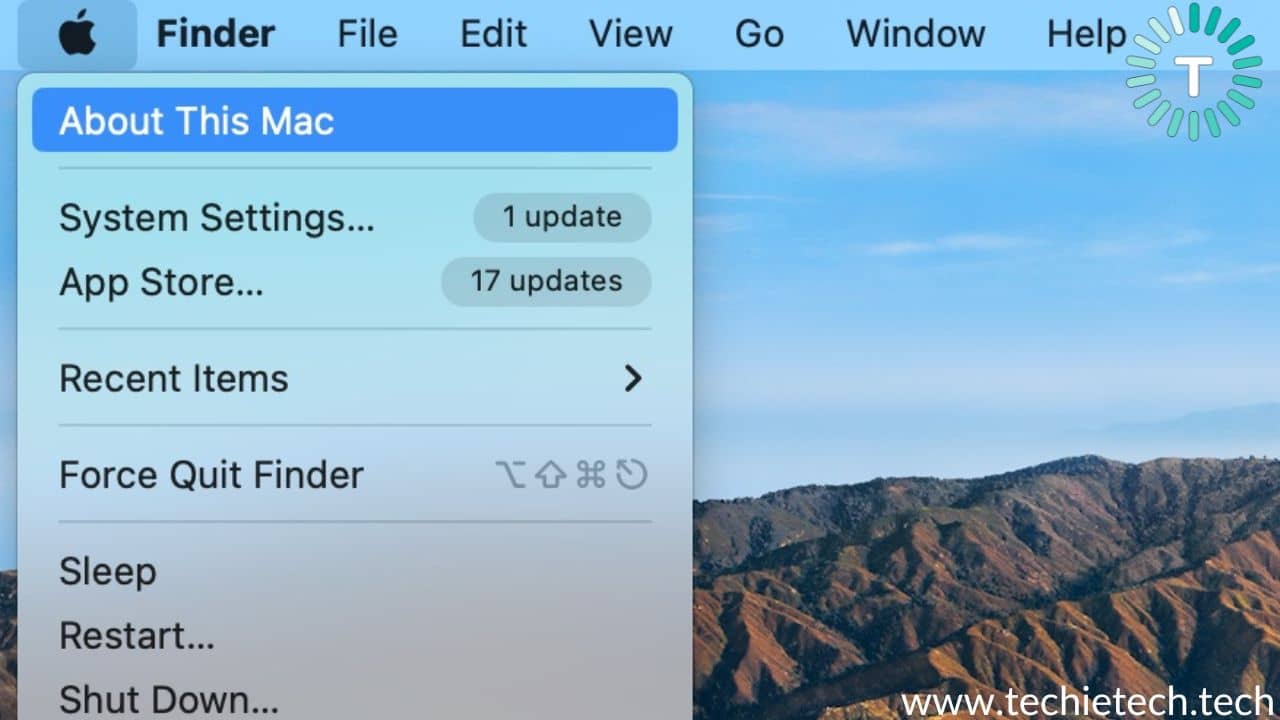
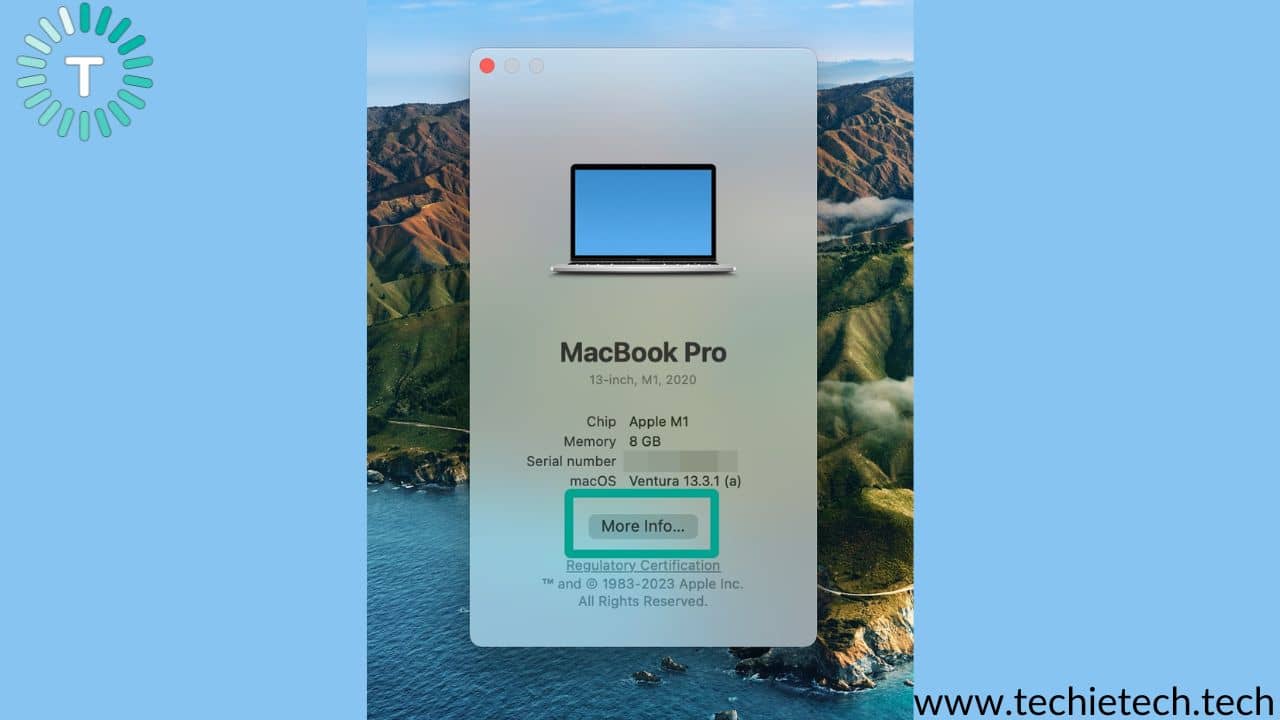
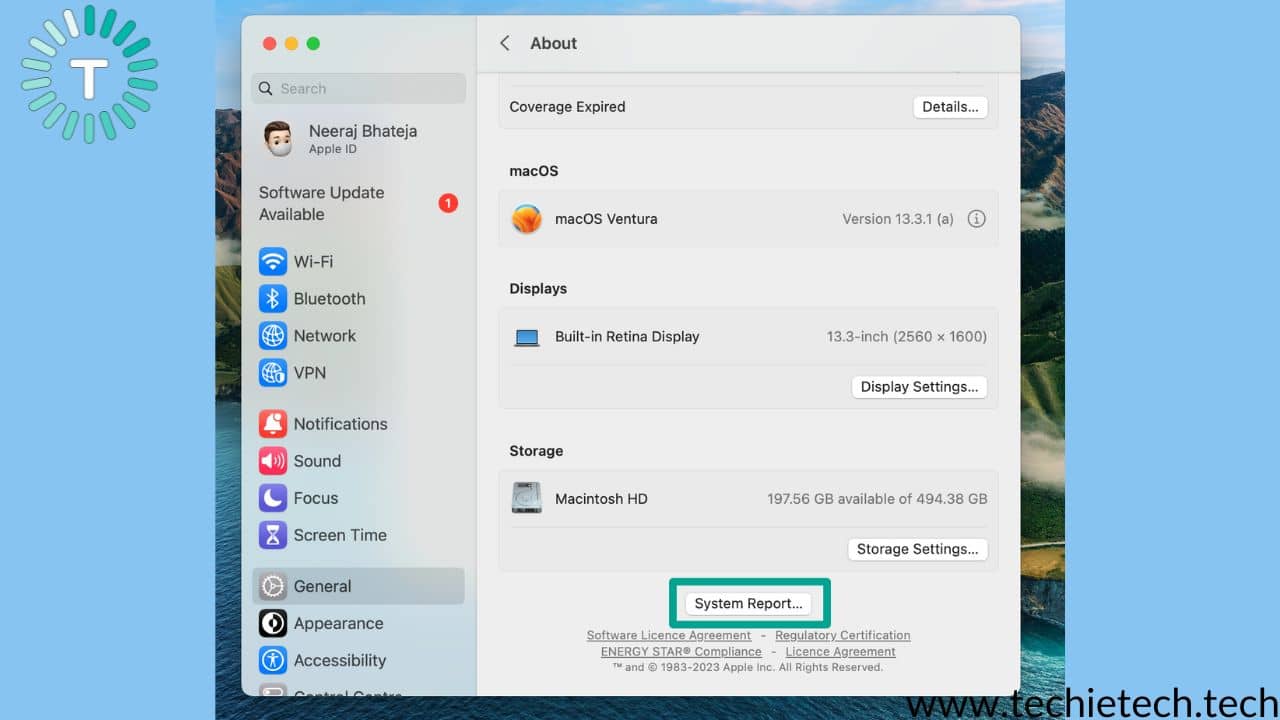
Step 3: Then, click on System Report,
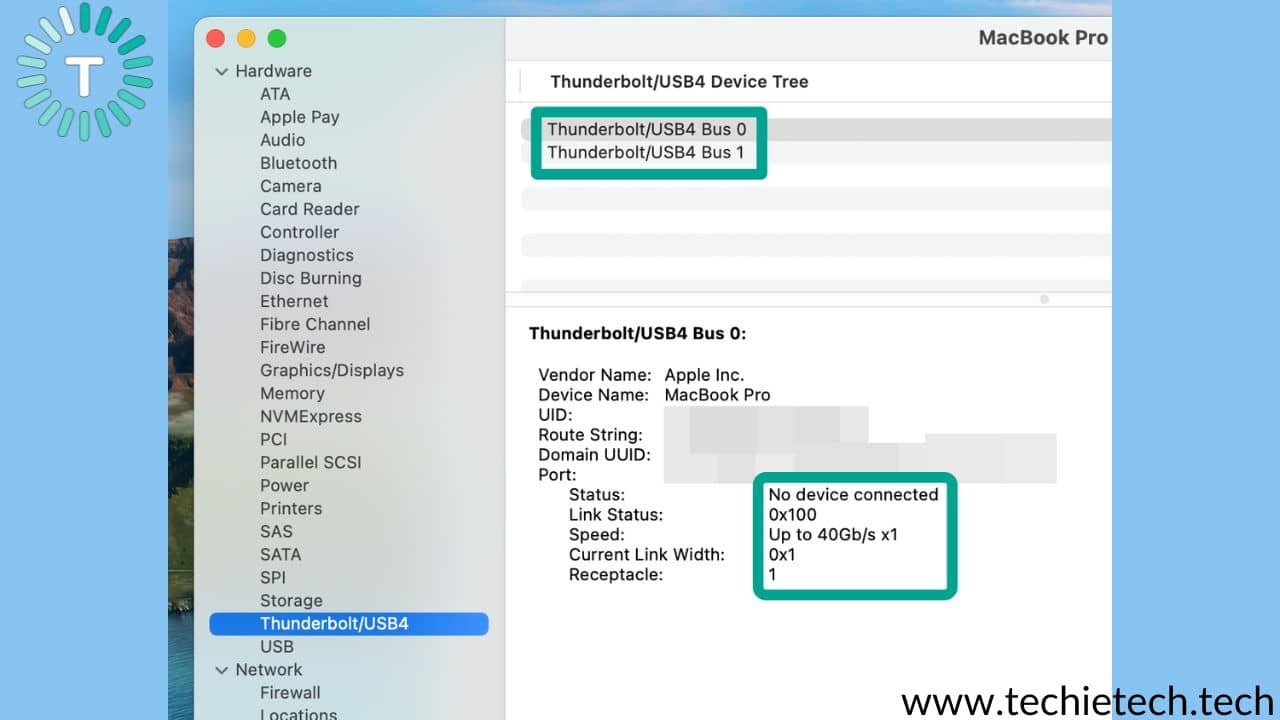
Step 4: Next, click on the Thunderbolt/USB4 from the left sidebar, if you can see the name of the Thunderbolt port and don’t find any error codes as mentioned below, please understand that Mac’s USB-C port is fine.
Step 5: Next, click on USB-C and check if you can see the name of the port and confirm whether there’s any error code or not,
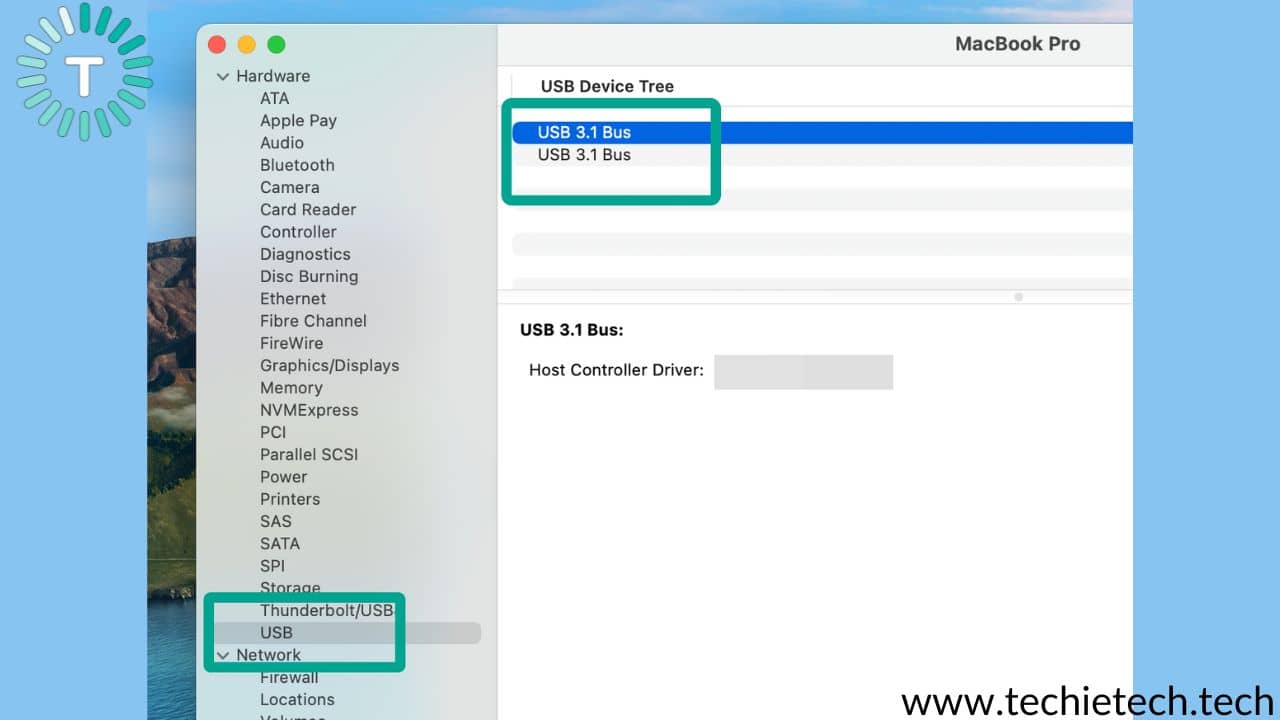
If you found error codes NDT001 to NDT006 in the report, you should understand that there’s some fault in the Thunderbolt/USB-C ports that needs some fixing. In addition, if you can’t see the name of the ports, it also indicates some kind of problem associated with the USB-C or Thunderbolt port. However, if everything seems fine, but still USB-C port is not working on your MacBook, we recommend updating your macOS.
Also read: TouchID not working on MacBook? Here are 10 ways to fix it
Method #8: Update macOS
System updates focus on offering new and improved features, potential bug fixes, and much more. You should understand that outdated system software could cause your Macbook to run into different problems, and USB-C port issues could be one instance out of many. We don’t usually pay attention, but you might be experiencing a USB-C port not working issue on MacBook Air because it running on a buggy macOS version. Therefore, updating your Mac to the latest macOS available is the best thing to do.
Here’s how to update your MacBook to the latest macOS version available:
Step 1: First, tap on the Apple Logo from the top left corner of the MacBook home screen,
Step 2: From the drop-down menu, tap on System Settings,
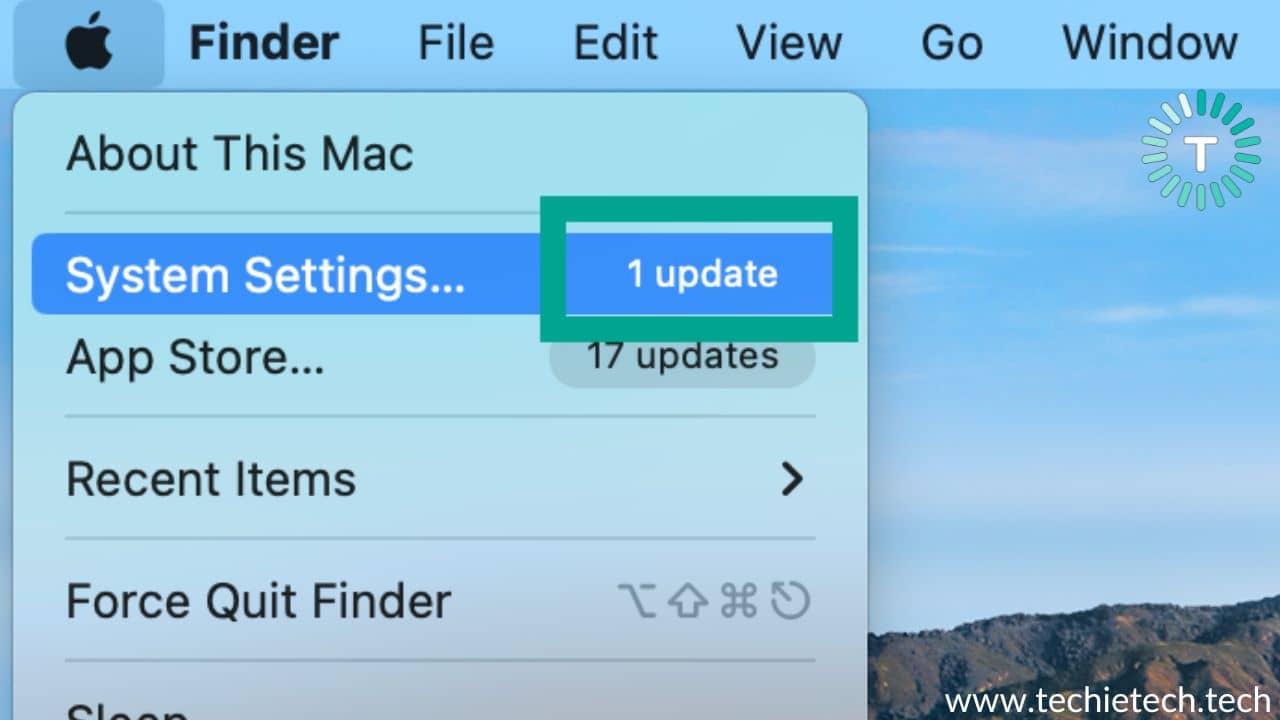
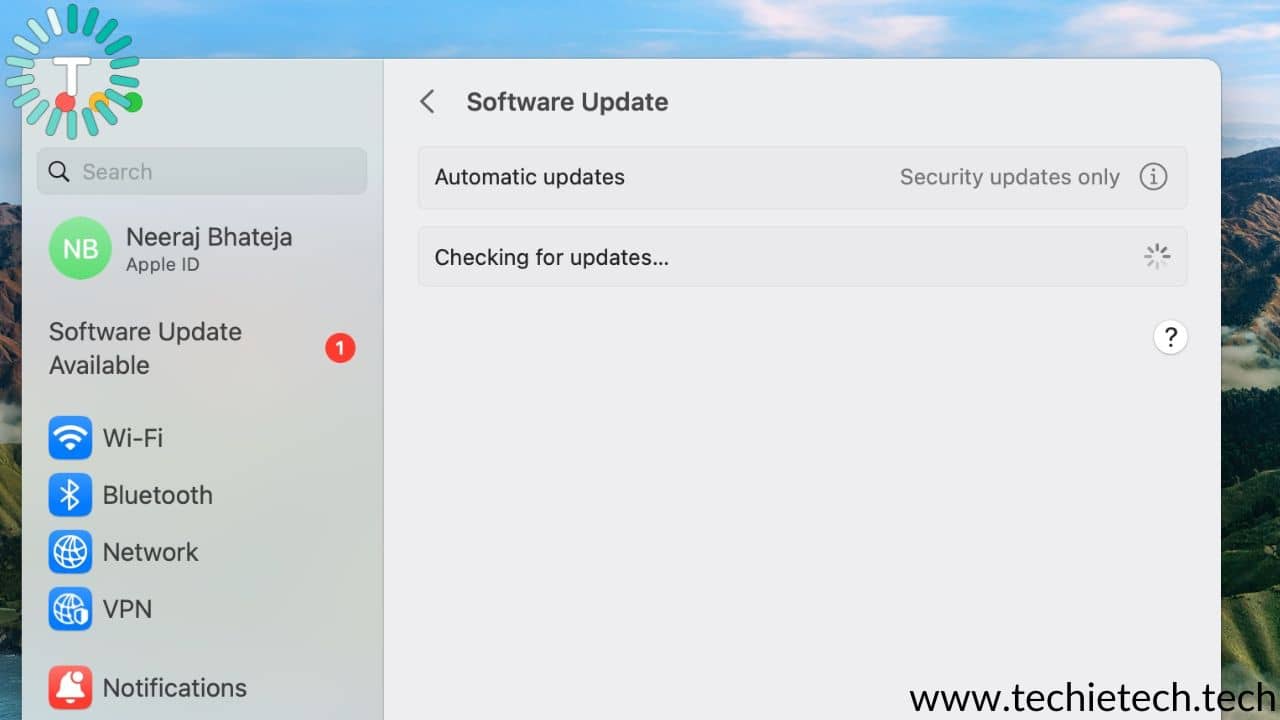
Step 3: Then, click on Software Update,
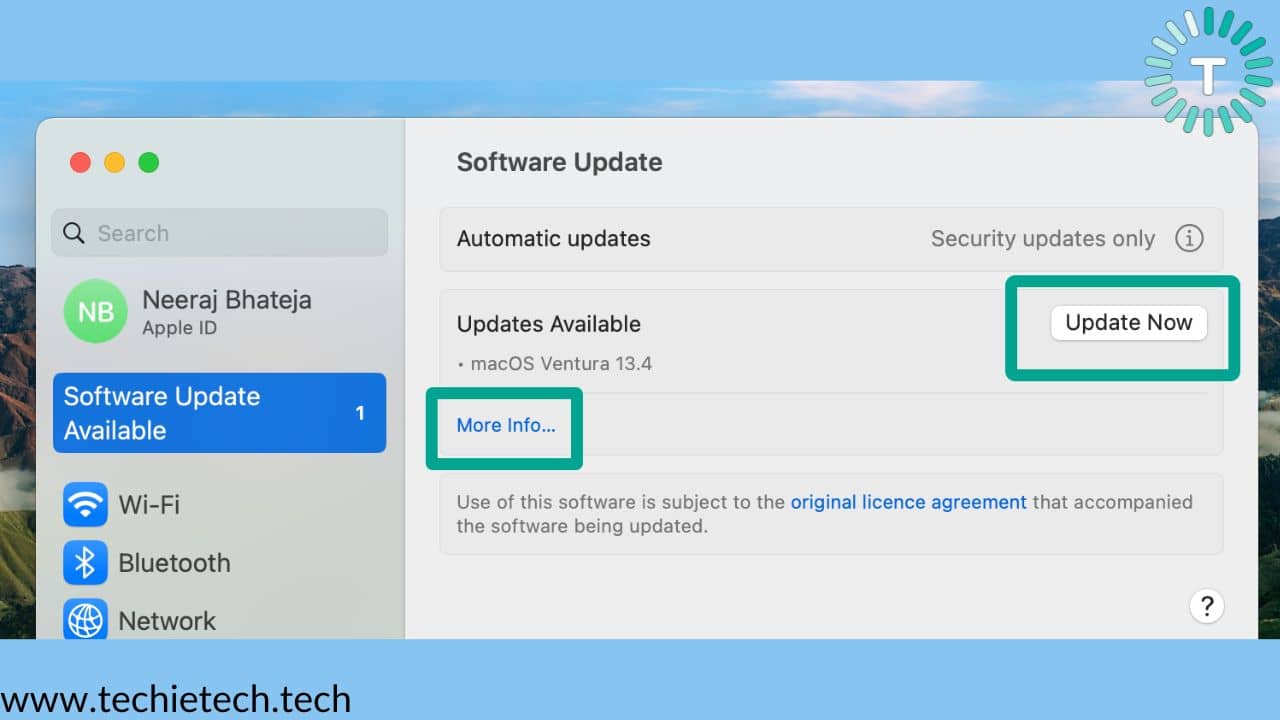
Step 4: Now you’ll see the Software Update window, check whether a new update is available or not,
Step 5: If there’s any new update, tap on Update Now or Upgrade Now,
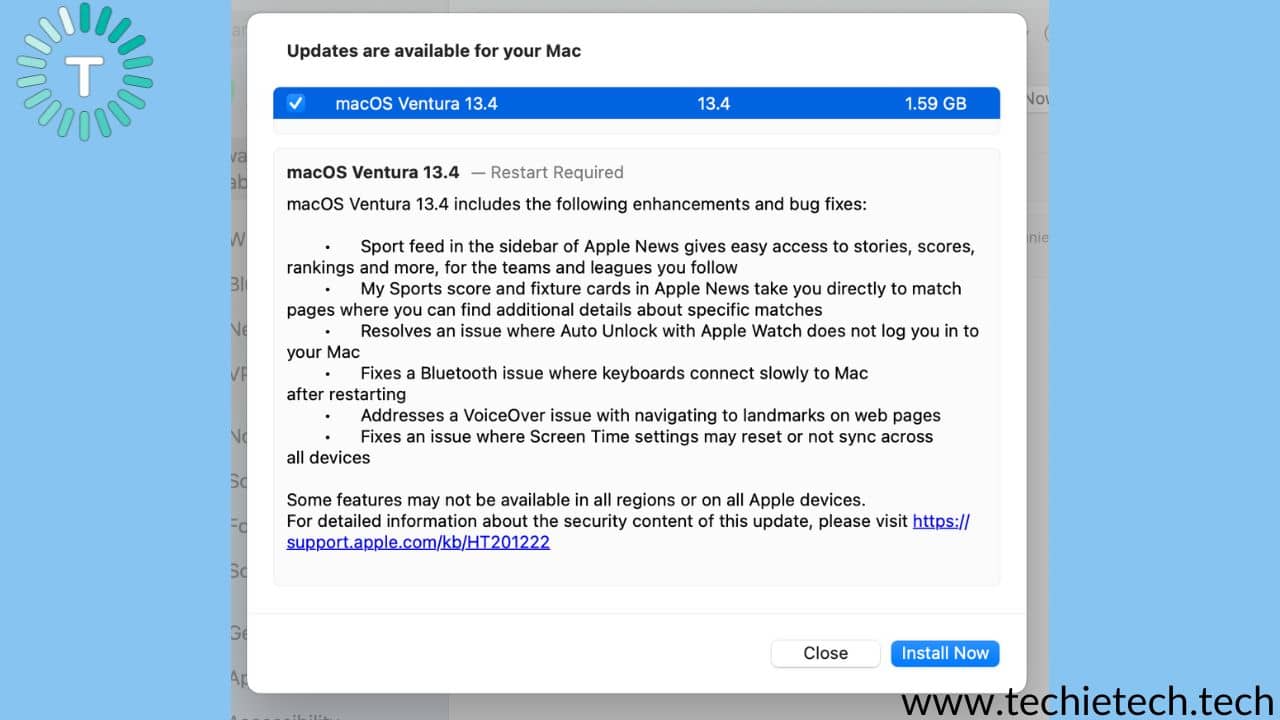
Step 6: If asked, make sure to enter the administrator password.
Once the MacBook is updated, make sure to check whether your MacBook is recognizing USB-C devices or not. If the USB-C not working problem is resolved, you should understand that the outdated software was causing the issue. If you are among those who are still facing issues where the
USB-C hub is not working on MacBook Pro, make sure to continue trying the methods listed below.
Also read: MacBook Pro Trackpad not working? Here 16 are ways to fix
Method #9: Run M1 Mac in Safe Mode
Is the MacBook USB-C port not working issue still unresolved? Well, you need to boot your M1 Mac in Safe mode. If a third-party app triggers the issue, this method might help you.
Here’s how to boot your M1 Mac in Safe Mode:
Step 1: Click on the Apple Logo icon, then click on the Shut Down option,
Step 2: Now, turn on your Mac and continue to press and hold the power button until you see the startup options,
Step 3: Then, select your startup disk,
Step 4: Lastly, press and hold the Shift key, then click on the Continue in Safe Mode option,
Step 5: After your Mac is booted in safe mode (you’ll see ‘Safe Boot’ in the upper right), make sure to log in using your account details.
Are the USB-C ports on your Mac working fine in Safe Mode? If so, you need to understand that the USB-C problem on your Mac is triggered by a faulty third-party app. Therefore, it is best to uninstall such apps to resolve the issue. Even if you didn’t find any troubling apps, we still recommend removing the last two apps installed to confirm that they are not causing any trouble. You can uninstall the conflicting apps by following the step-by-step instructions from the method given below.
Remember, the use of an emulator app on your Mac like Parallels Access could be another reason behind USB-C port problems. Therefore, it is best to check if the app is causing the issue. Recently, one of our team members was having a similar issue where his USB-C SSD was not being detected on Mac. However, it turned out to be a bug in macOS Ventura and was easily resolved by updating the app as well as macOS.
Also read: M1 MacBook Pro/MacBook Air not turning ON? Here are 11 Ways to fix it
Method #10: Uninstall potentially conflicting apps
If the USB-C port is not working on your MacBook Air lately, and you didn’t find any problem with USB devices, faulty apps might be the reason behind this issue. If you have downloaded an app from the internet, it may contain malware which could be causing all the problems. Trust us, we’ve been there.
If you have any such apps downloaded to your MacBook Pro, don’t forget to uninstall them at the earliest to resolve the USB-C port not working on your MacBook Air.
Here’s how to uninstall an app from MacBook Pro using Finder:
Step1: First, open the Finder app and go to Applications,
Step 2: Now, find the app that you want to uninstall, then drag the icon of the app to the Trash or you can right-click to open options and click on “Move to Bin” (you might be asked to enter an administrator password),
Step 3: Then, right-click on the Trash icon and select Empty Trash.
Also read: 10 Ways to Fix MacBook Pro Touch Bar not working
Method #11: Run Apple Diagnostics
If you are unable to detect or fix the USB-C not working issues on your MacBook Pro 2020 or 2023, the in-built Apple Diagnostics tool can come in handy for you. That said, the process of running Apple Diagnostics varies depending on which MacBook model you own.
For Apple Silicon MacBooks:
Step 1: Press the power button on your MacBook and keep holding it while your MacBook reboots,
Step 2: Once you see the Startup Options on your screen, simply release the power button and press Command + D on the keyboard,
For Intel-based MacBooks:
Step 1: First, press the Power button, then quickly press and hold the D key while your Mac reboots,
Step 2: When you see the progress bar, you can release the D key.
If the Apple Diagonastic detects any problem or returns any error code, make sure to write the information or take a picture with your phone. The information could be handy in deciding whether you need to take your MacBook Pro for hardware repair.
Also read: MacBook Pro not turning ON? Here’s how to fix it
Method #12: Visit the nearest Apple Store
If nothing seems to be helping you in fixing the MacBook USB-C port not working issue, we recommend visiting the nearest Apple Store. Your device will be checked by trained professionals and the issue will most probably be fixed. Just in case the USB-C port of your MacBook isn’t fixable from their end as well, you might end up getting a brand new MacBook as well. But, you need to ensure that the device is under warranty or has Apple Care and that you have all the relevant documents.
That’s all for now in this troubleshooting guide where we discussed about top ways to fix the USB-C port not working on your MacBook Pro and MacBook Air. Also don’t forget to read our guide on
how to fix your MacBook not connecting to Wi-Fi or Internet.
Banner Image Source: Unsplash