With the announcement of iOS 17, Apple showcased numerous features that will supposedly elevate the user experience on iPhone. Profiles in Safari is one such feature that has been introduced to iPhone with iOS 17. This feature allows you to distinguish your web browsing data from one profile from another. It could be a personal profile or a work profile or even a holiday profile for an upcoming trip. For philomaths or learners, it allows separating their academic profile and personal profile on Safari. Honestly, it is like having different browsers in a single browser. All the cookies, history, tab groups, extensions, and favorites for each profile are separate, ensuring more privacy and a personalized Safari browsing experience.
Why profiles on Safari is beneficial?
There are a few reasons this new iOS 17 feature can be handy for you. We have discussed them below in brief, keep reading.
- Personalization: You can personalize extensions and favorites for each profile creating a customized experience for yourself.
- Improved Privacy: Apple cares about users’ privacy, and we know it. Each profile that you create saves its own history and cookies. This ensures to keep data of each profile is separate from your other profiles making the browsing experience more private and streamlined.
- Organized Browsing: Profiles allow you to keep your browsing activities organized, keeping them separate and distinct from other profiles. It would be weird to use your work email for ordering DoorDash, right?
Also read: How to Create, Delete and Share Contact Posters on iPhone (iOS 17)
What are the uses of profiles in Safari?
Now that we know profiles offer you a separate and more personalized browsing experience, there can be multiple use cases for this feature. We have explained it in the section below to give you a better understanding.
- Work-Life Balance: It can be challenging to keep your personal and professional life separate in the virtual world. That’s why profiles are there to help you out. It ensures that you have a separate virtual space for personal and work-related browsing, keeping them apart. In the context of working from home, this iOS 17 feature can be a lifesaver.
- Family Sharing: For people who have a common device like iMac or iPad for home. You can always create a separate profile for each family member. It ensures a private and personalized Safari browsing experience for everyone.
- Safe Browsing: If you have minors in your family, a dedicated profile can be created to control the content they consume and make web browsing safe for them. It offers a similar experience that you might experience when enabling the Safe Search feature on Google Chrome.
Also read: How to Speed up your iPhone?
Now that you have understood the profiles feature, it’s now time to set it up. We are well aware that it is a relatively new feature and you are here to find out how to create profiles in Safari. Luckily, you’ve landed in the right place, and we are more than happy to help.
We have divided this guide into three different sections. The first section talks about how to create or set up profiles in Safari on iPhone. The second one talks about deleting a Safari profile, whereas the third section will help you learn how to switch between different profiles in Safari on iPhone.
So, let’s not waste further time and jump right into the steps.
How to create a profile in Safari on iPhone running on iOS 17
Creating a profile in Safari on your iPhone is a piece of cake. You can simply follow the instructions given below:
Here’s how to create a profile in Safari:
Note: We have created two profiles (Work and Learn) using the above steps to demonstrate how to delete and switch profiles.
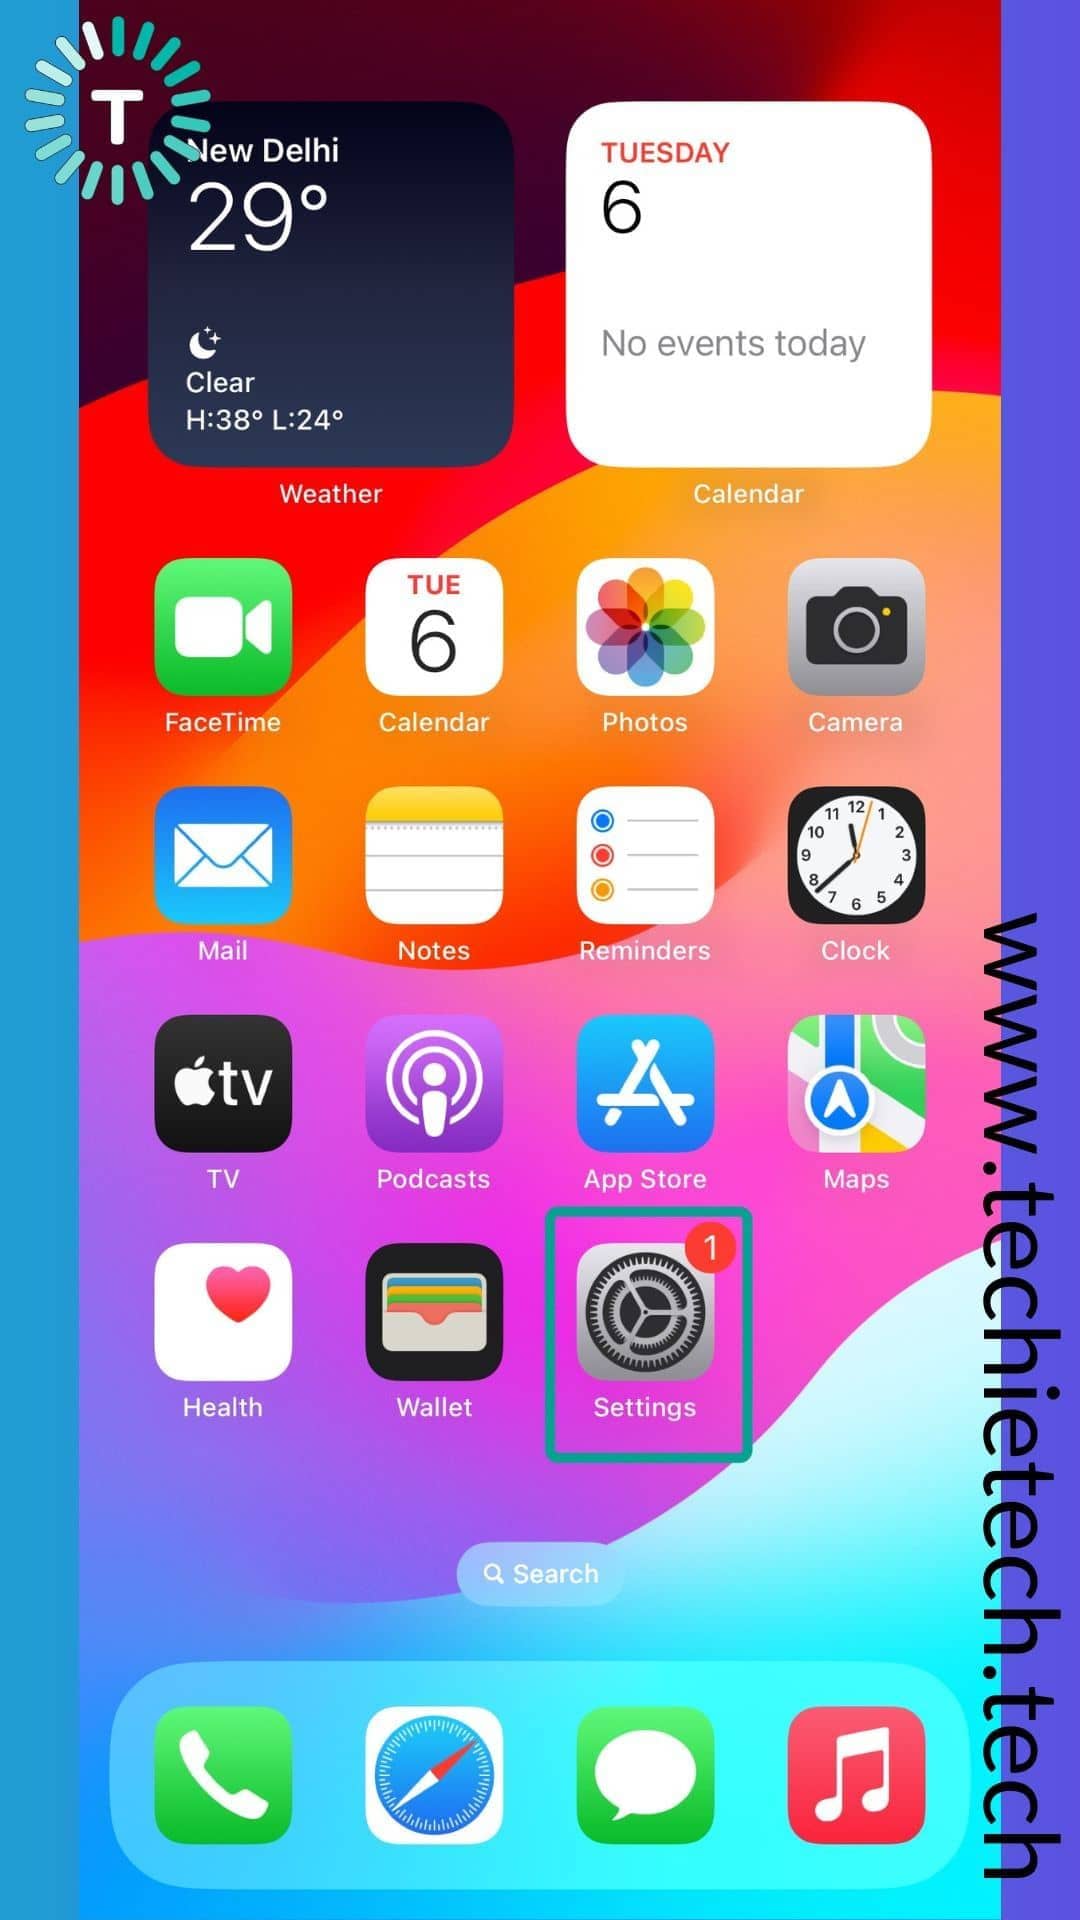
Step 1: Go to the Settings app,
Step 2: Tap Safari,
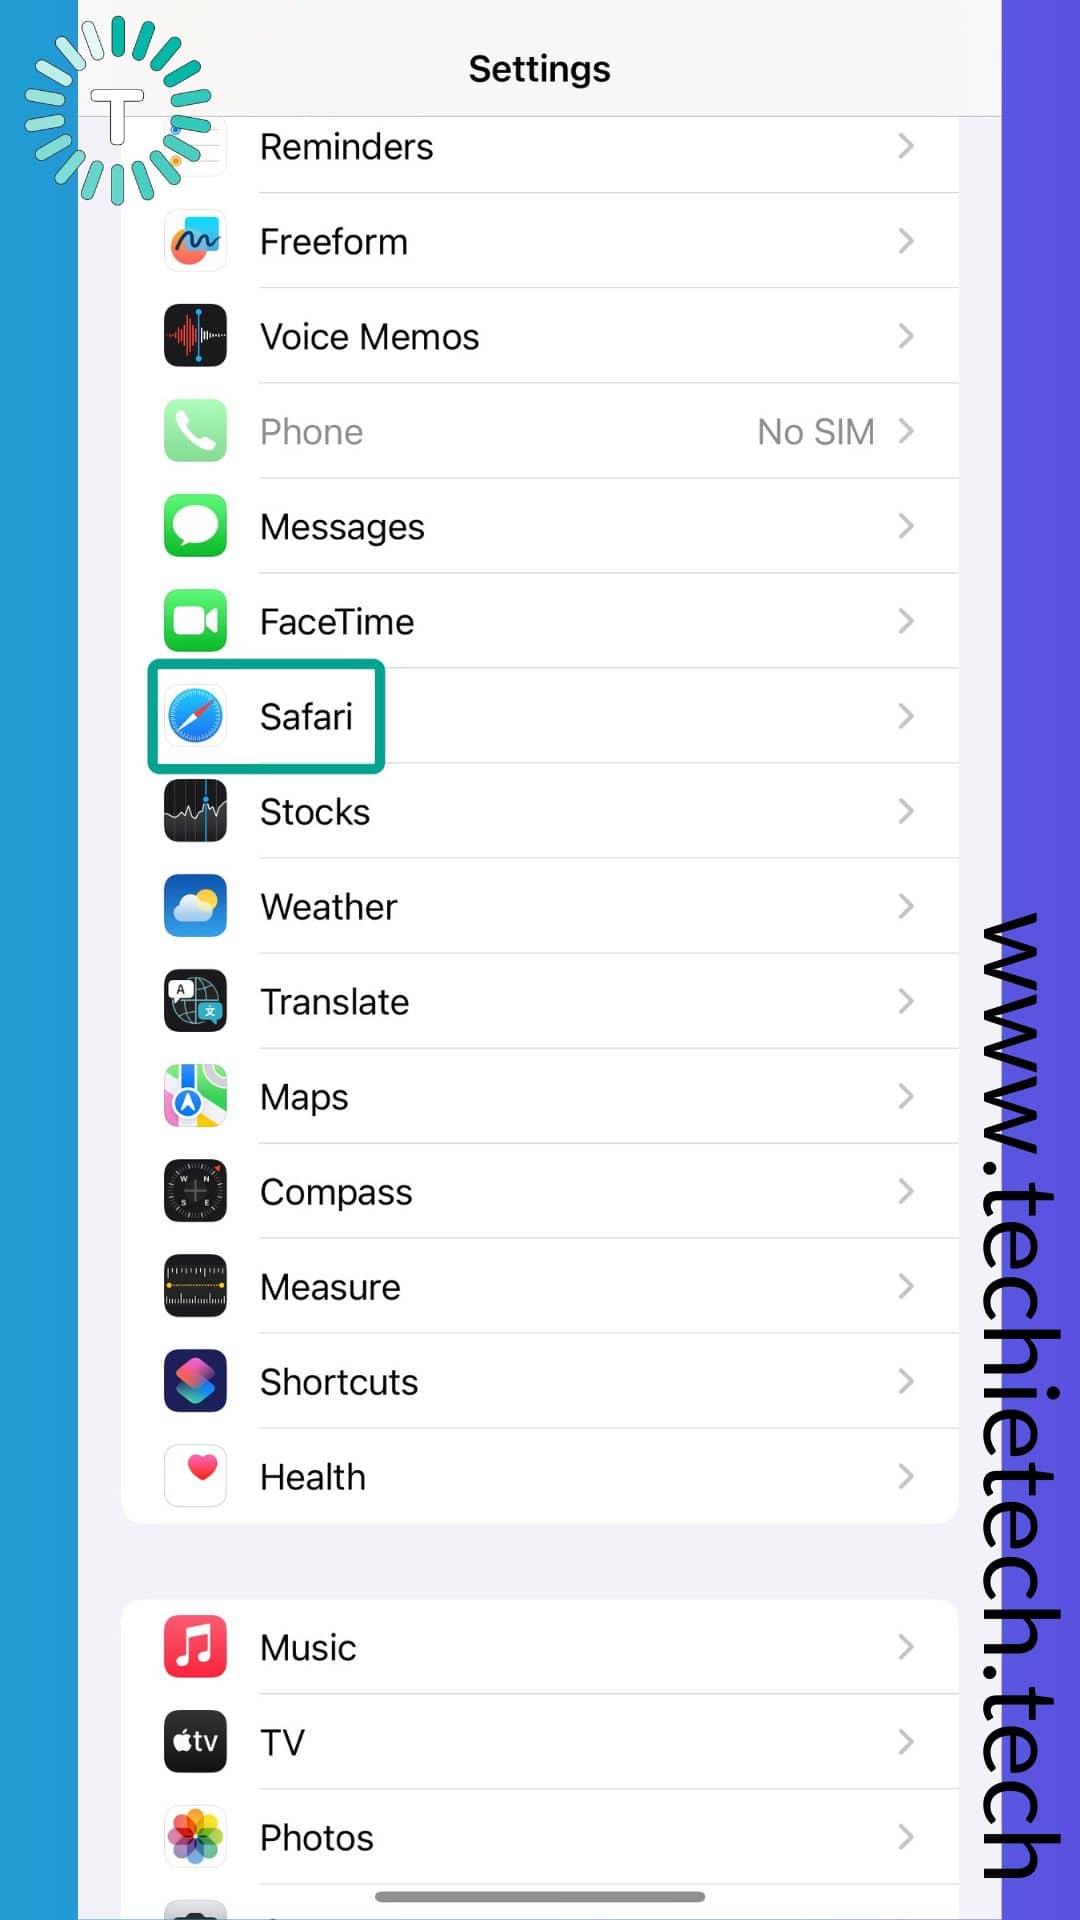
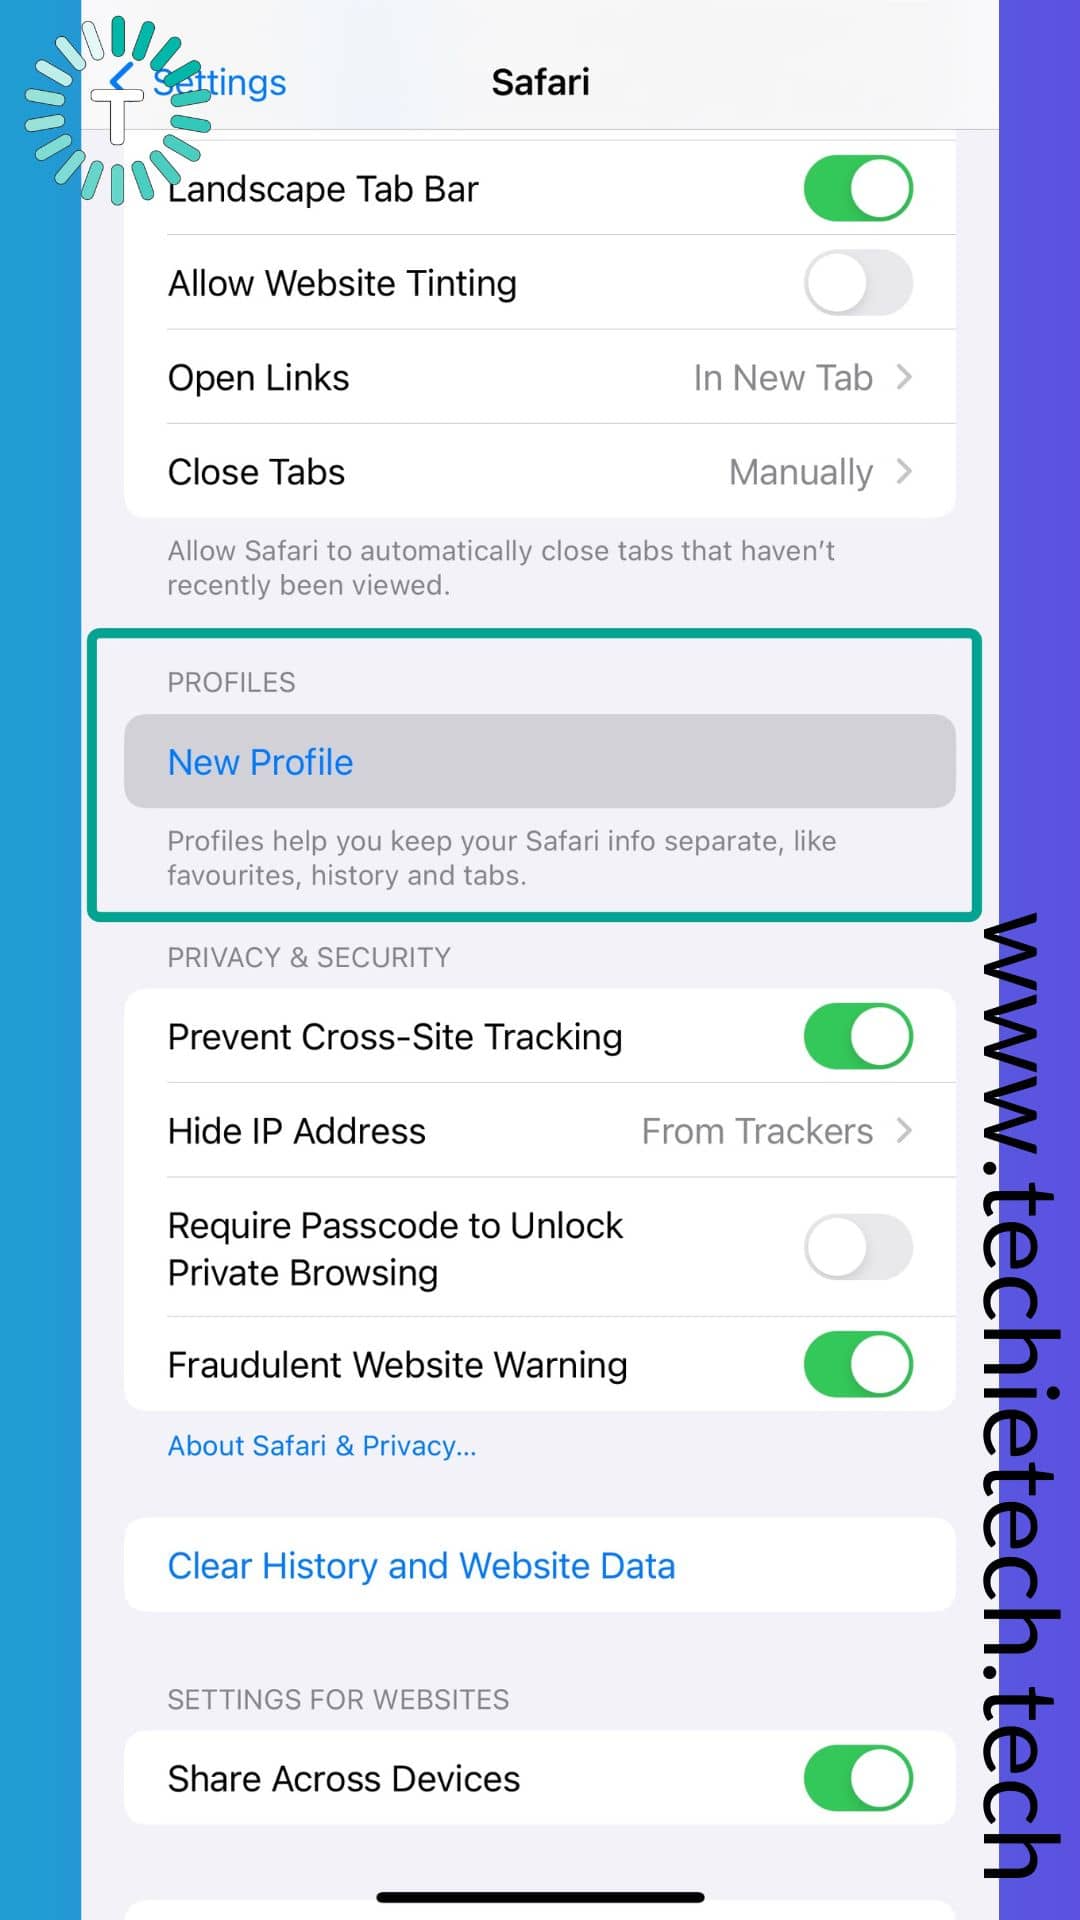
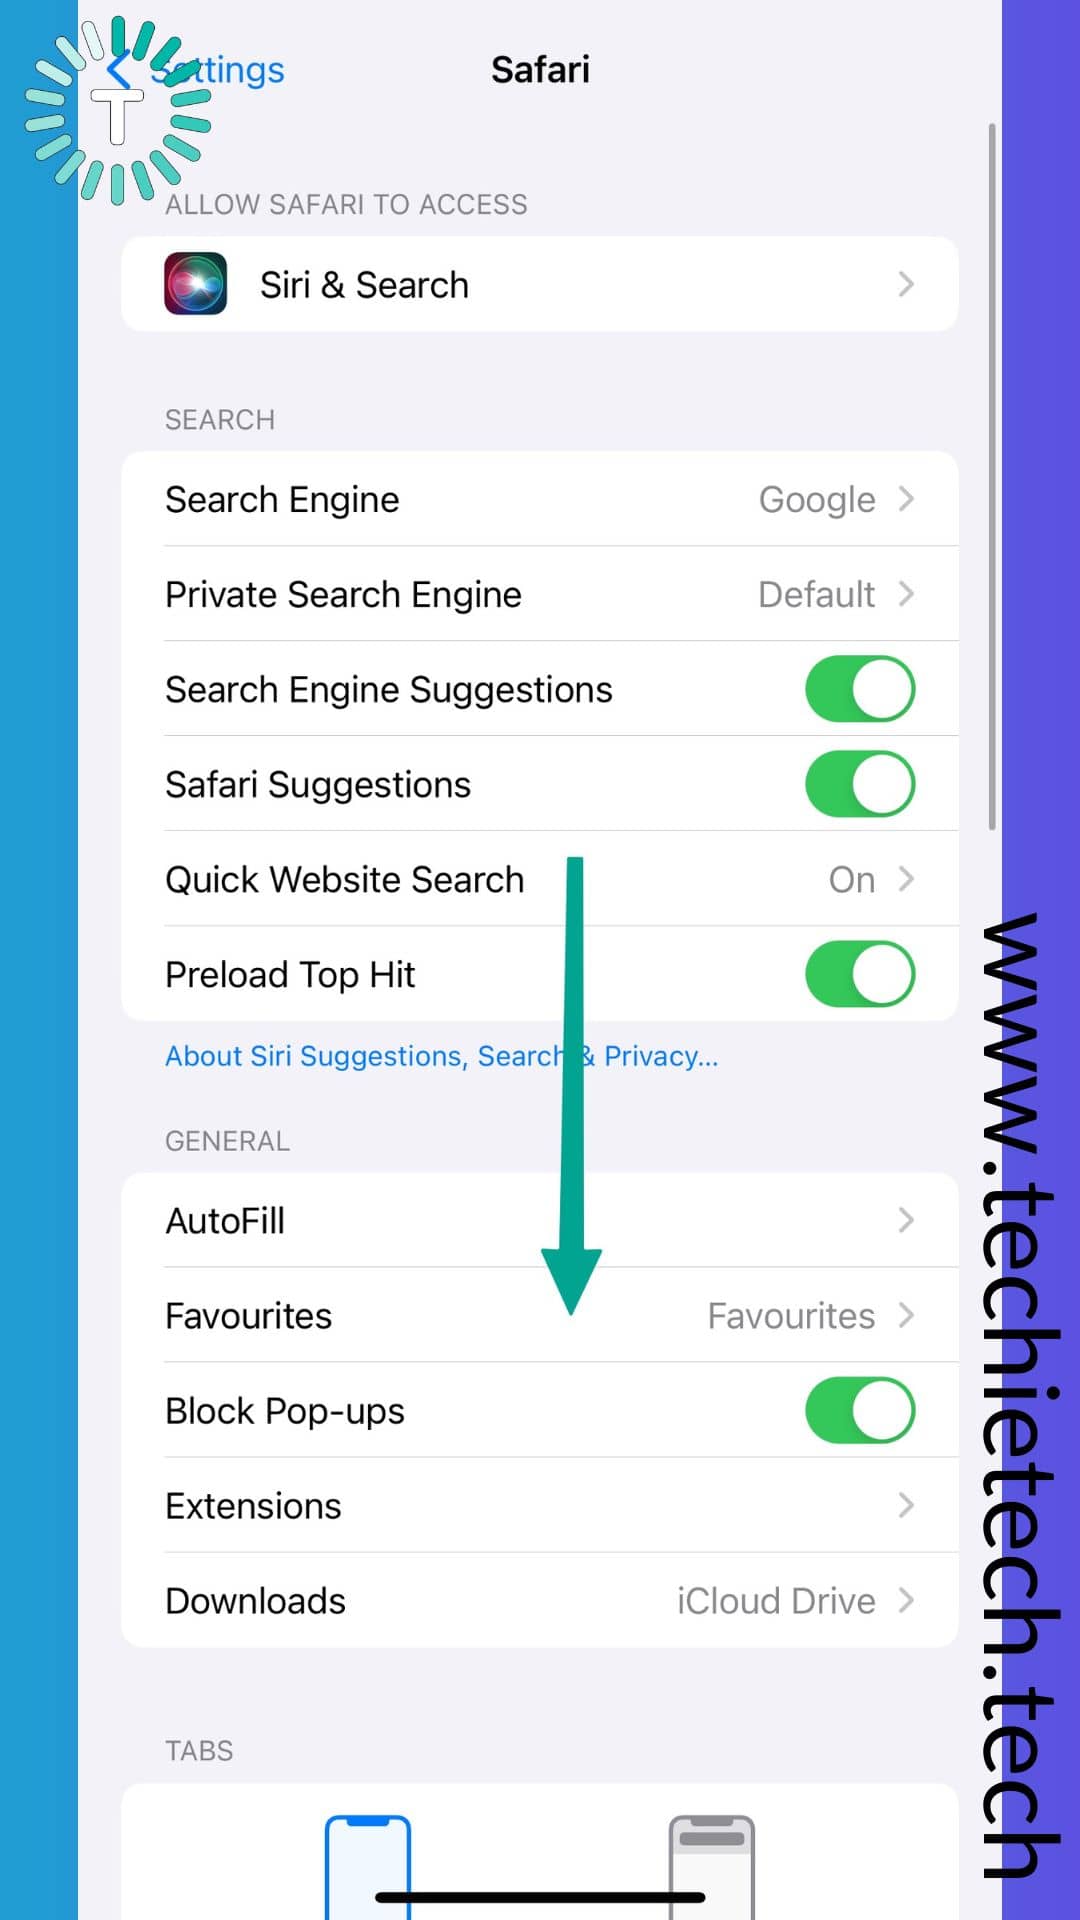
Step 3: Scroll down the Safari settings, tap the New Profile option under profiles,

Step 4: On the next screen, type in the name of the profile, and choose an icon (if you’re creating an academic profile you can choose the Degree icon, for corporate profile you can choose the Briefcase icon, and so on). You can also choose a color for it. The icons are colors that help you distinguish between different profiles easily. You can also customize settings like Favorite sites and even choose what you want to see when a new tab is opened.
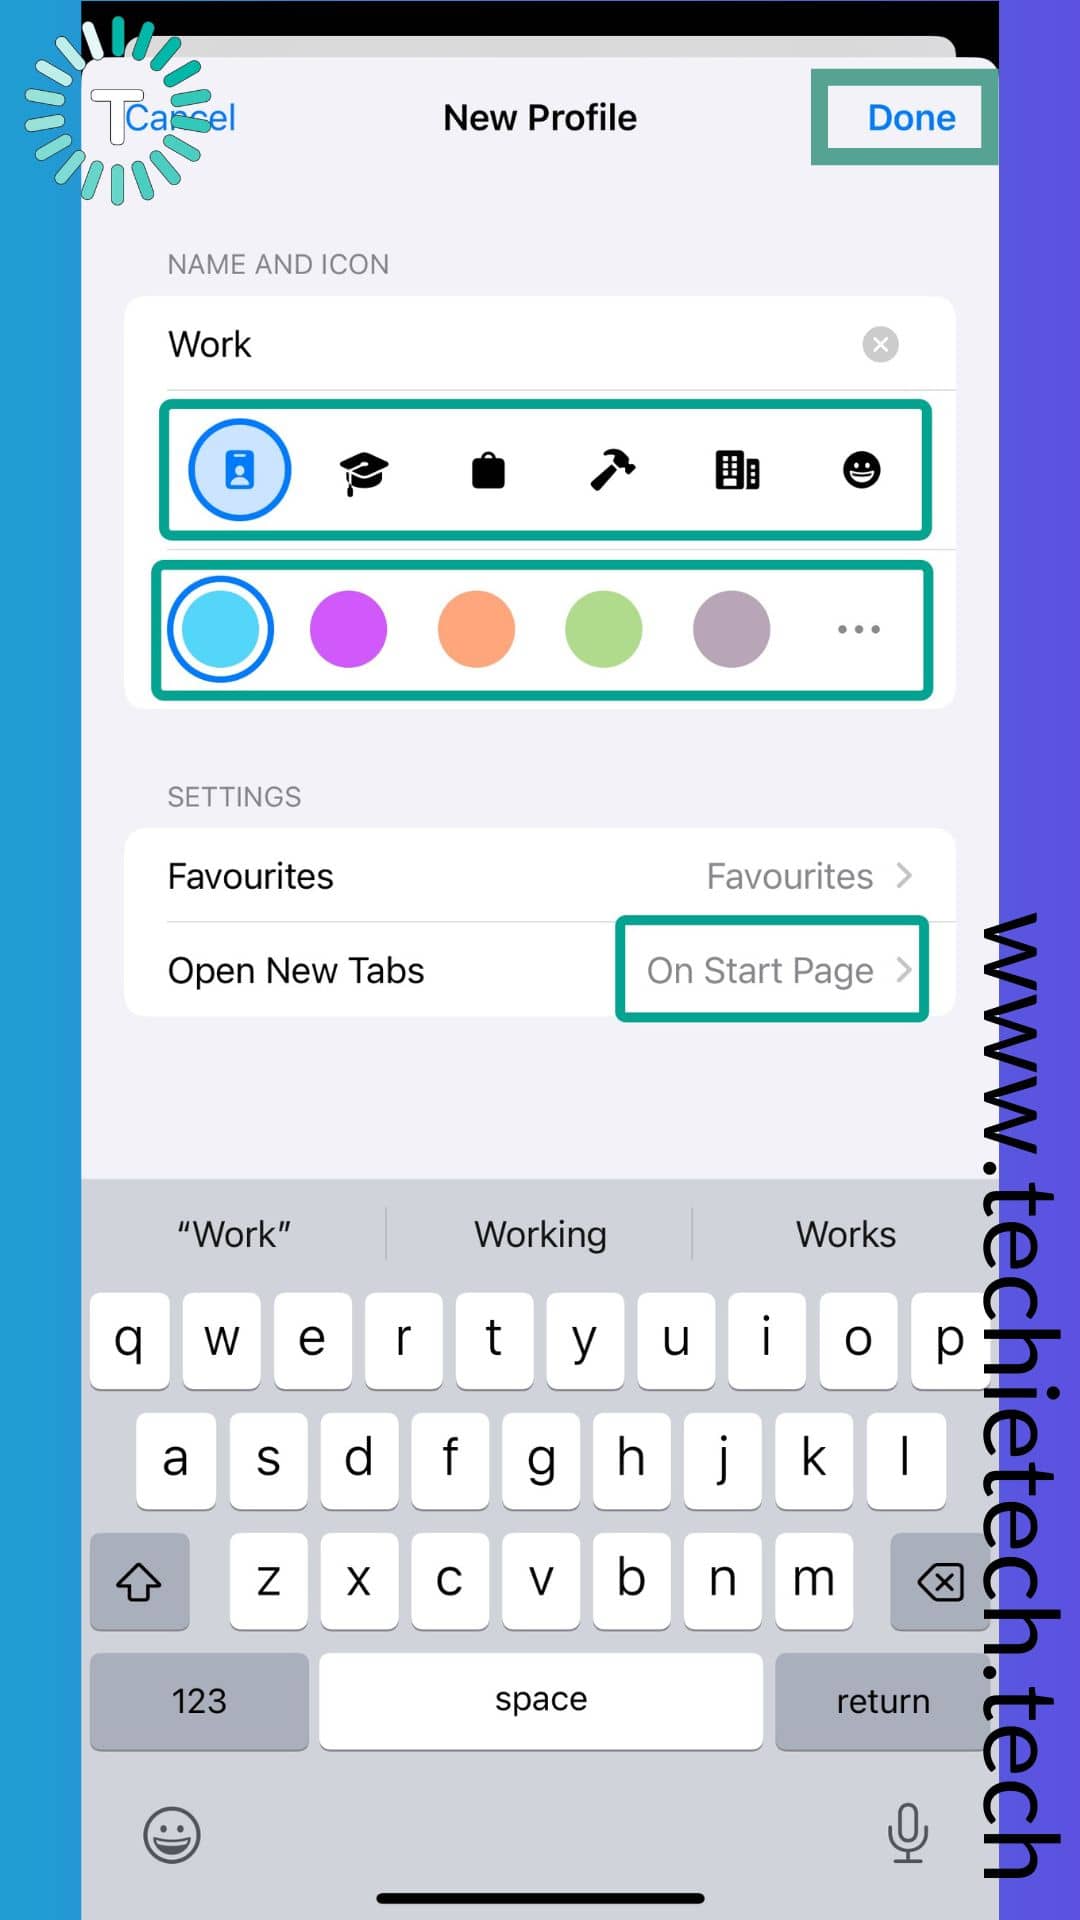
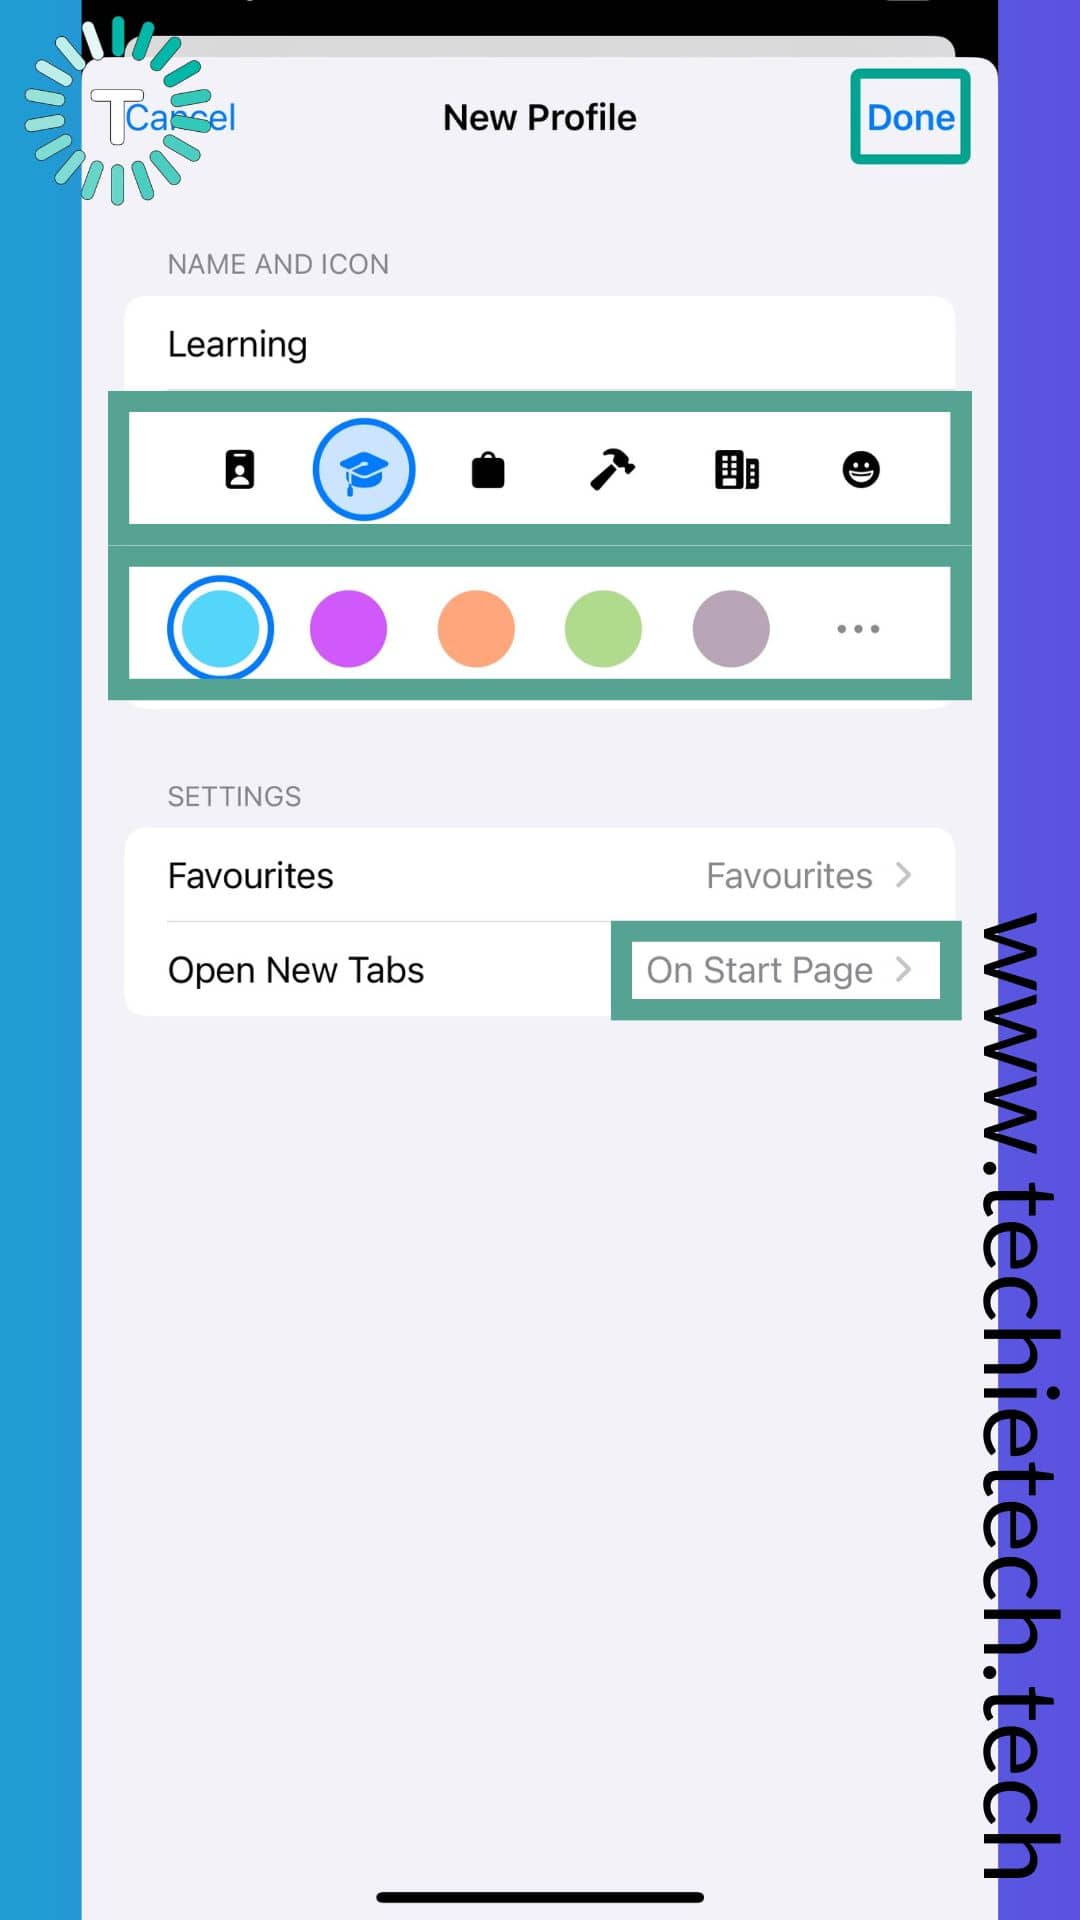
Step 5: Tap Done as shown in the image above to finish the process, and a new profile will be created in Safari.
Also read: Top iOS 17 features announced at WWDC 2023
How to delete a profile in Safari on iPhone running on iOS 17
If you think you have created too many profiles to try the feature or such profiles are of no use to you, you can easily delete them by following the below instructions:
Step 1: Open the Settings app,

Step 2: Tap Safari,
Step 3: Scroll down the Safari settings page,
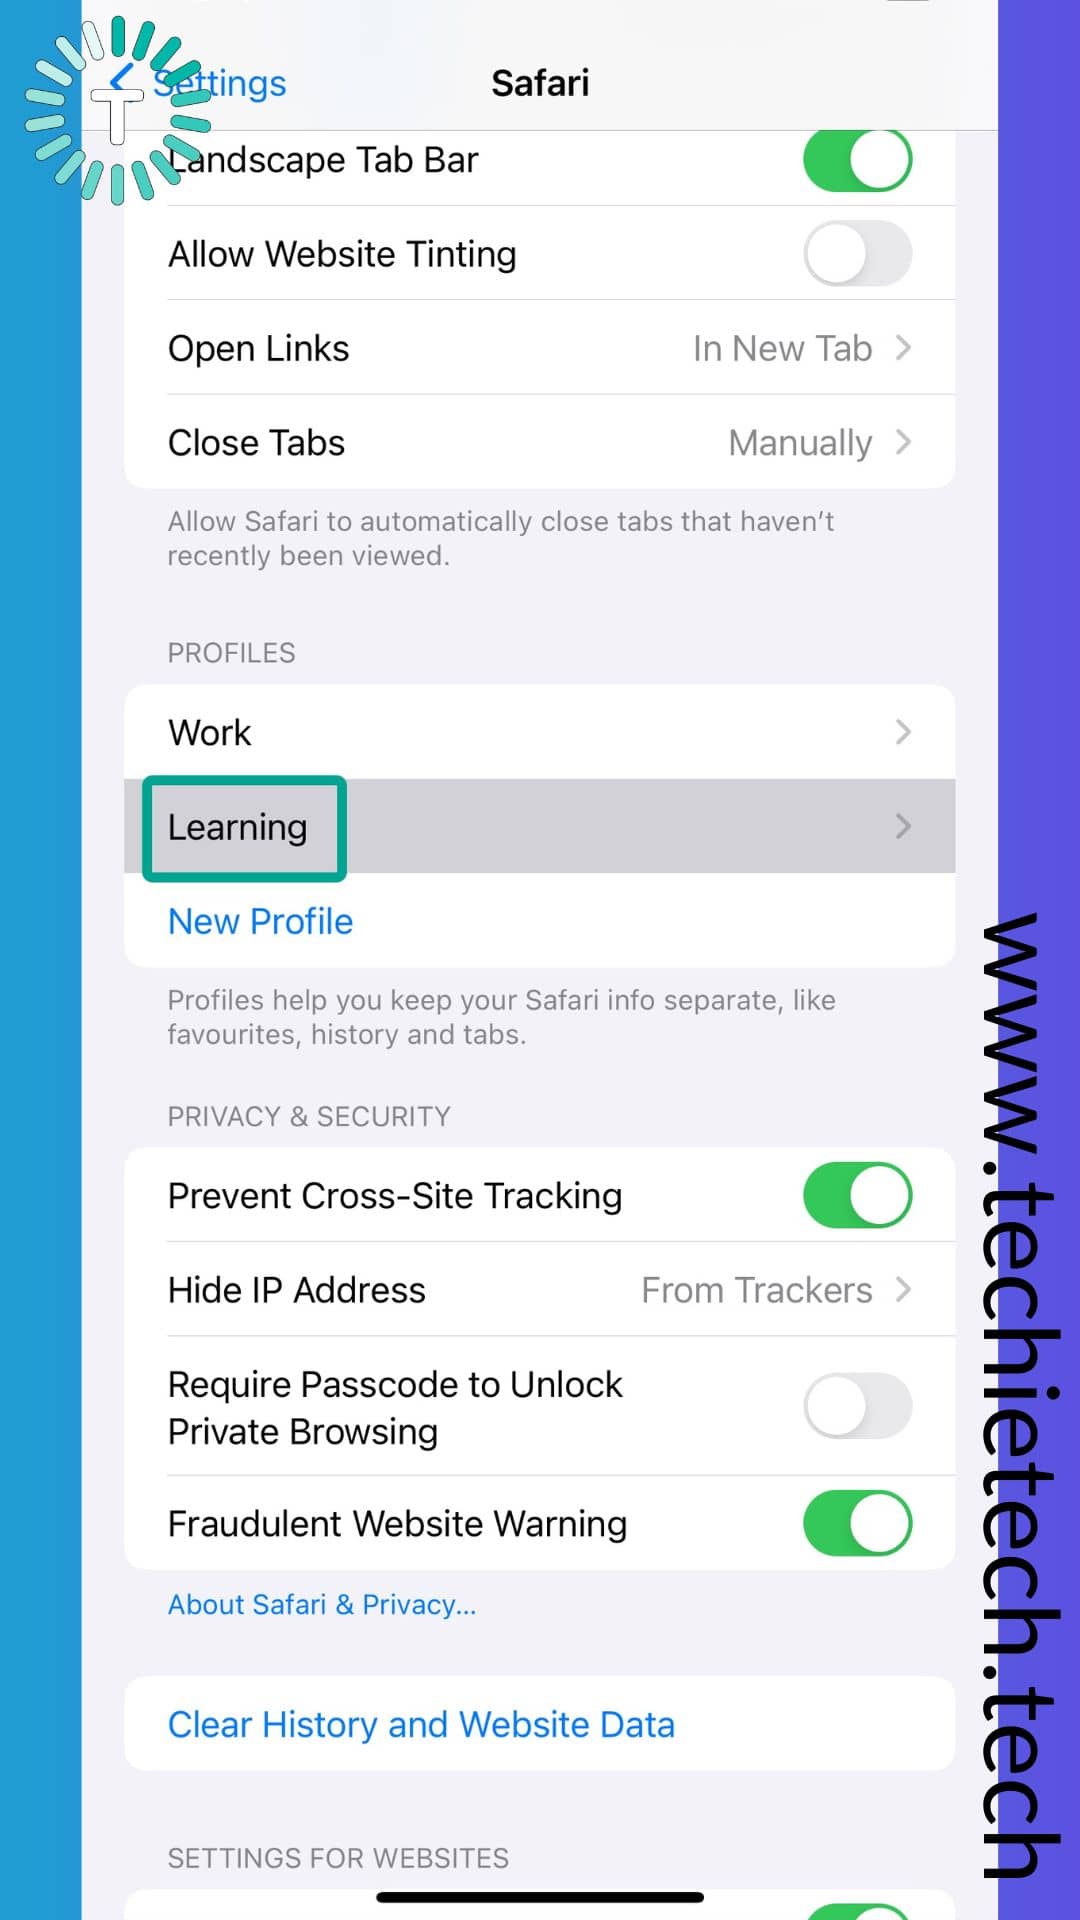
Step 4: Under the Profiles header you’ll see the profiles that you have recently created (in this case we have Work and Learning),

Step 5: Tap on the profile you want to delete (we chose Learning),
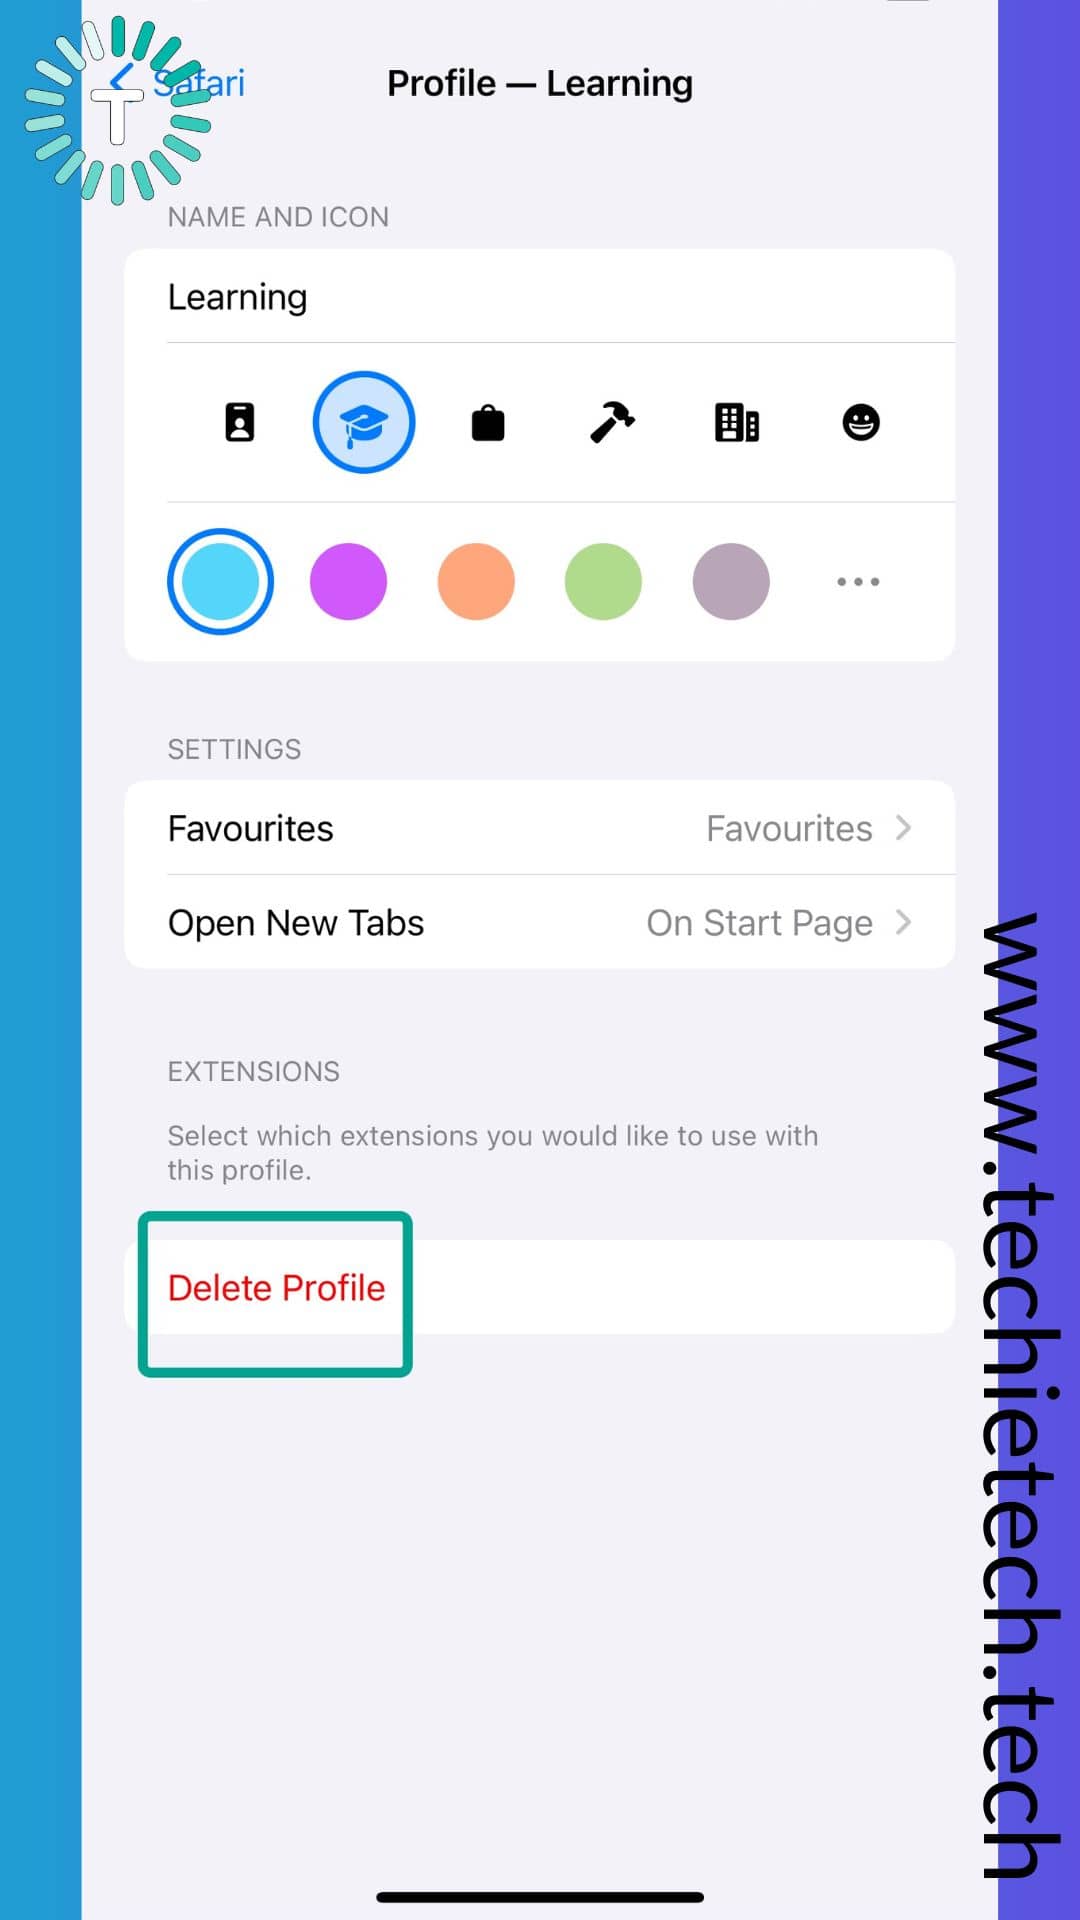
Step 6: On the next screen, tap Delete Profile,
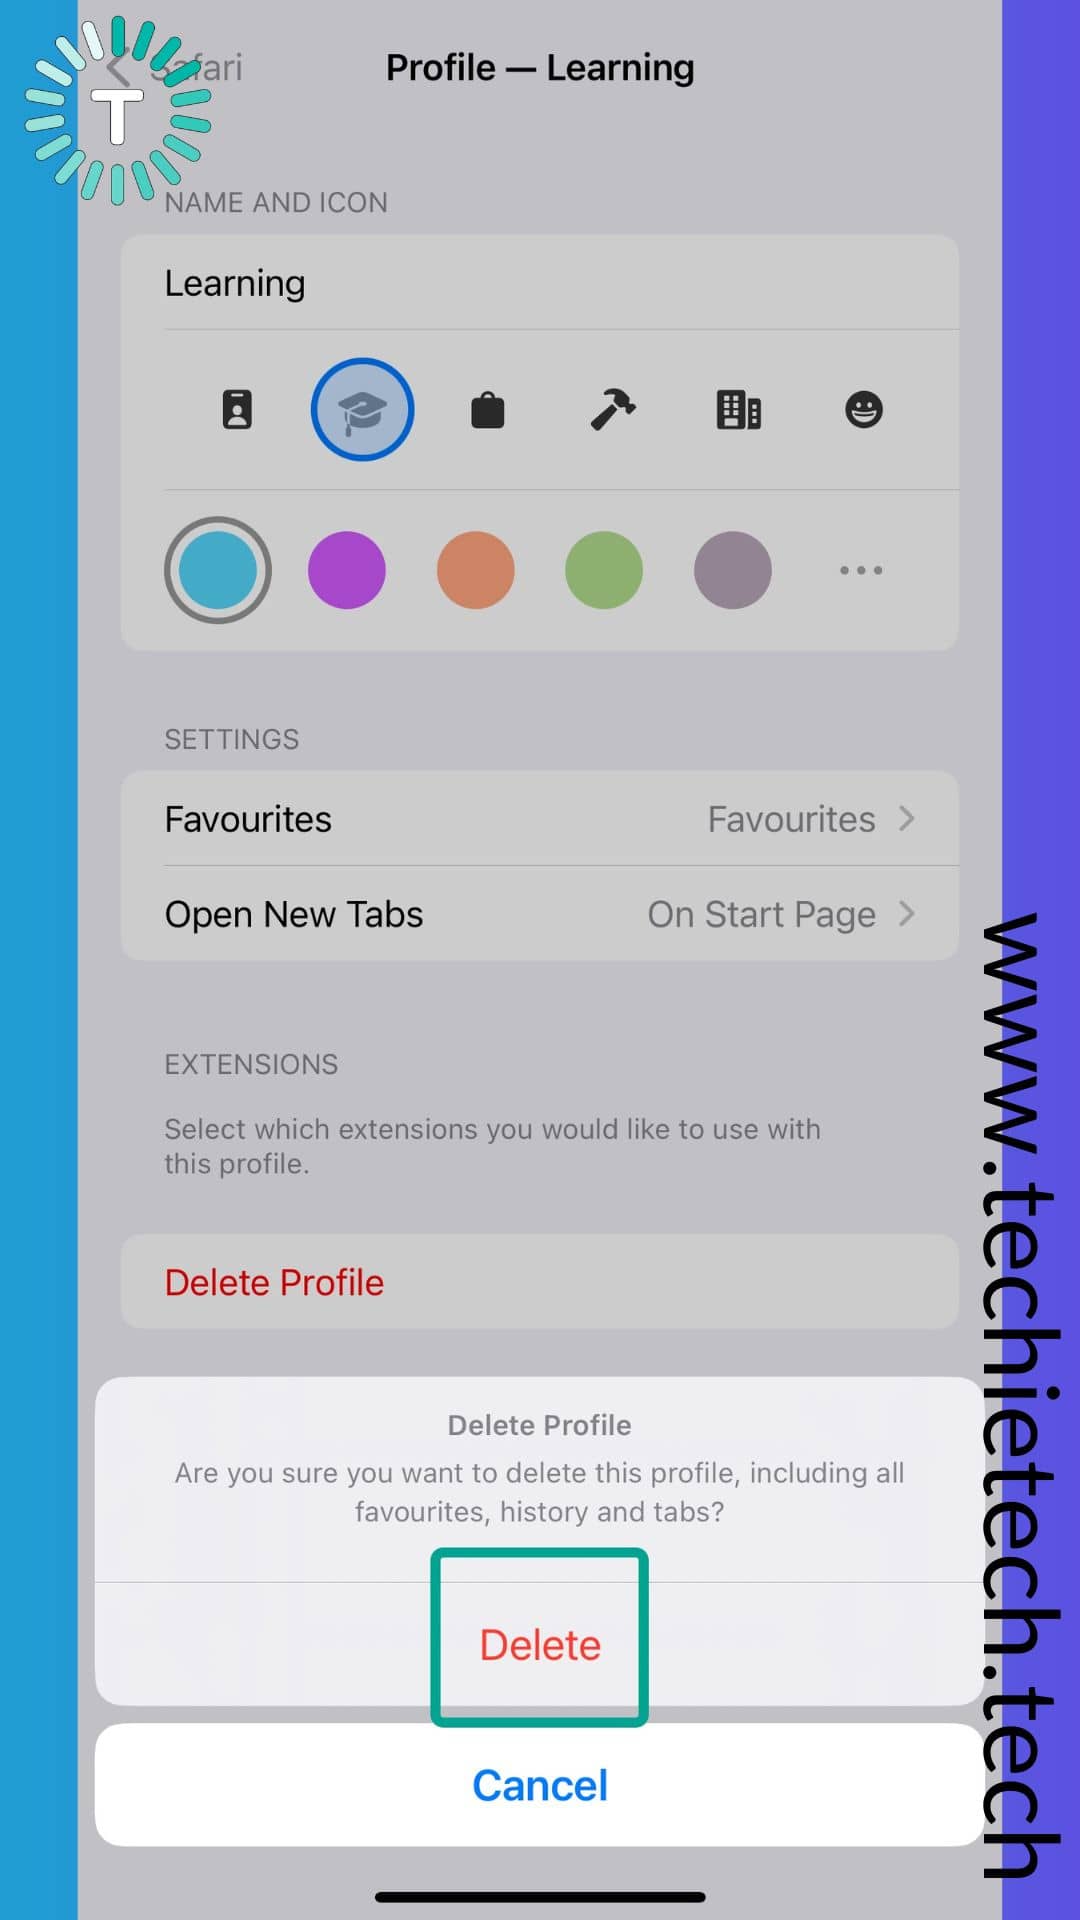
Step 7: When a prompt appears, tap Delete, and you are done.
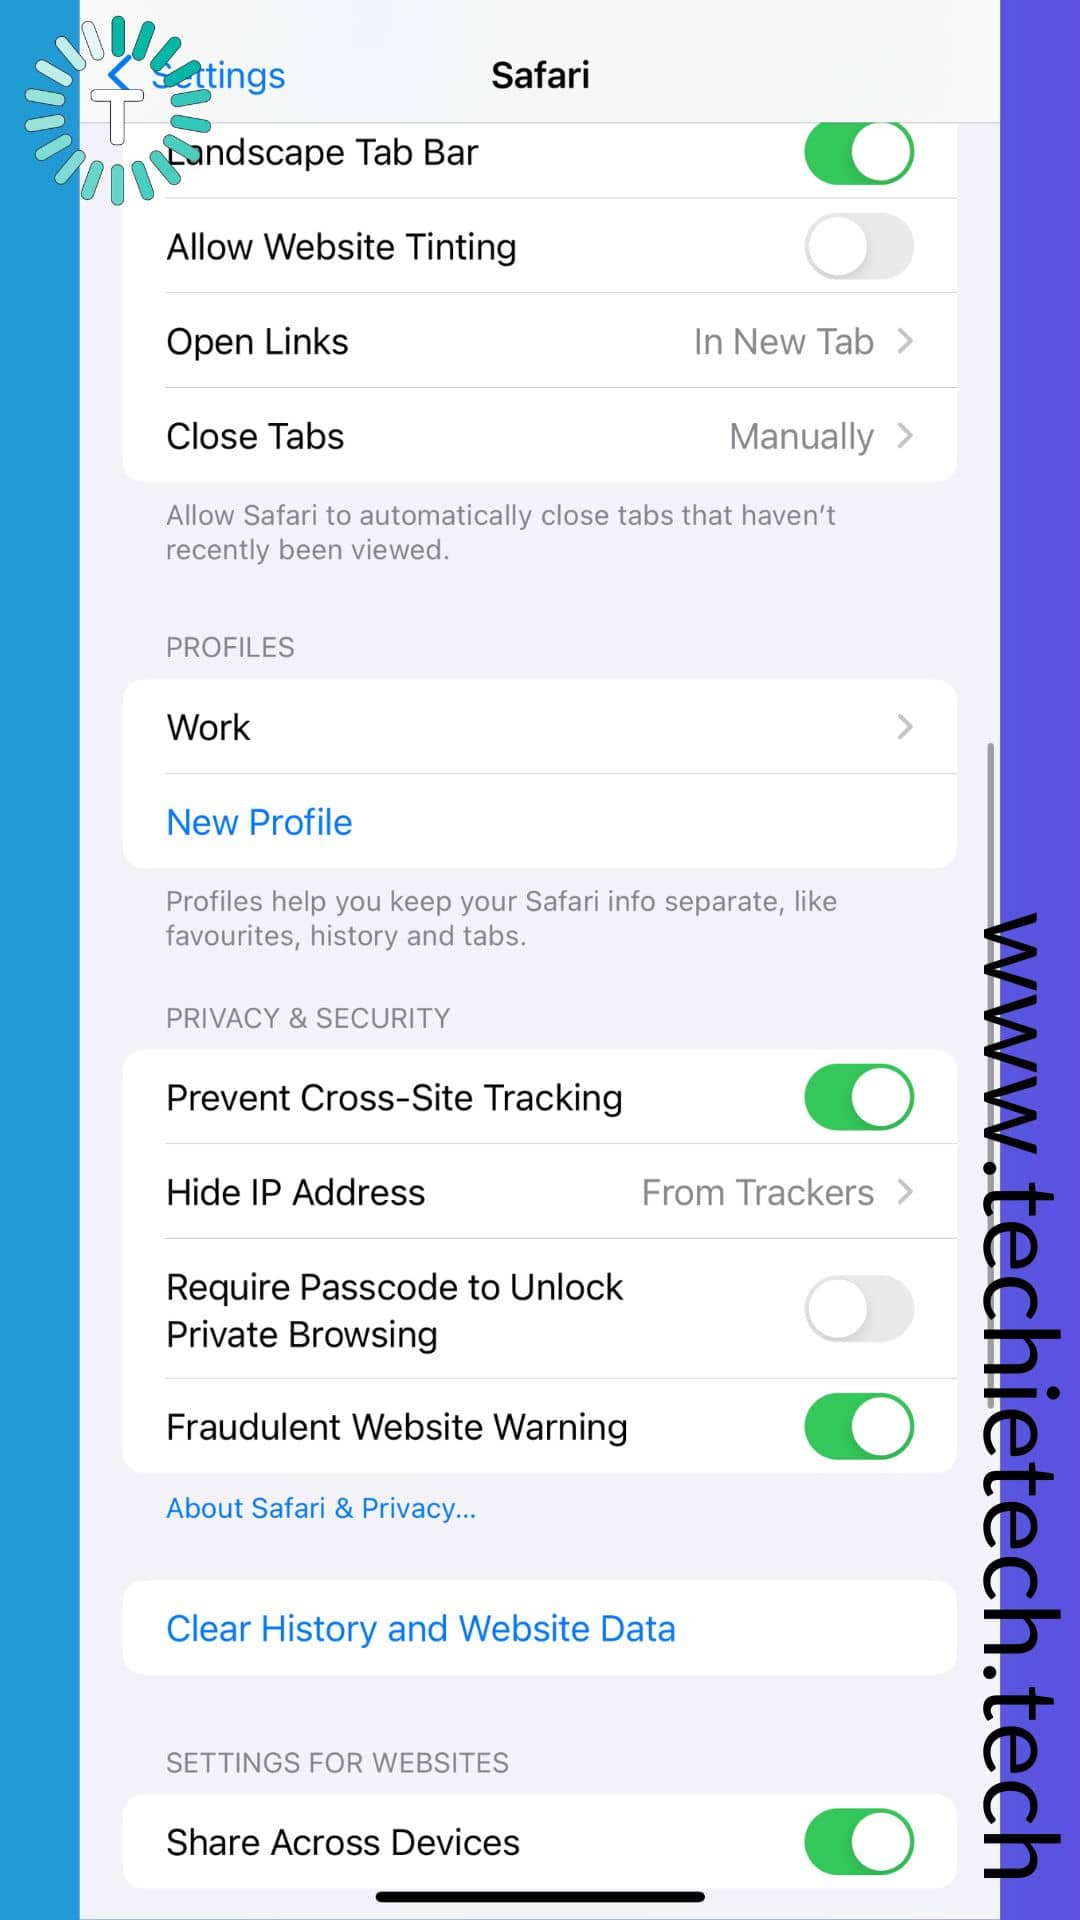
Now, the deleted profiles (which in this case is Learning) will be removed from the profiles sections of the Safari settings page. This will clear the profile’s browsing history, cookies, etc. You can refer to the image below to confirm the same.
Also read: Best AI Apps for iPhone You Can Download Now (Free & Paid)
How to switch profiles in Safari on iPhone with iOS 17
Once the profiles are created you can use and switch between them in Safari for a more personalized browsing experience. But, how? When we are here, don’t worry. We have mentioned step-by-step instructions on how to switch profiles in Safari on iOS 17.
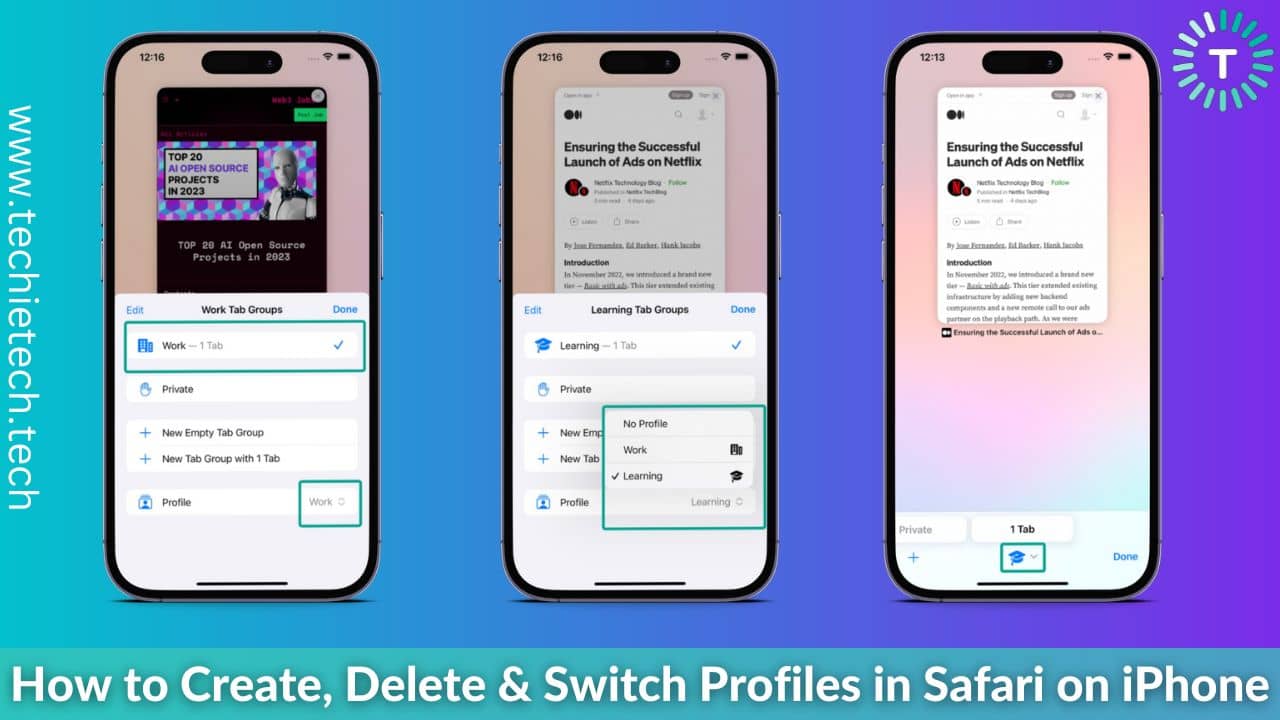
Here’s how to switch profiles in Safari:
Step 1: Open Safari,
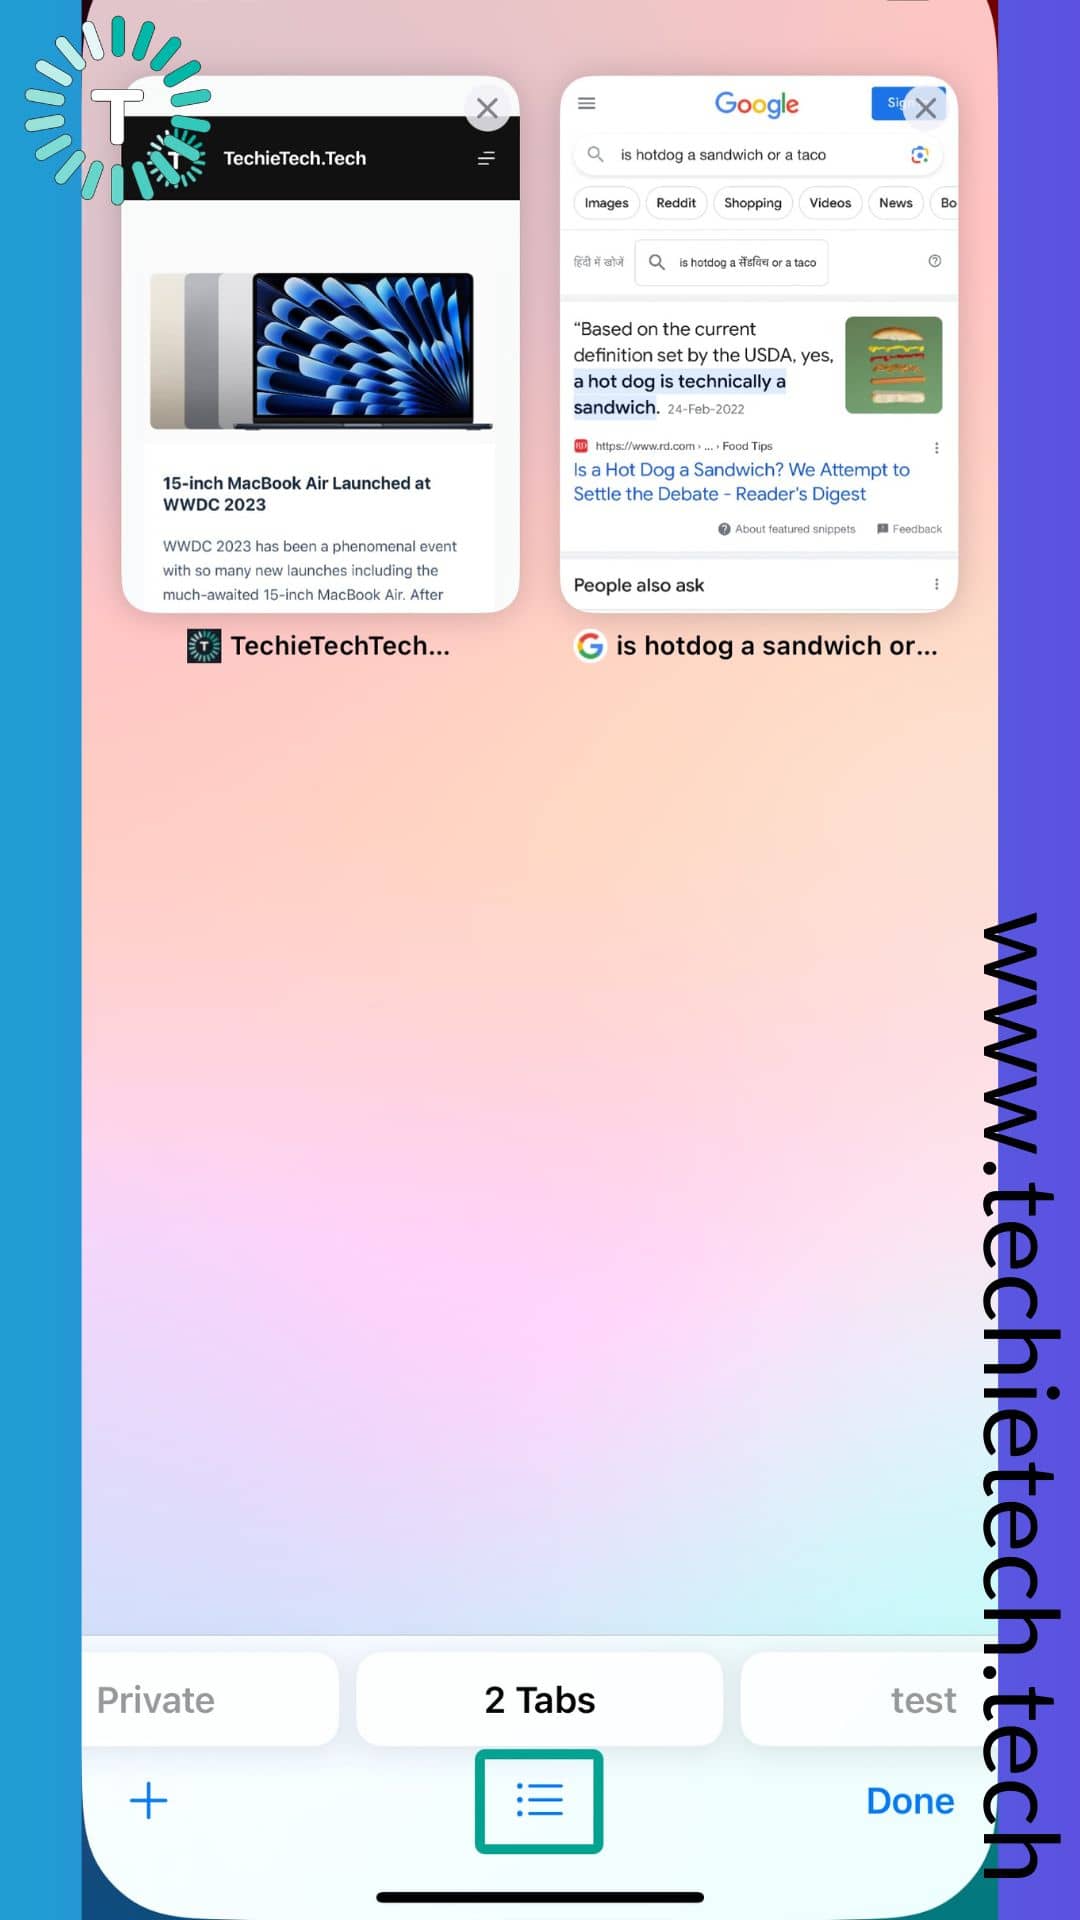
Step 2: Tap Tabs,
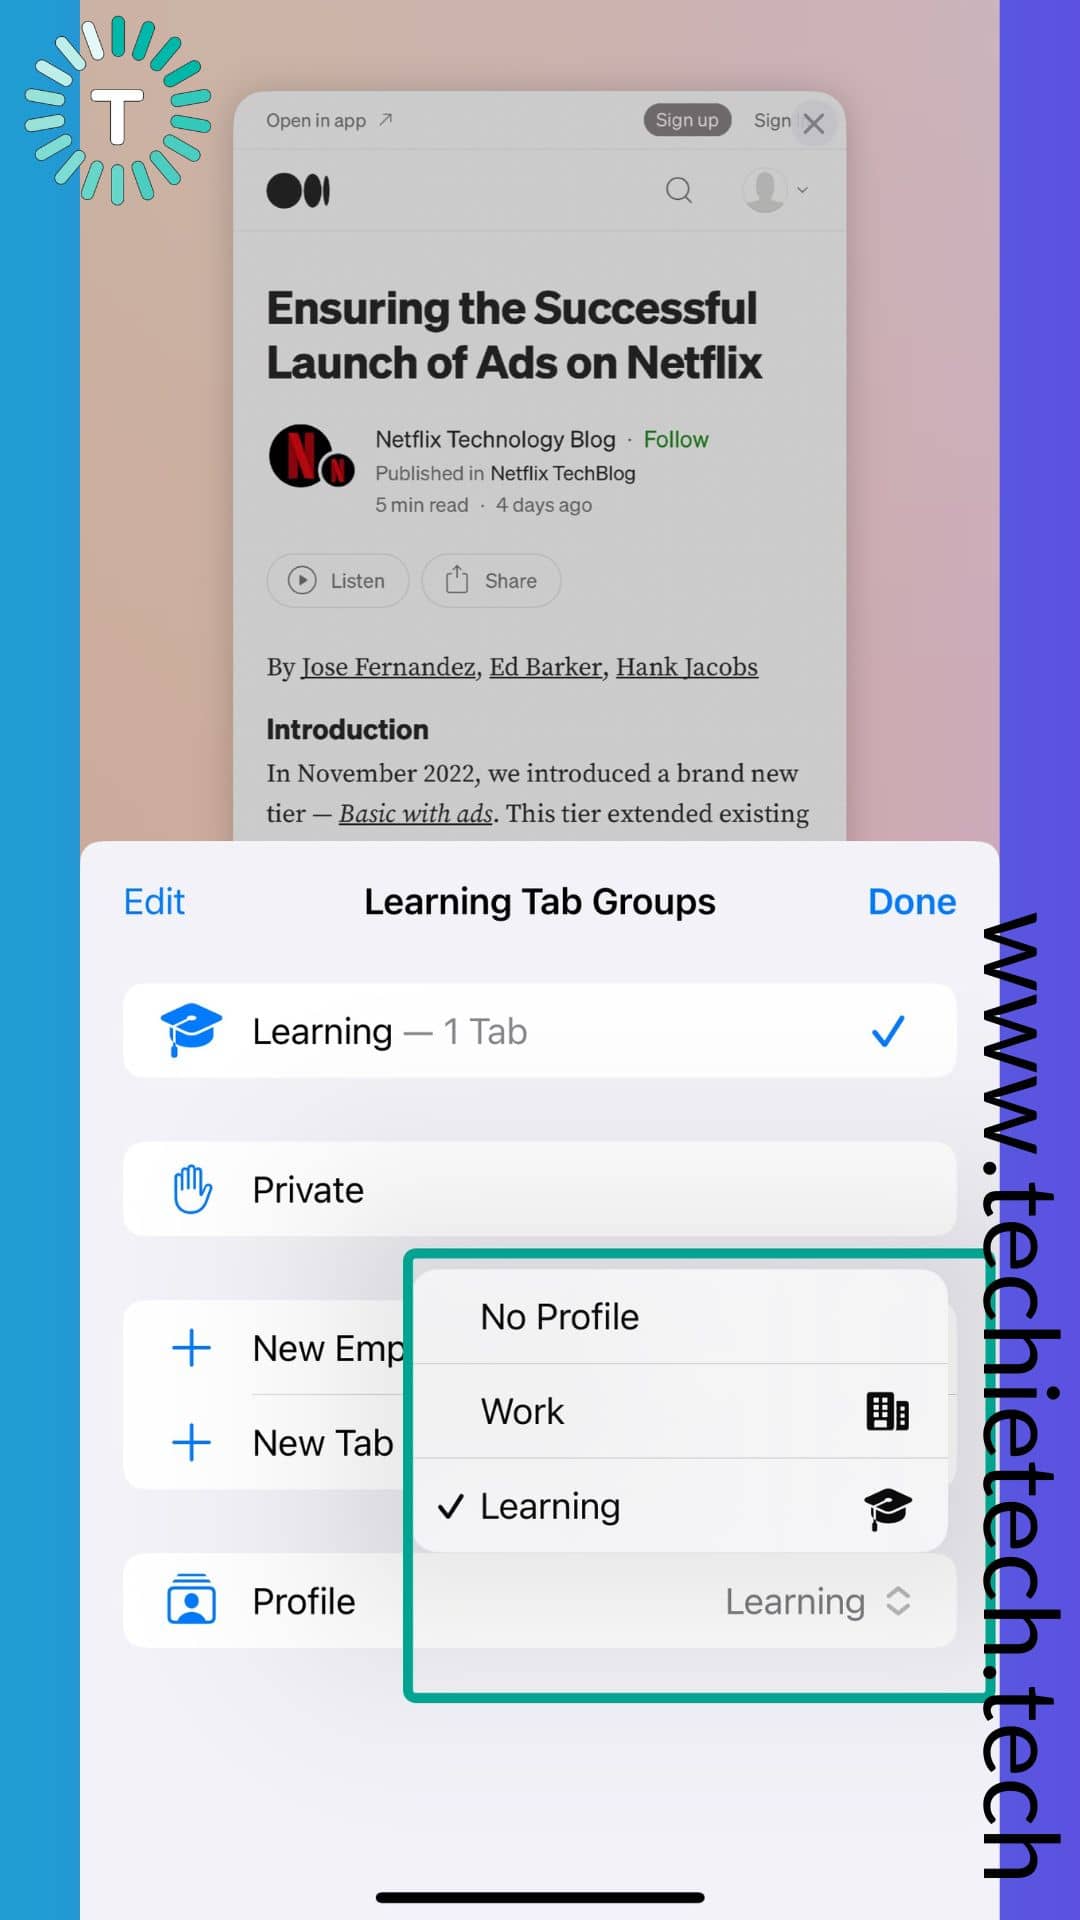
Step 3: Under Tab Groups, tap the drop-down icon beside the Profile option,
![]()
Step 4: You can choose any profile that you have created earlier based on your need, we have selected Learning to demonstrate the steps,
Step 5: Now, your profile icon will be seen below Tabs indicating that you are inside the Profile, as seen in the image below.
![]()
Also read: How to Setup Passkeys for Gmail [on Web, Android, and iPhone]
That’s all for now, folks. We would like to hear about your experiences while creating and using profiles in Safari, make sure to comment below. Also, don’t forget to read our guide about setting up Contact Posters on iPhone to give the call screen a personal touch.