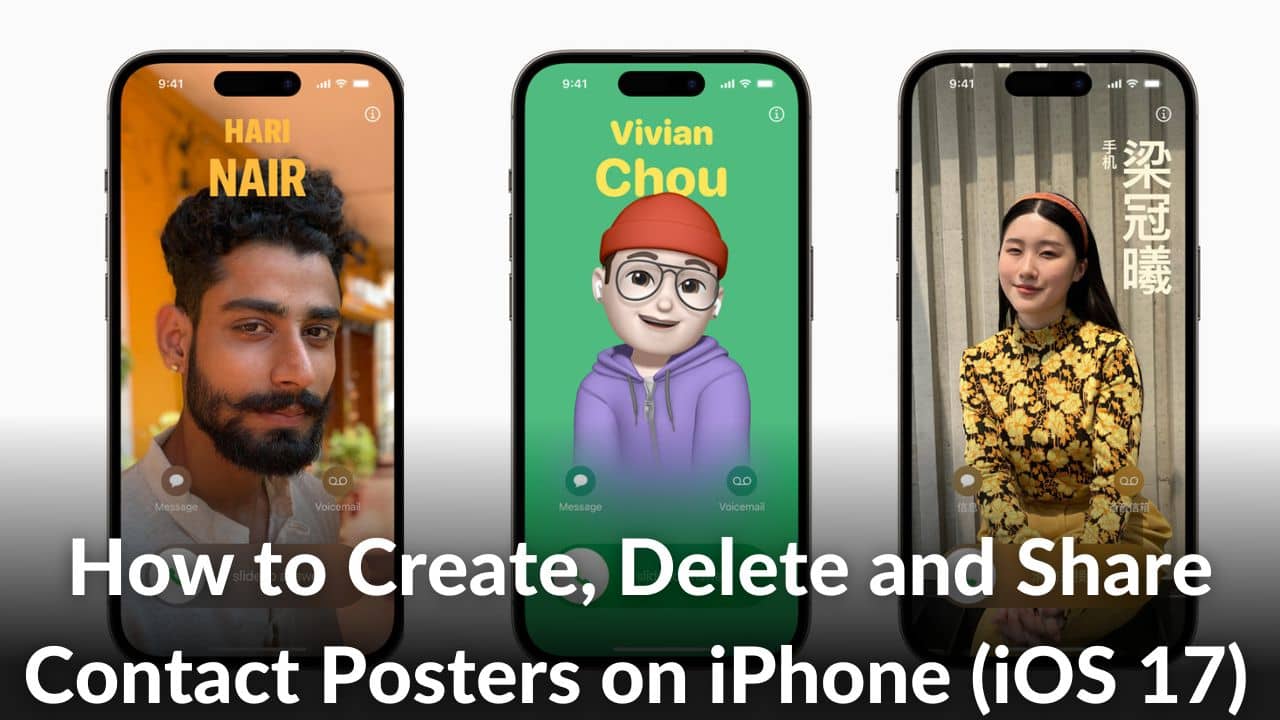
Apple officially announced the iOS 17, at the WWDC 2023 keynote event. The stable version of iOS 17 will come later this year, but we already know that it brings a plethora of features, upgrades, and experiences for iPhone users. Supporting the statement of new experiences and expressive communication, Apple showcased a cool feature called Contact Posters. You can create a personalized Contact Poster from the Phone app, and it will appear on the receiver’s screen whenever you call.
If you have already subscribed to the Apple Developer Program, you can try out this feature now with iOS 17 beta developer. We understand it is a fairly new feature, so it is expected that you may face difficulty setting it up. But, don’t worry, we are here to help. In this guide, we will walk you through step-by-step instructions on how to create and share Contact Poster on your iPhone.
How to Create My Card on Your iPhone
Before you start creating Contact Poster, the first thing you need to do is create My Card on your iPhone. That’s basically your own contact. For most of the users, it’s already set up. After that, you can customize it to include Contact Poster or Profile Photo. We have mentioned step-by-step instructions to create My Card on your iPhone running iOS 17.
Note: If you have already created a personal My card, we recommend skipping this part and jumping directly to the next section. For most iPhone users, it’s already set up but if you can’t find yours or you’re using iOS for the first time then follow these steps.
Step 1: First, open the Contacts app and tap on the + icon at the top right corner,
Step 2: Now, you can type a preferred name,
Step 3: Once Step #2 is completed, tap + add phone,
Step 4: Now, you can add your phone number and area code (if any),
Step 5: If you want to add additional details to your My Card, make sure to fill in all the details as shown in the image below,
Step 6: Once you are done, tap Done at the top right corner of the screen.
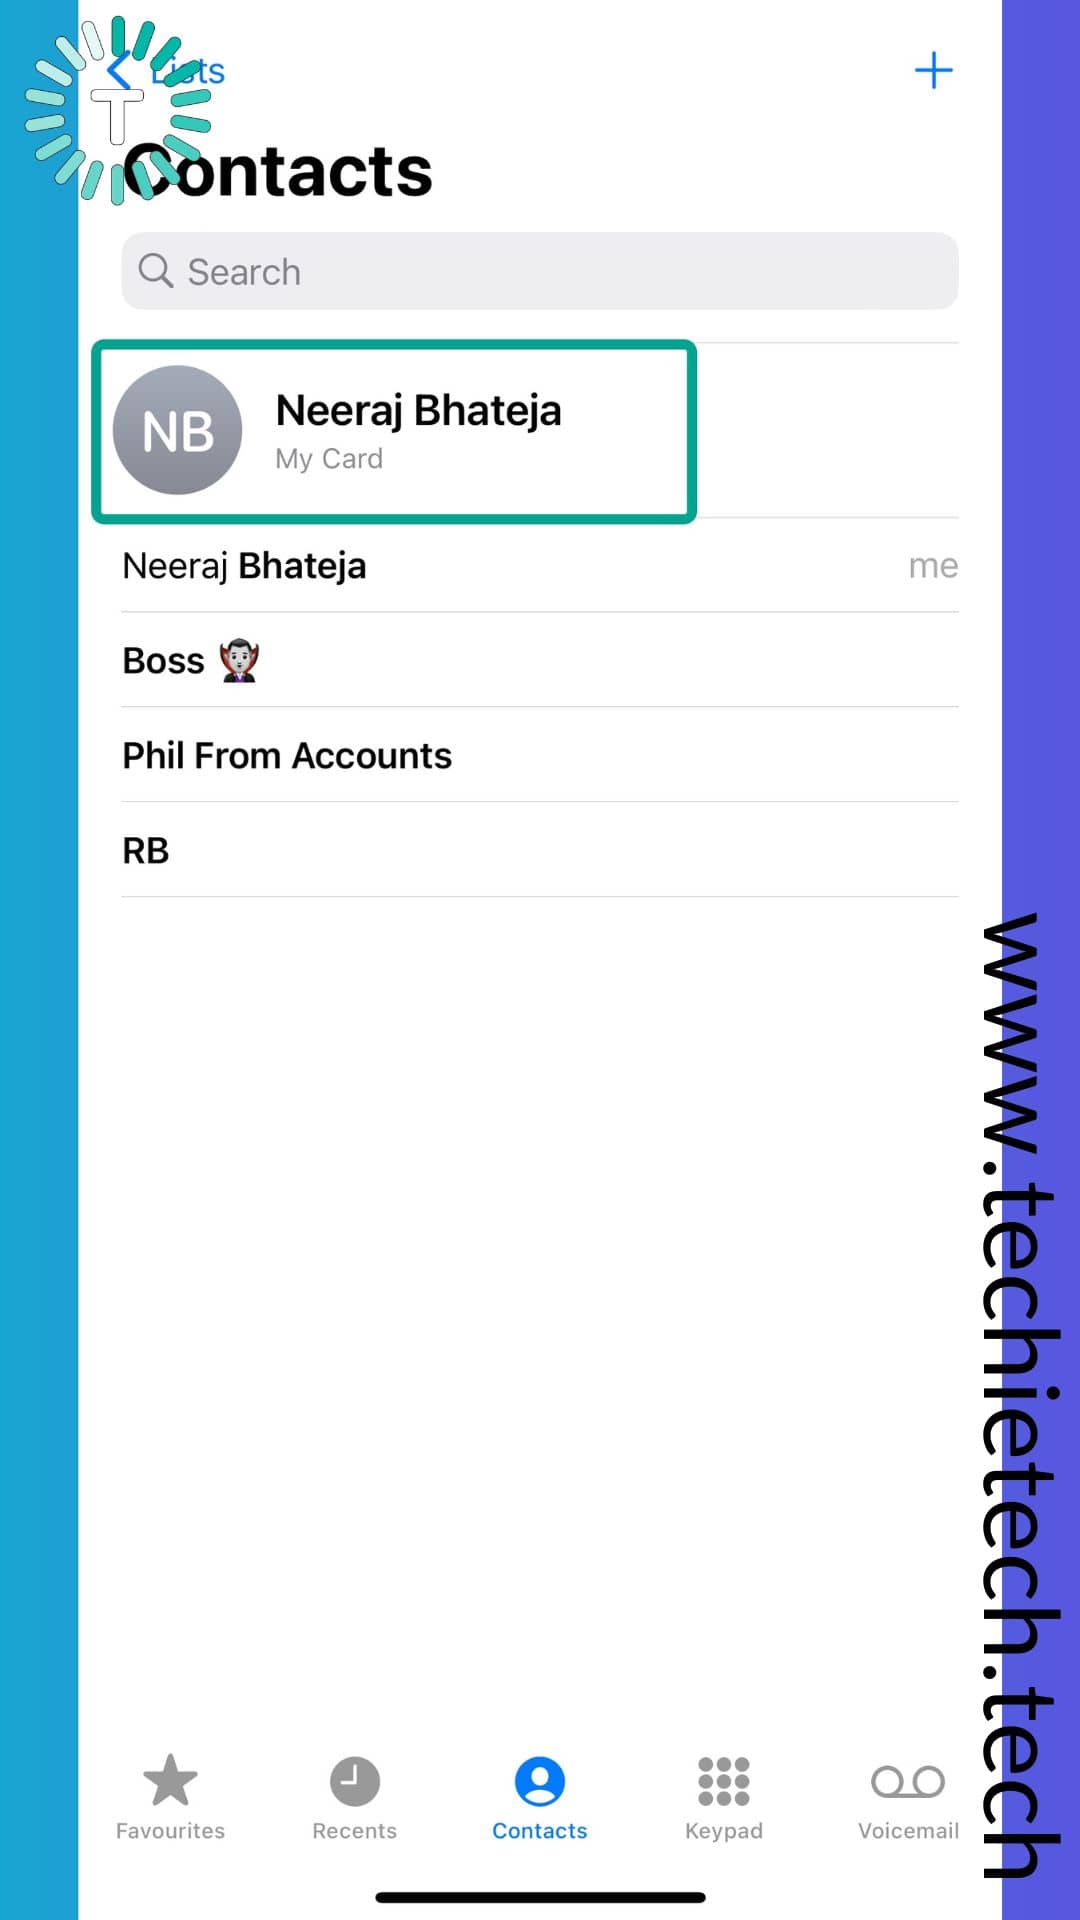
After you are done creating your contact, let’s set the contact you just created as “My Card” on your iPhone.
Step 7: Open Settings, then tap Contacts,
Step 8: Then, tap My info,
Step 9: Lastly, tap and select the contact you created above to set it as your My Card.
Also read: How to Speed up your iPhone?
How to Create a Contact Poster on iPhone Using Your Photo
In this section, we will walk you through step-by-step instructions on how to create Contact Poster using your photo on your iPhone. Let me tell you that there are four different elements on your Contact Poster. Meaning, you can create Contact Poster using your
live photo, a photo from your picture gallery, Memoji, and Monogram. But first, let’s start with creating Contact Poster using your photo.
Here’s how to create Contact Poster using your photo:
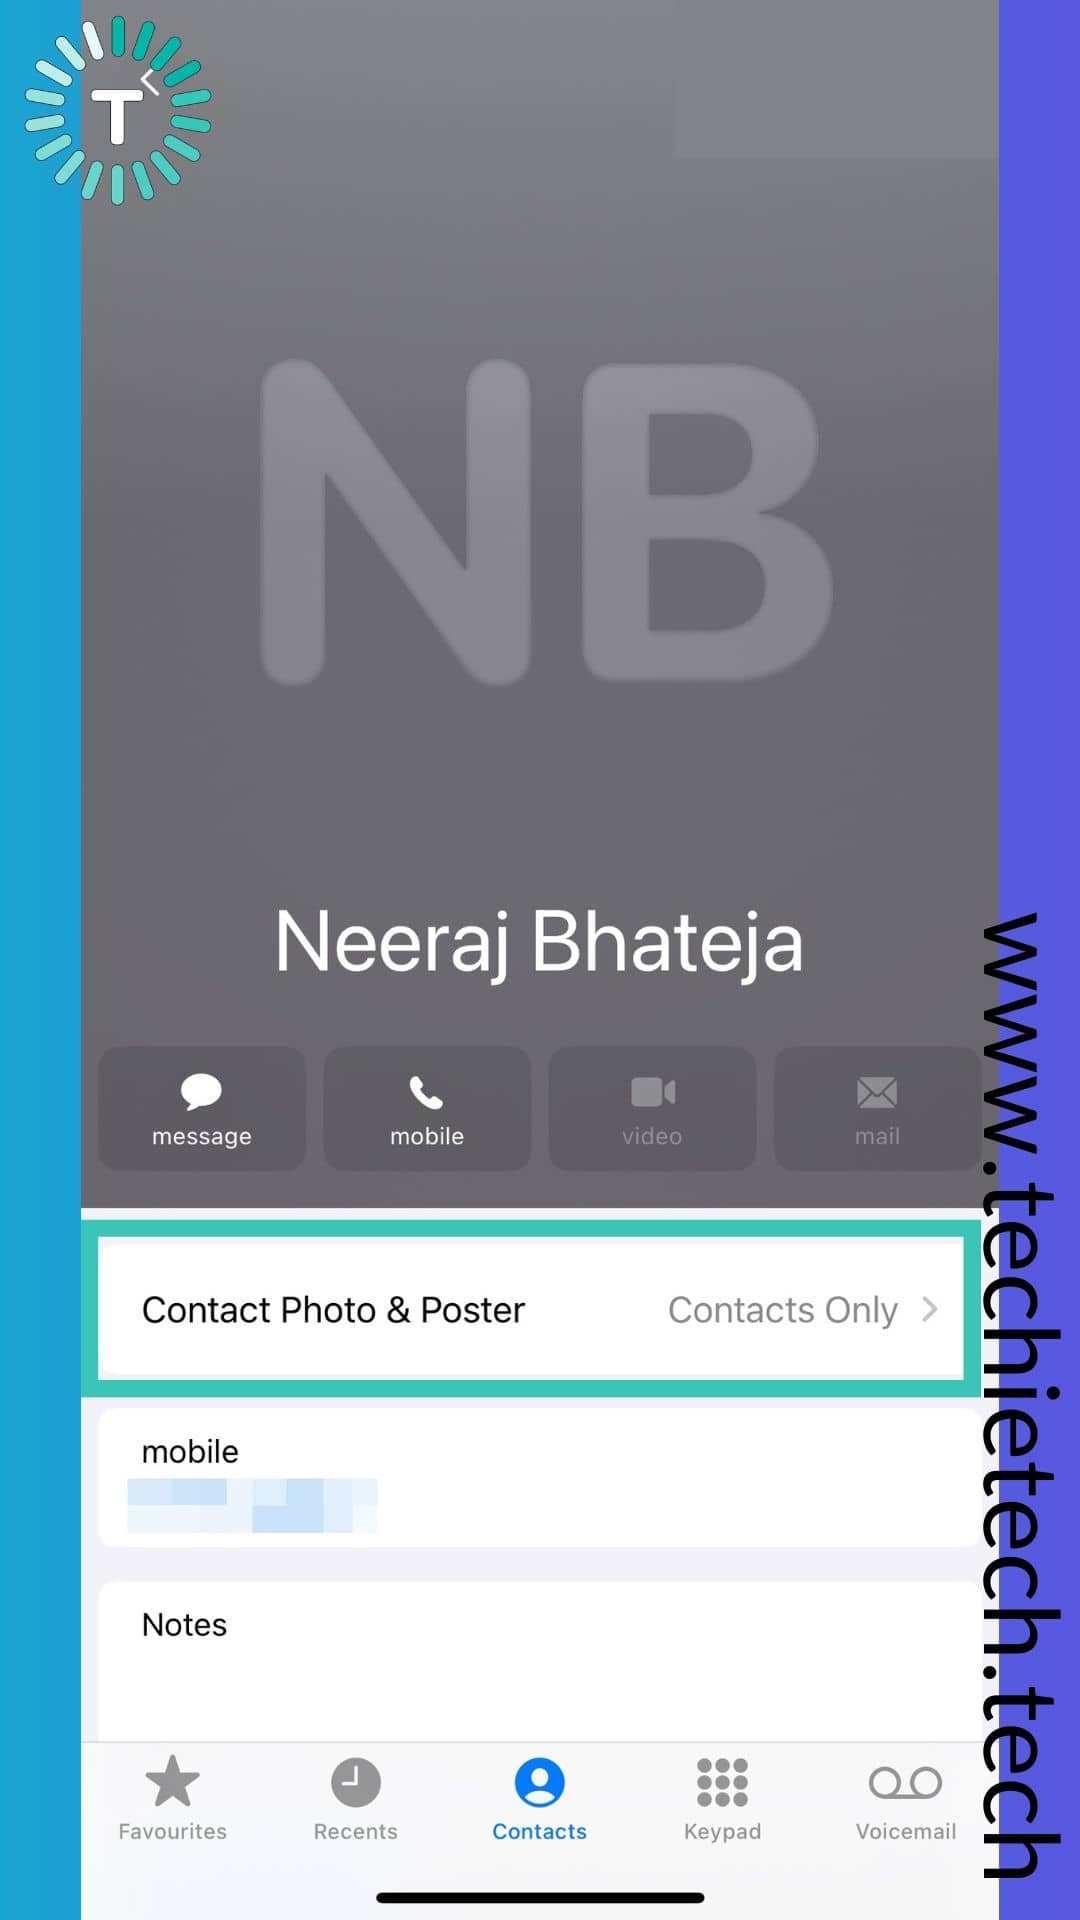
Step 1: Open the Contacts app on your iPhone and tap on your My Card from the top,
Step 2: Tap on Contact Photo & Poster,
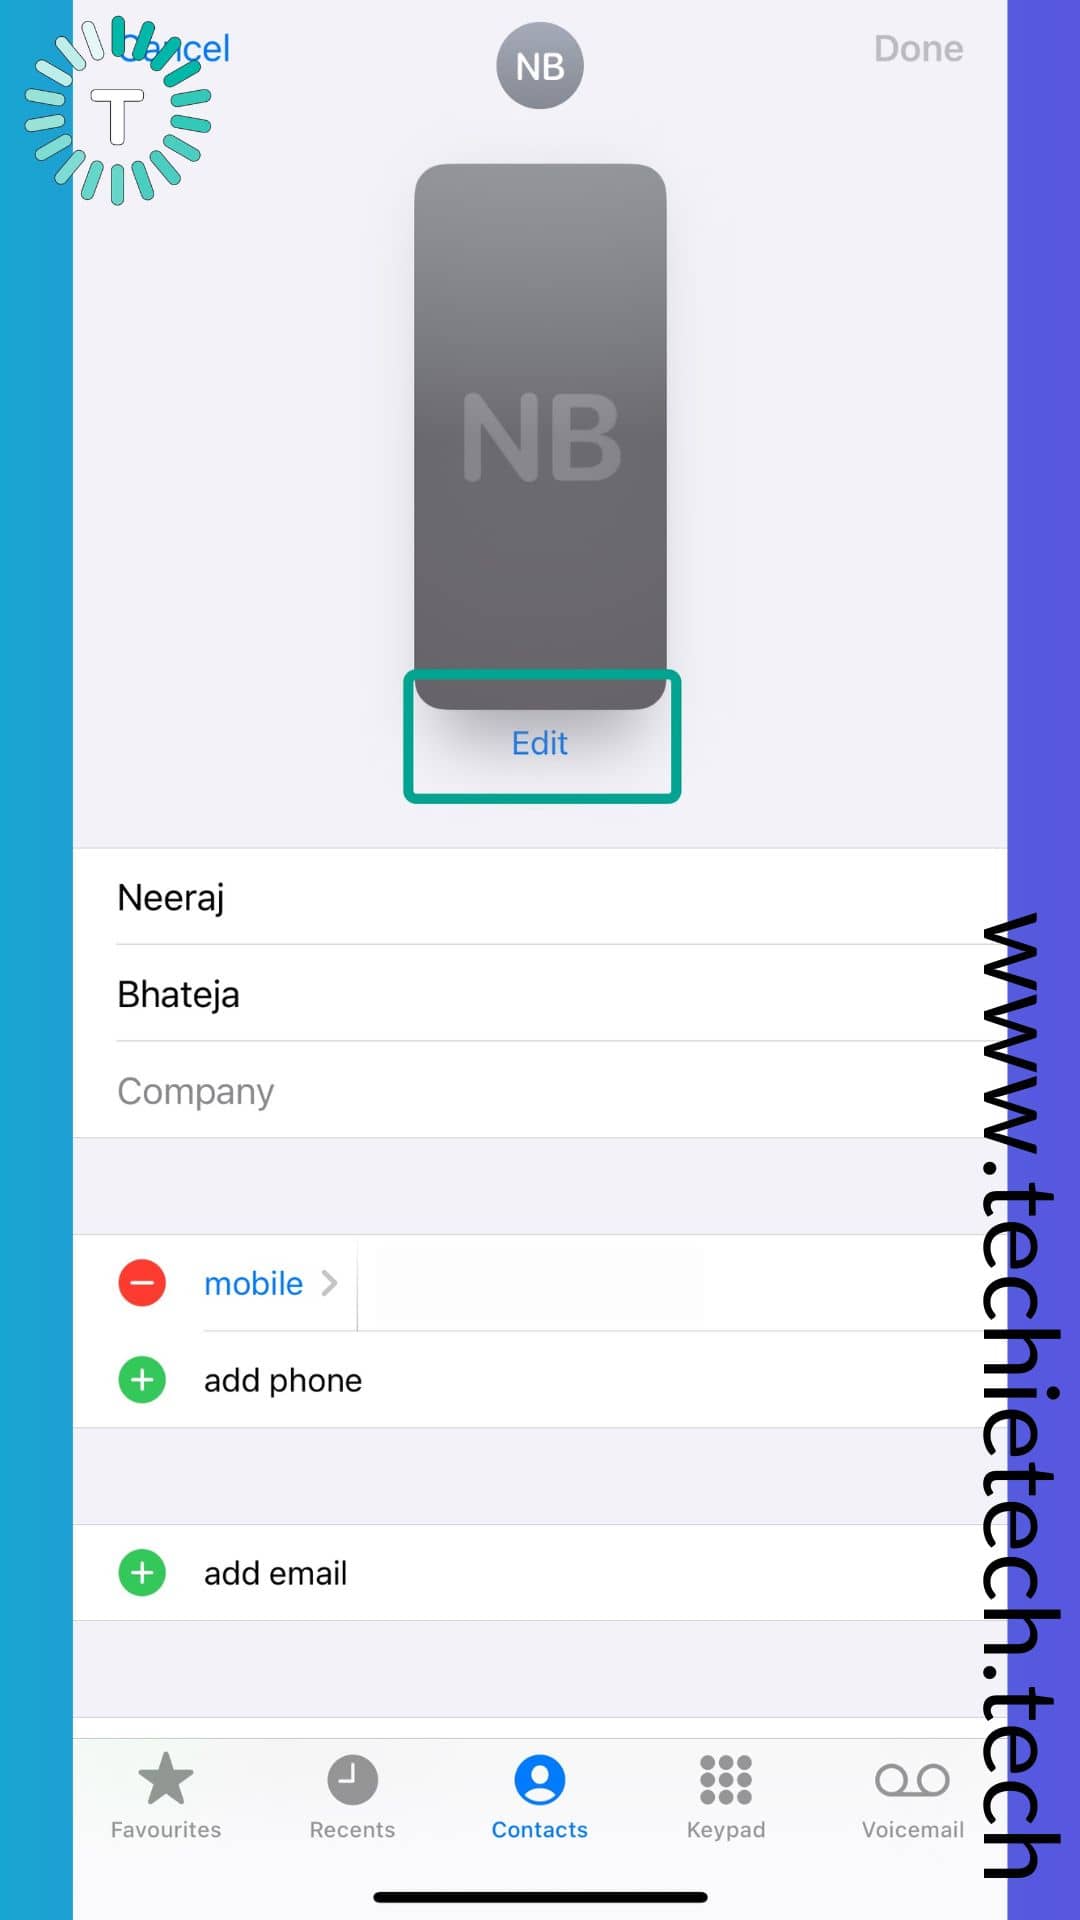
Step 3: Tap on the Edit button seen below the demo image of the call screen,
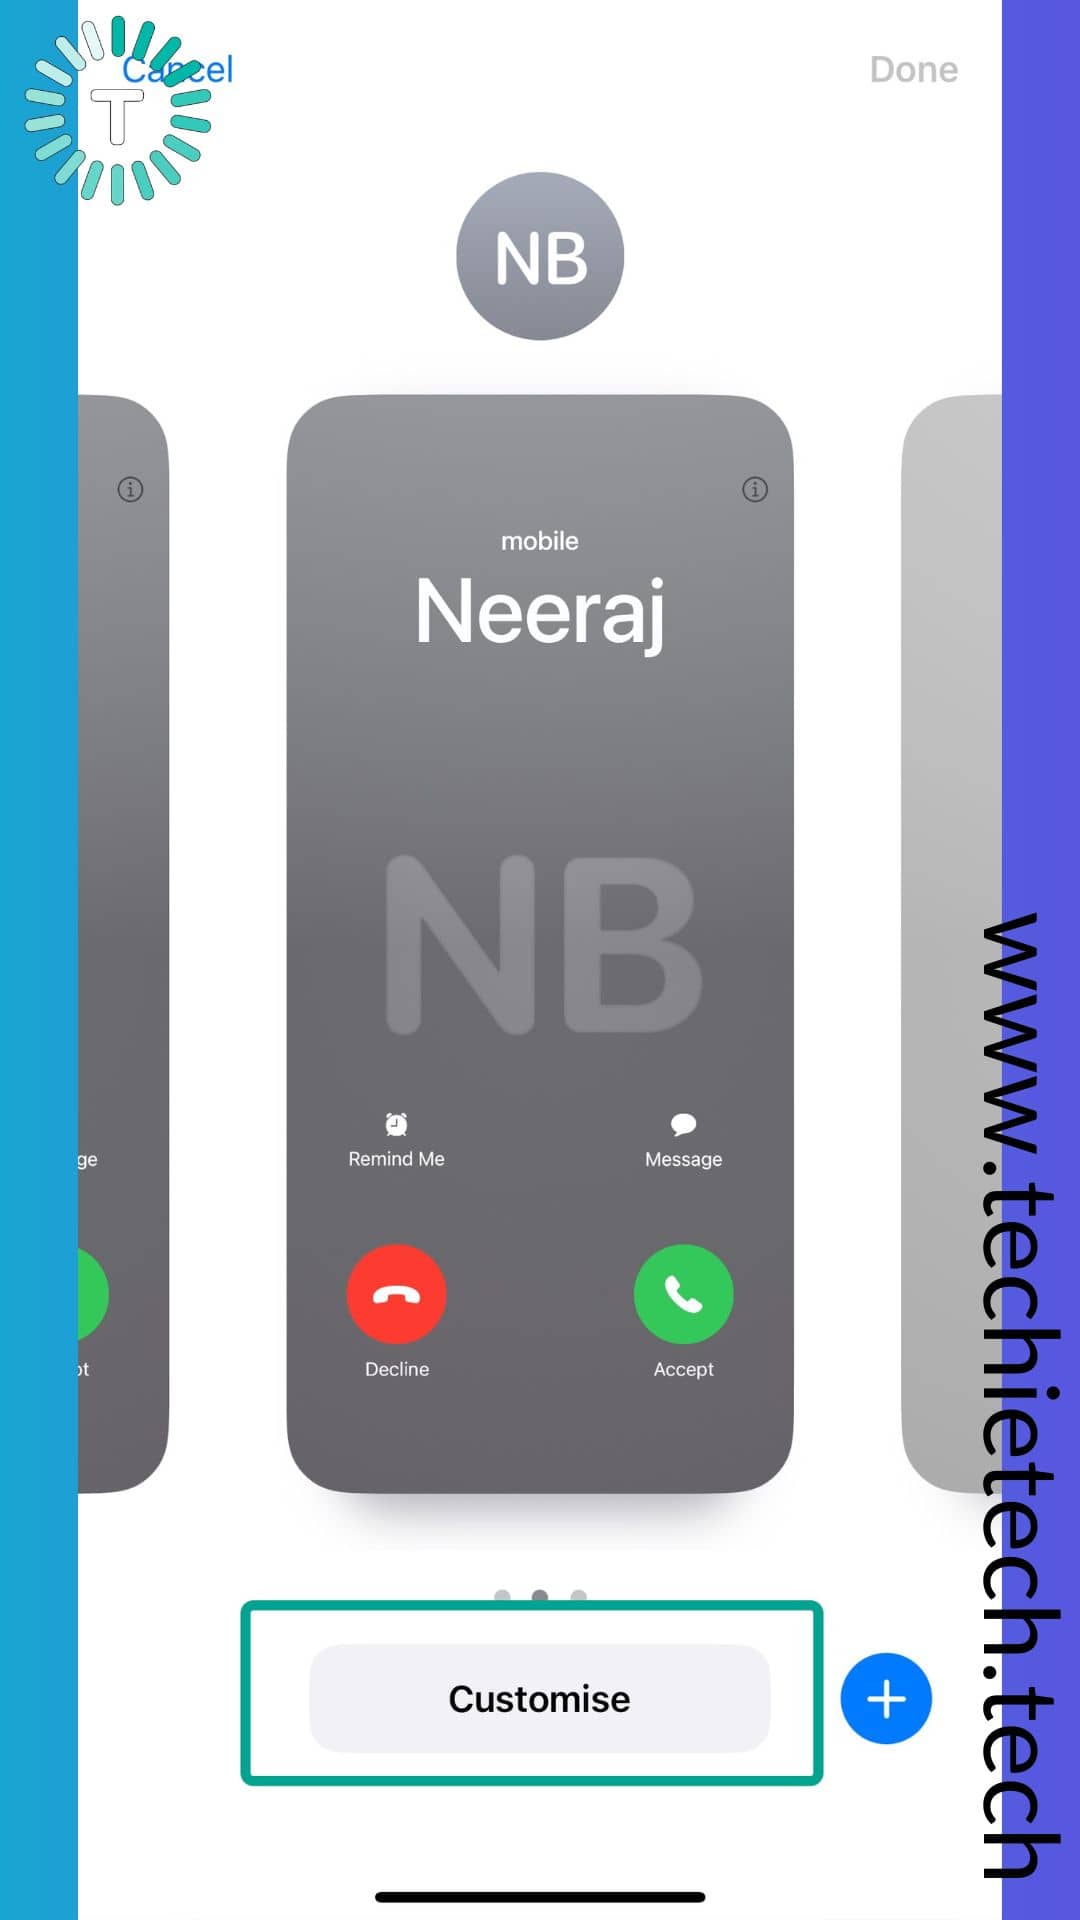
Step 4: Tap on Customise button under your preferred preset, or you can choose to Create New poster altogether. Here, we are going with the presets.
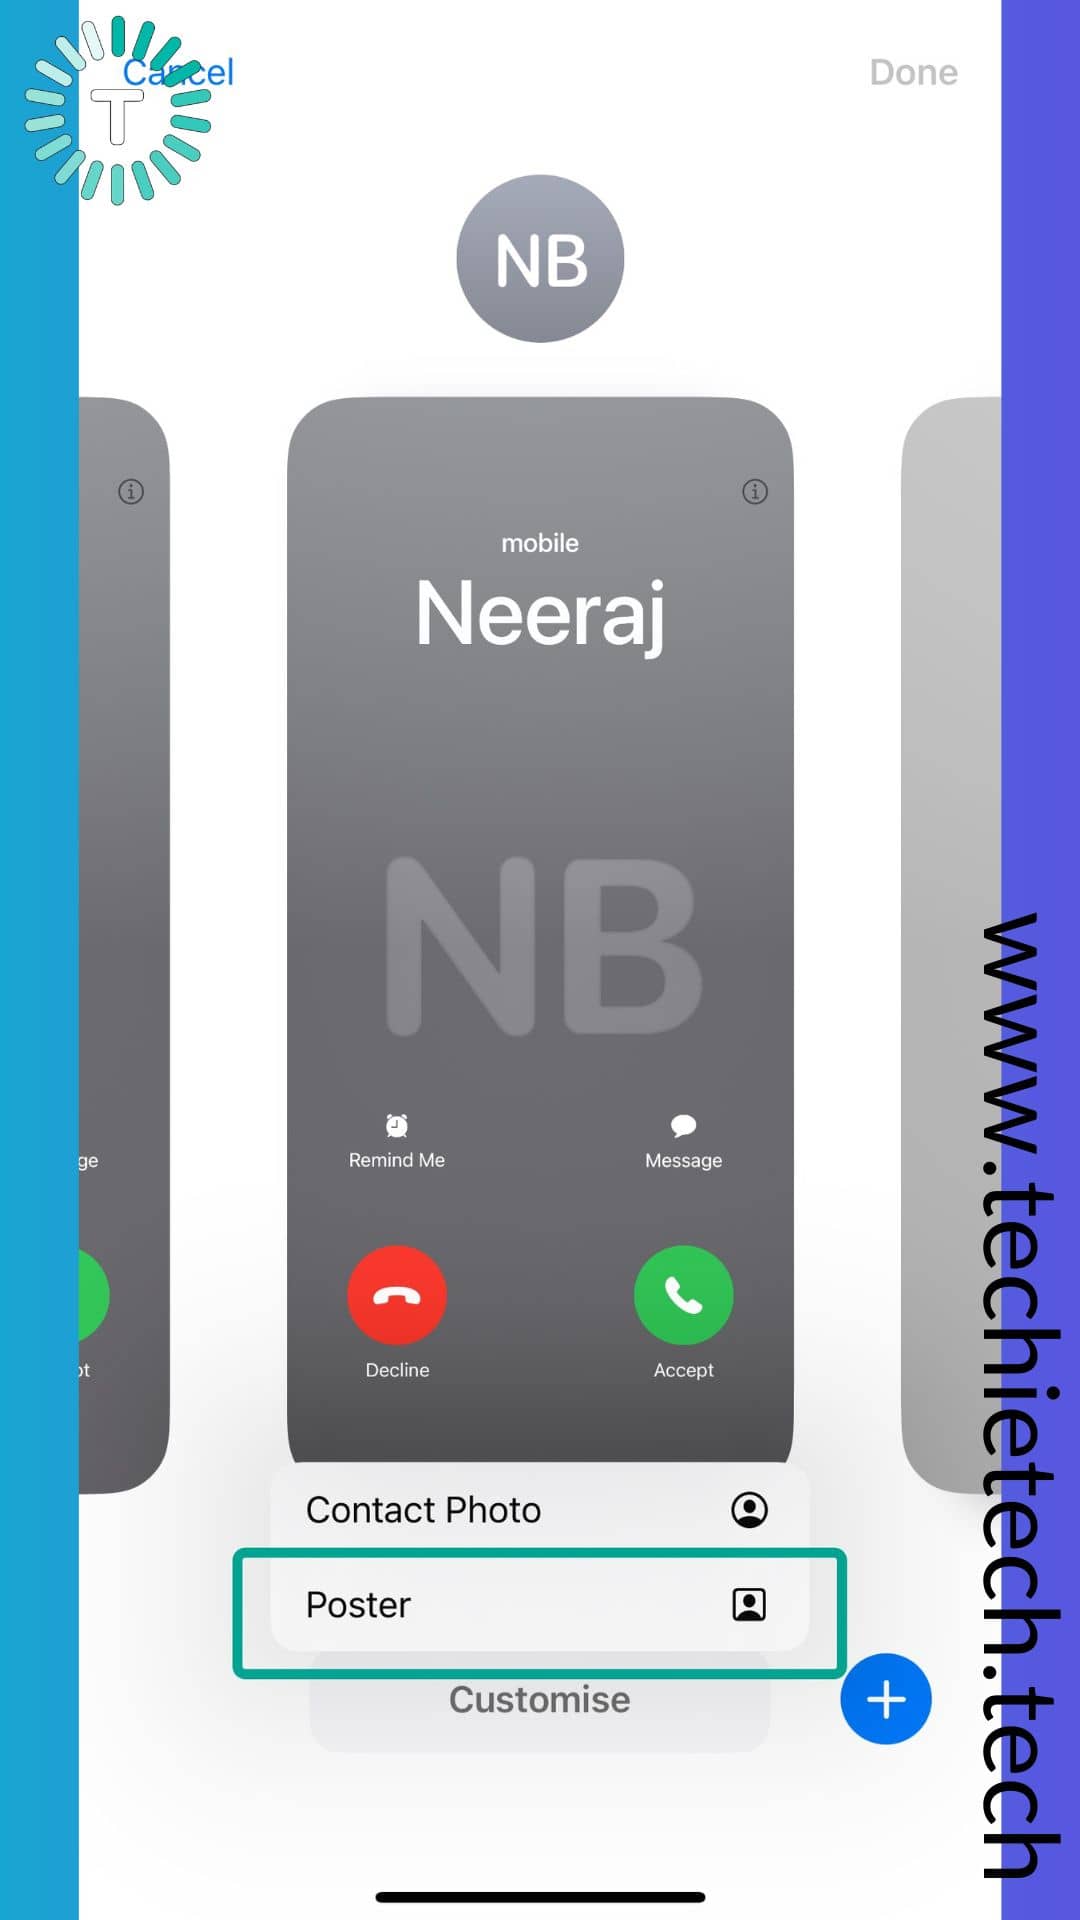
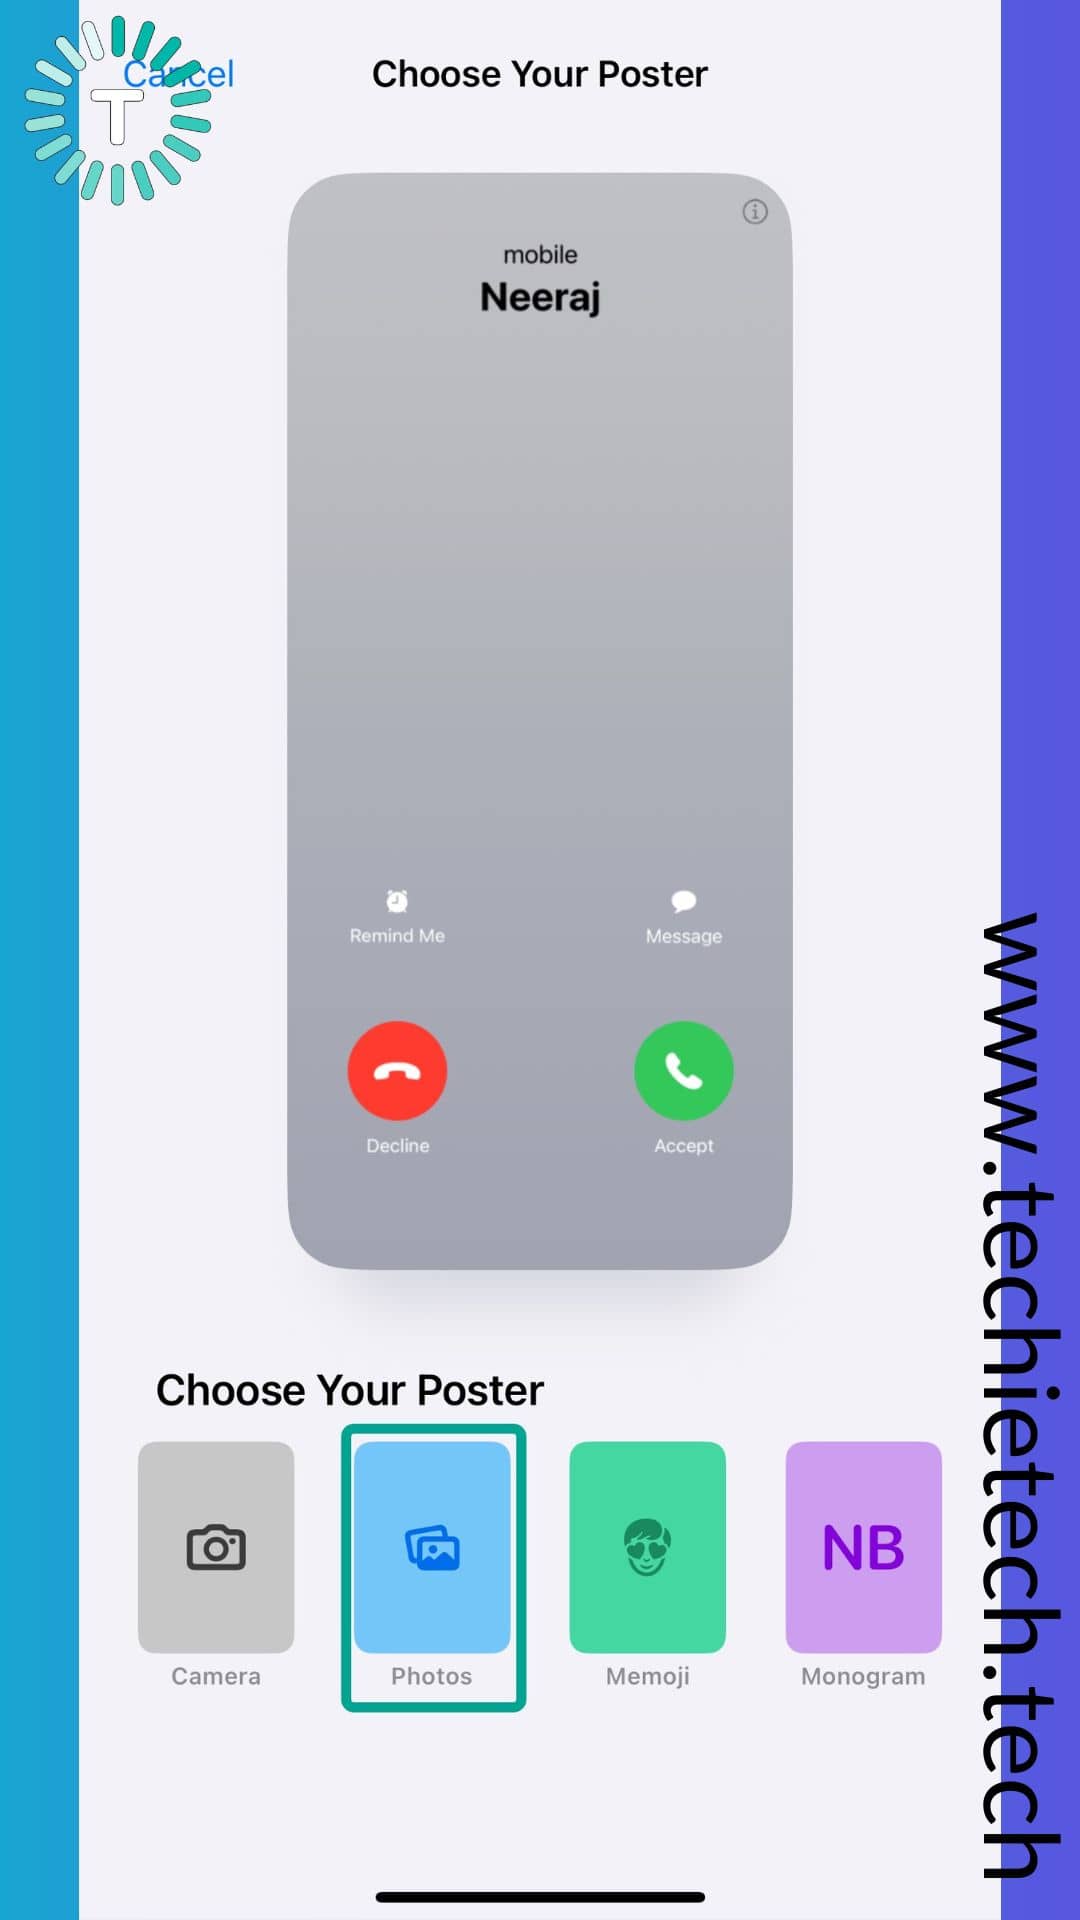
Step 5: Next, tap on the Poster option,
Step 6: Under Choose Your Poster, tap Photos,
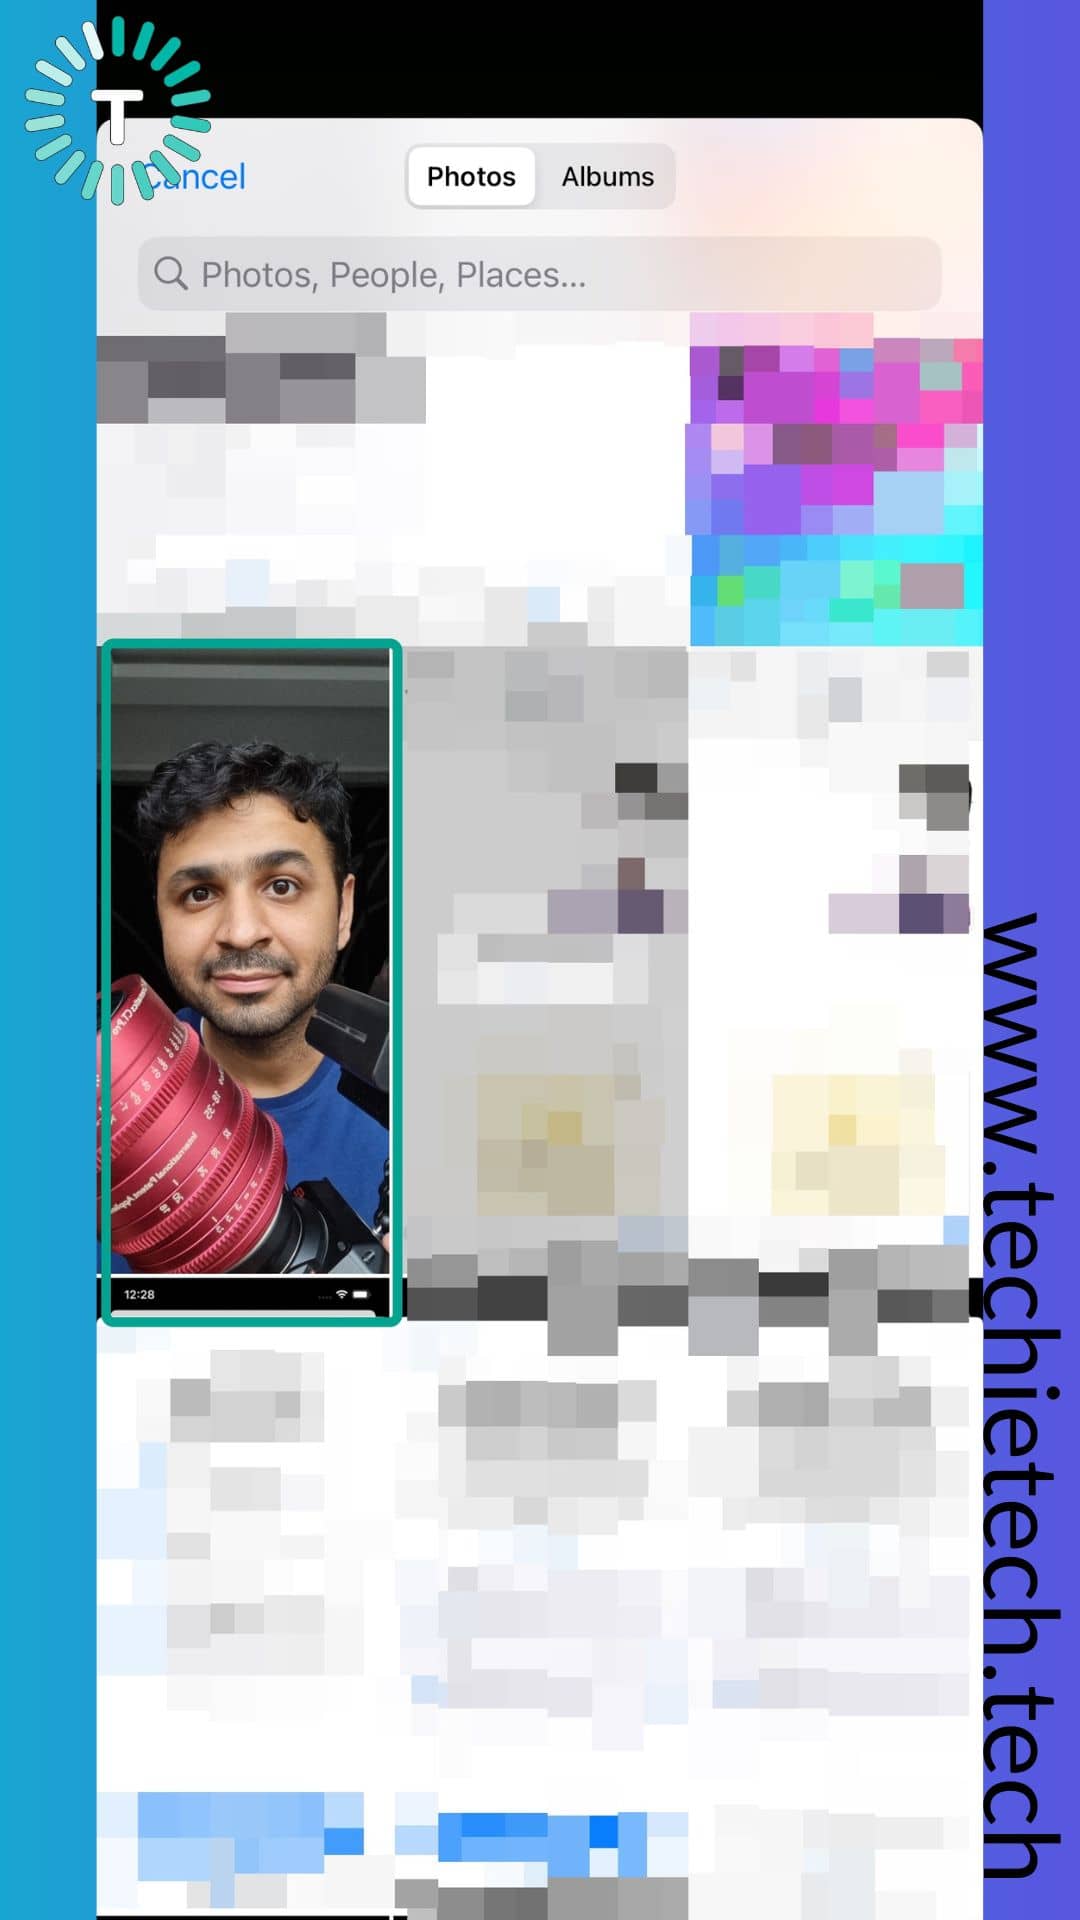
Step 7: Now, you’ll be redirected to choose a photo from the Photos app, simply select a photo,
Step 8: The selected photo will be shown on the poster layout, you can adjust the same by tapping Pinch to Crop. If you want to add filters to your photos, you can swipe right or left through the filters at the bottom,
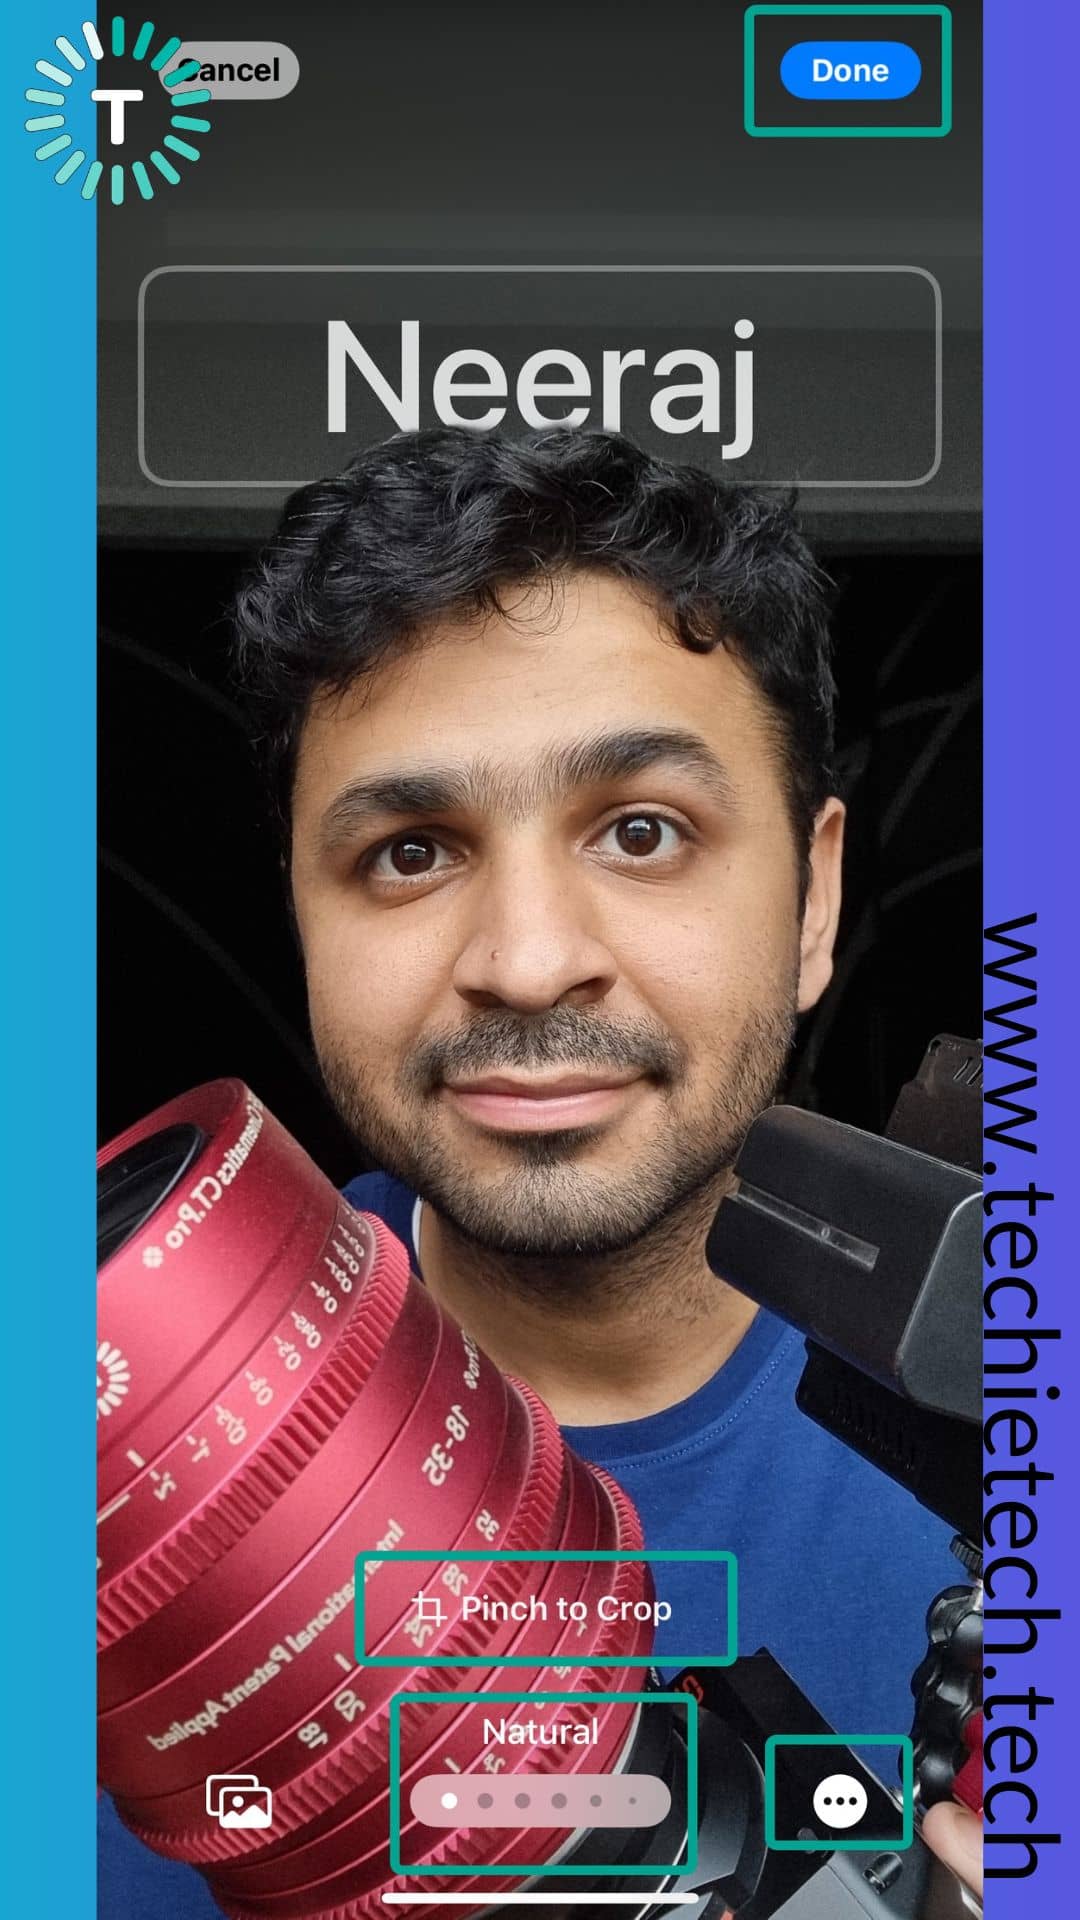
Step 9: Now, let’s play with the text part, tap on your name as shown in the image below,
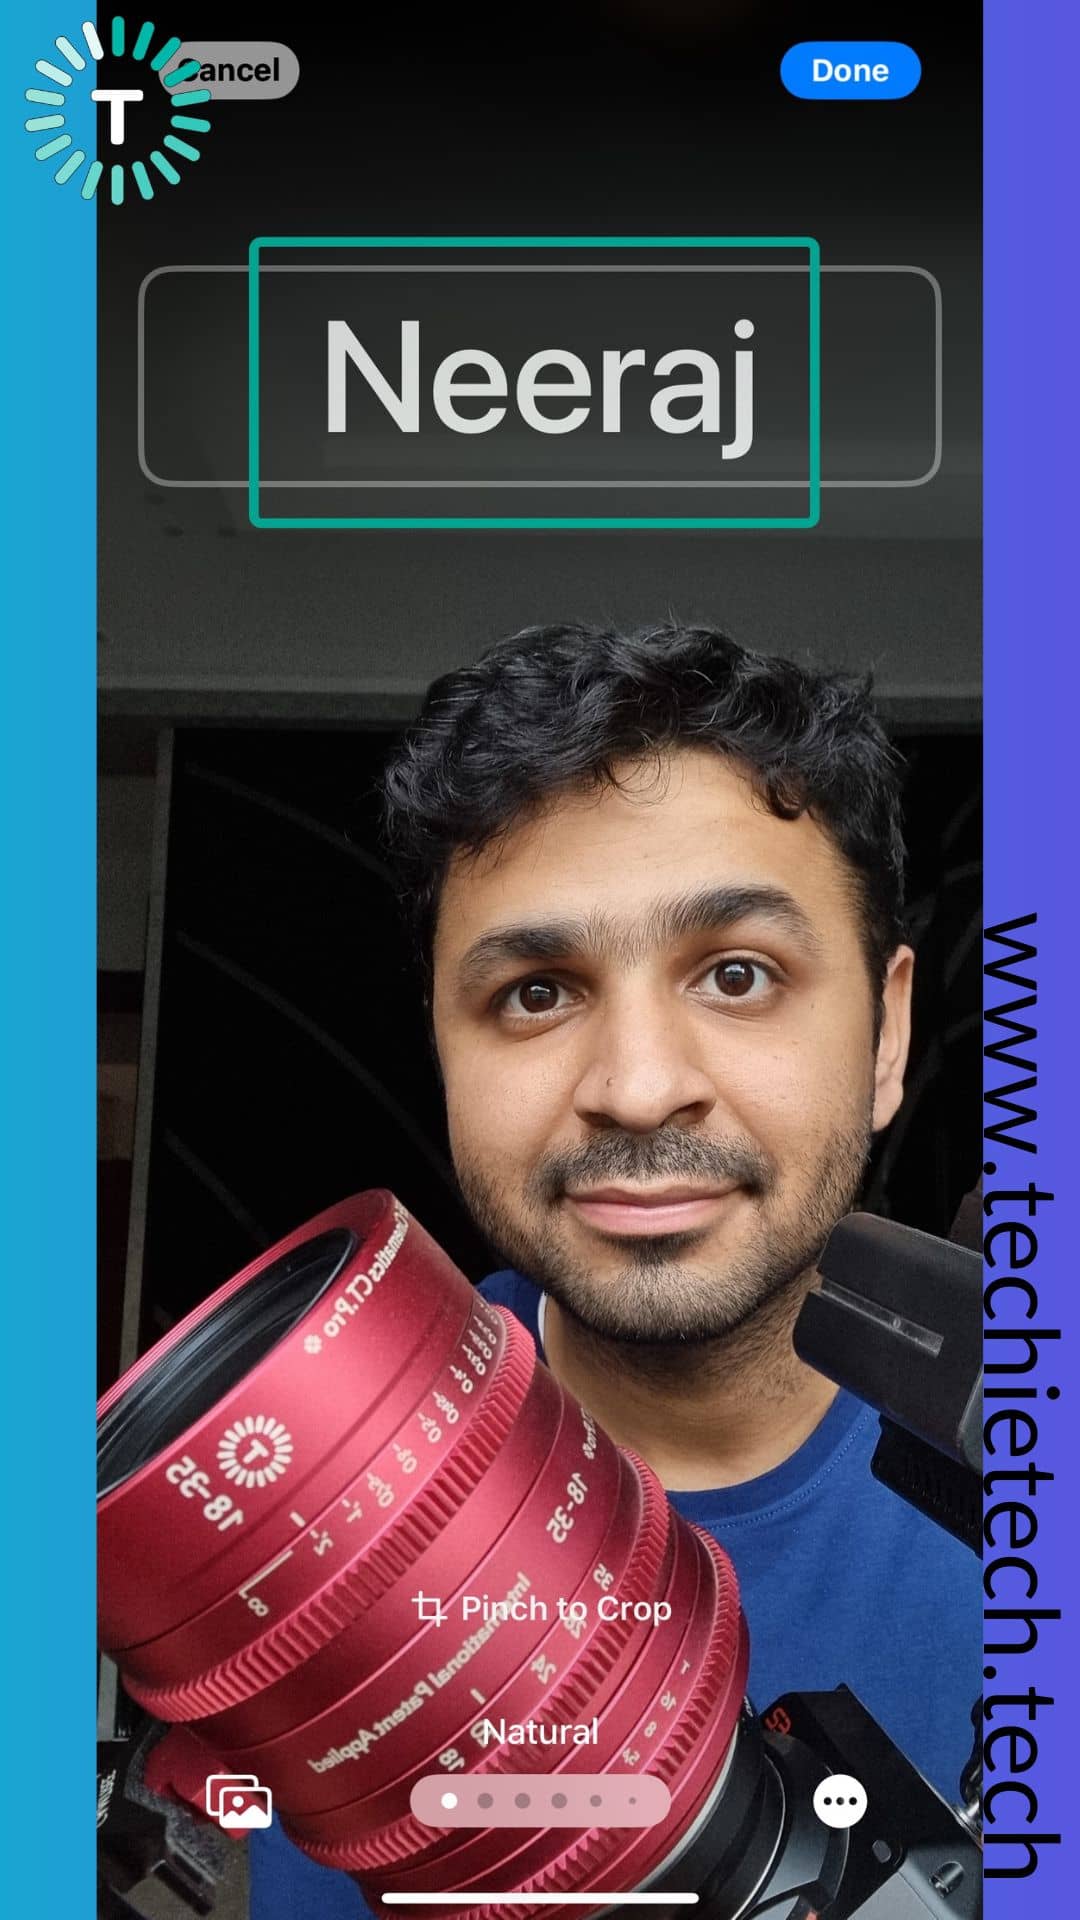
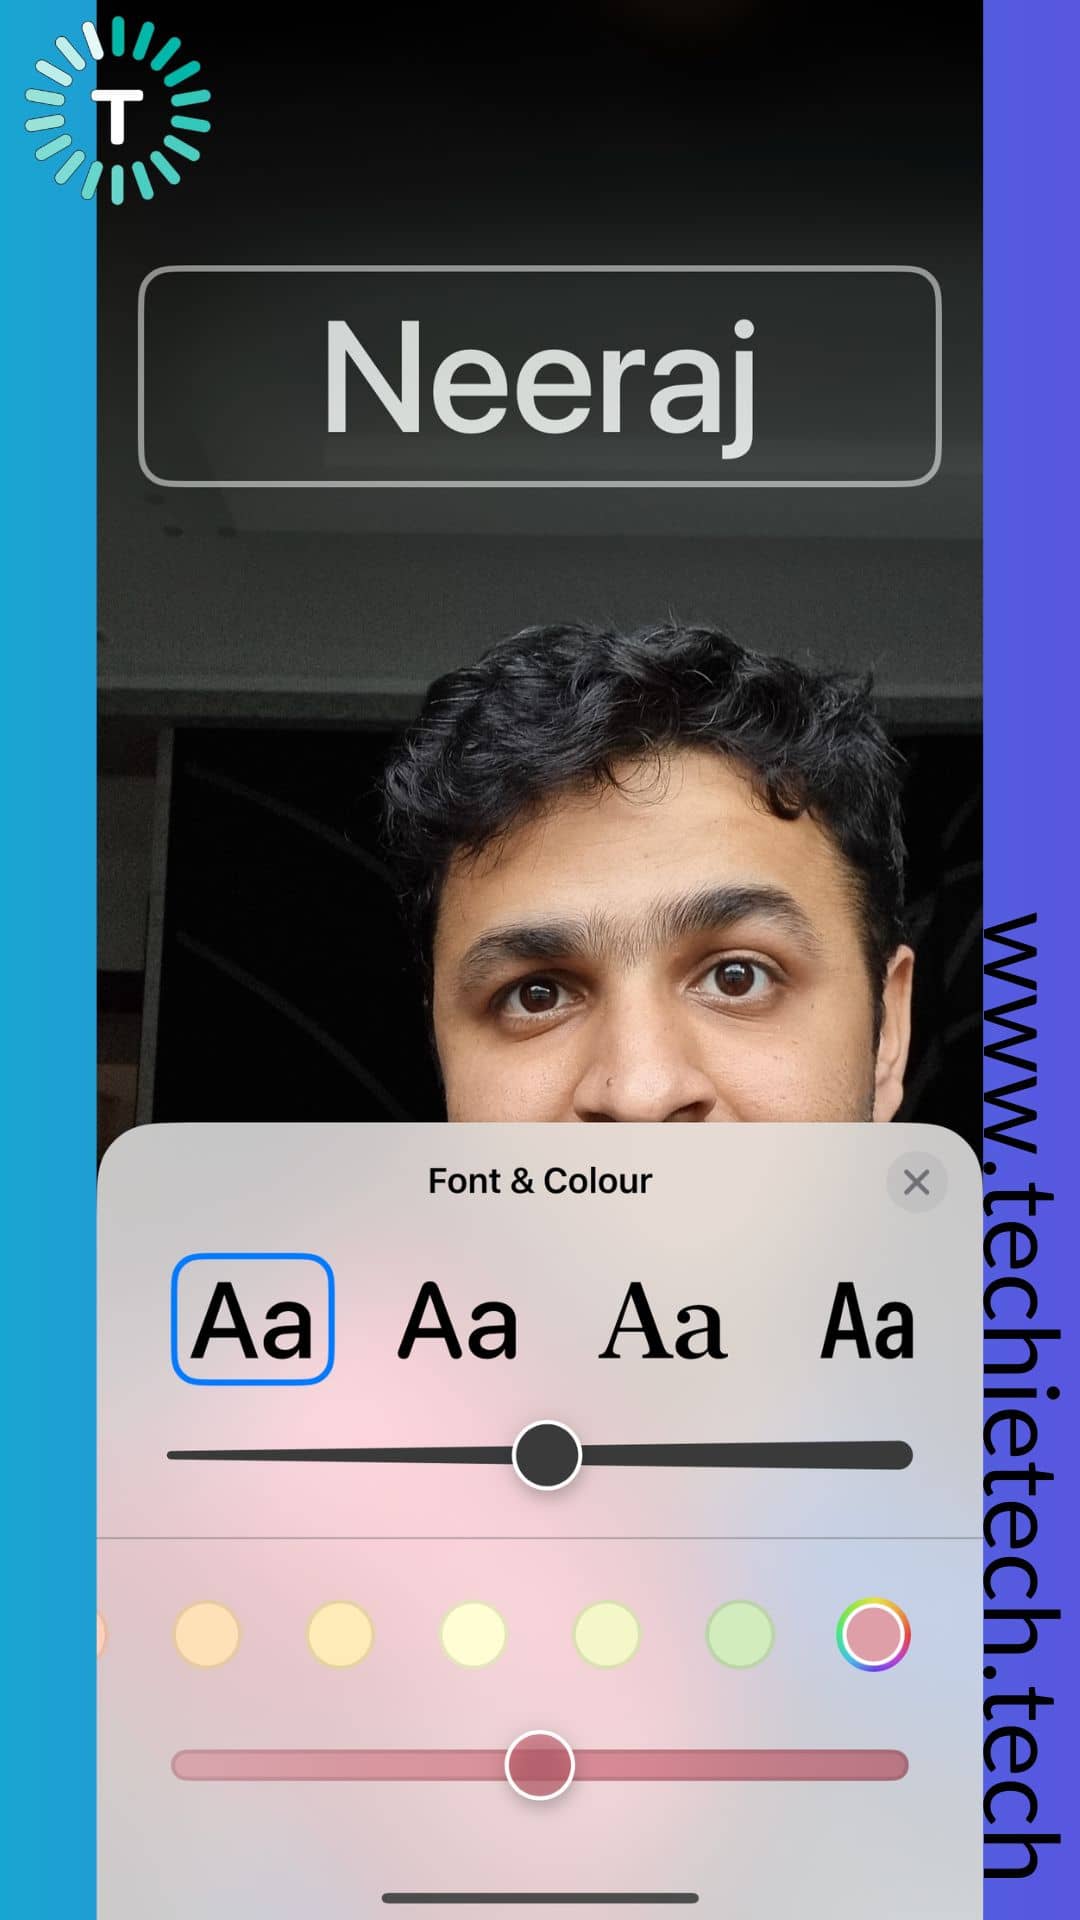
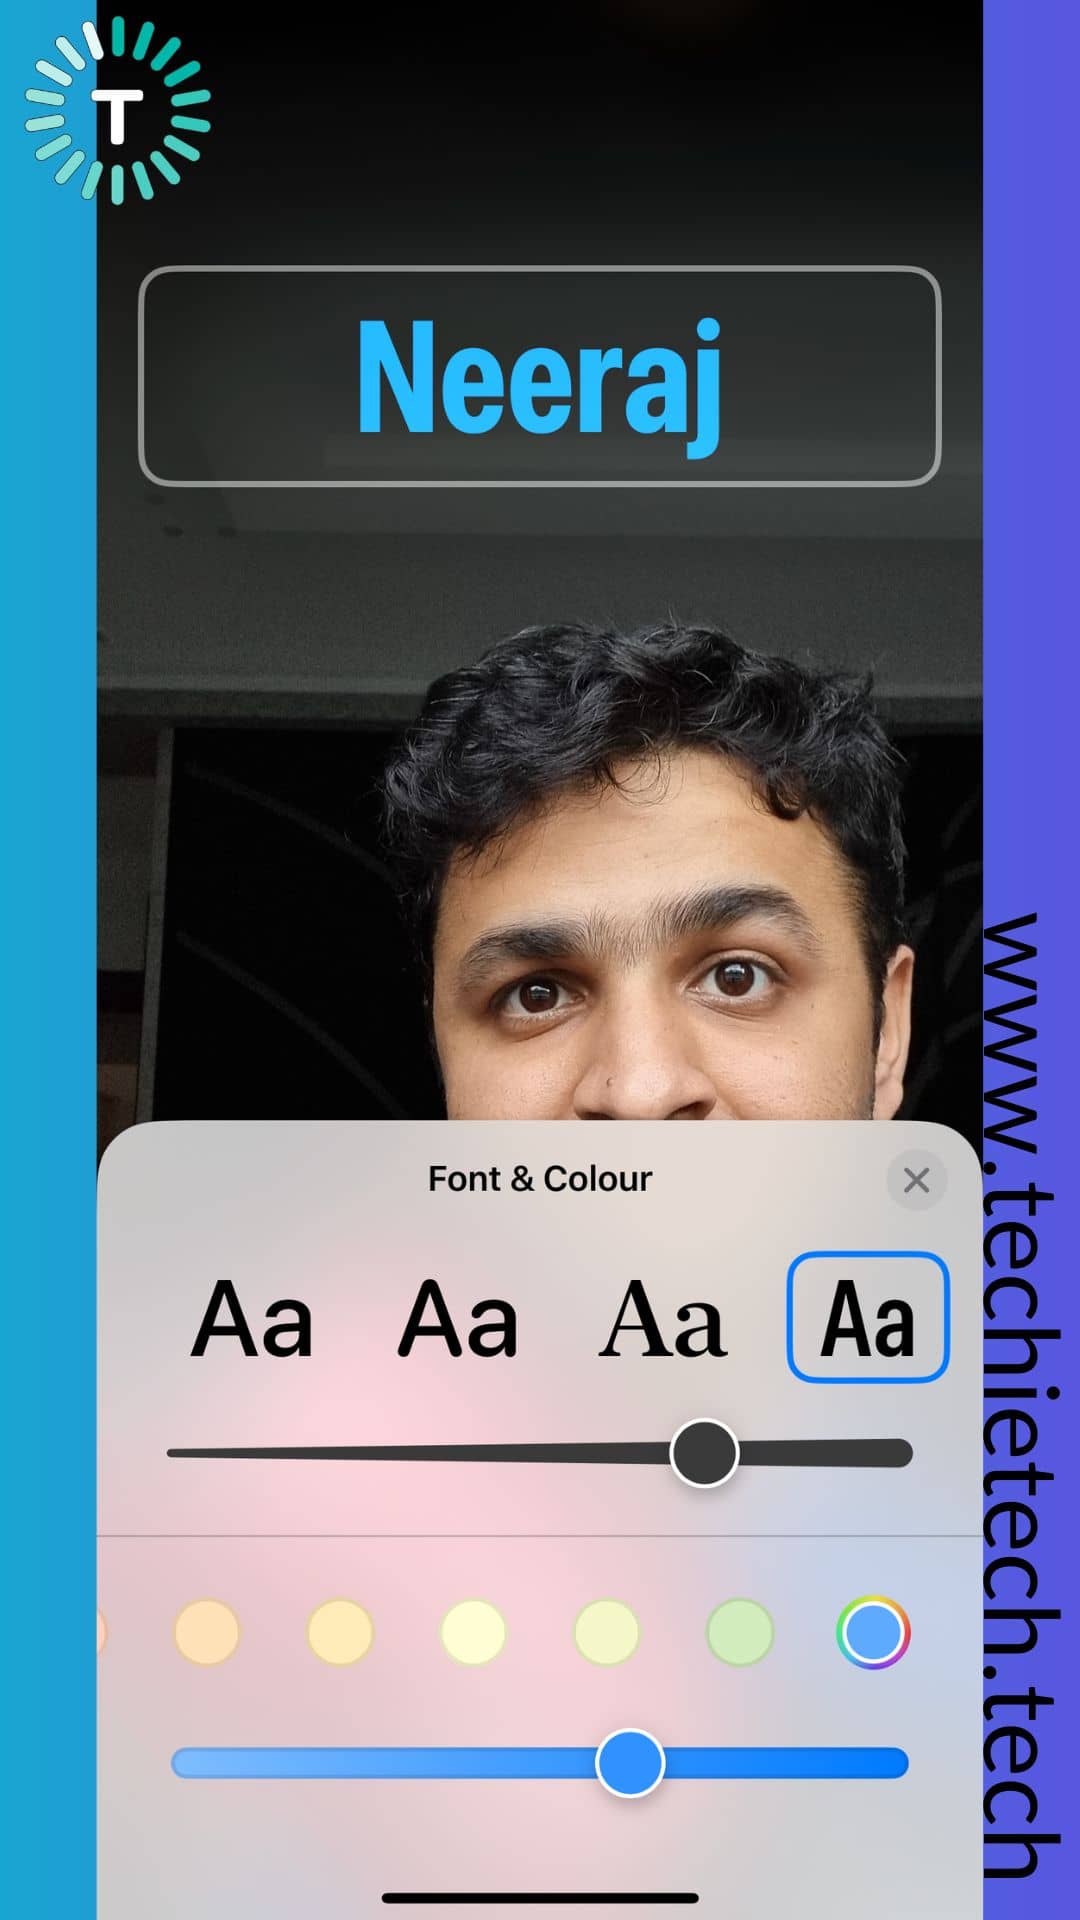
Step 10: On the next screen, you’ll see different text styles to choose from, the image shown below is the default font and color,
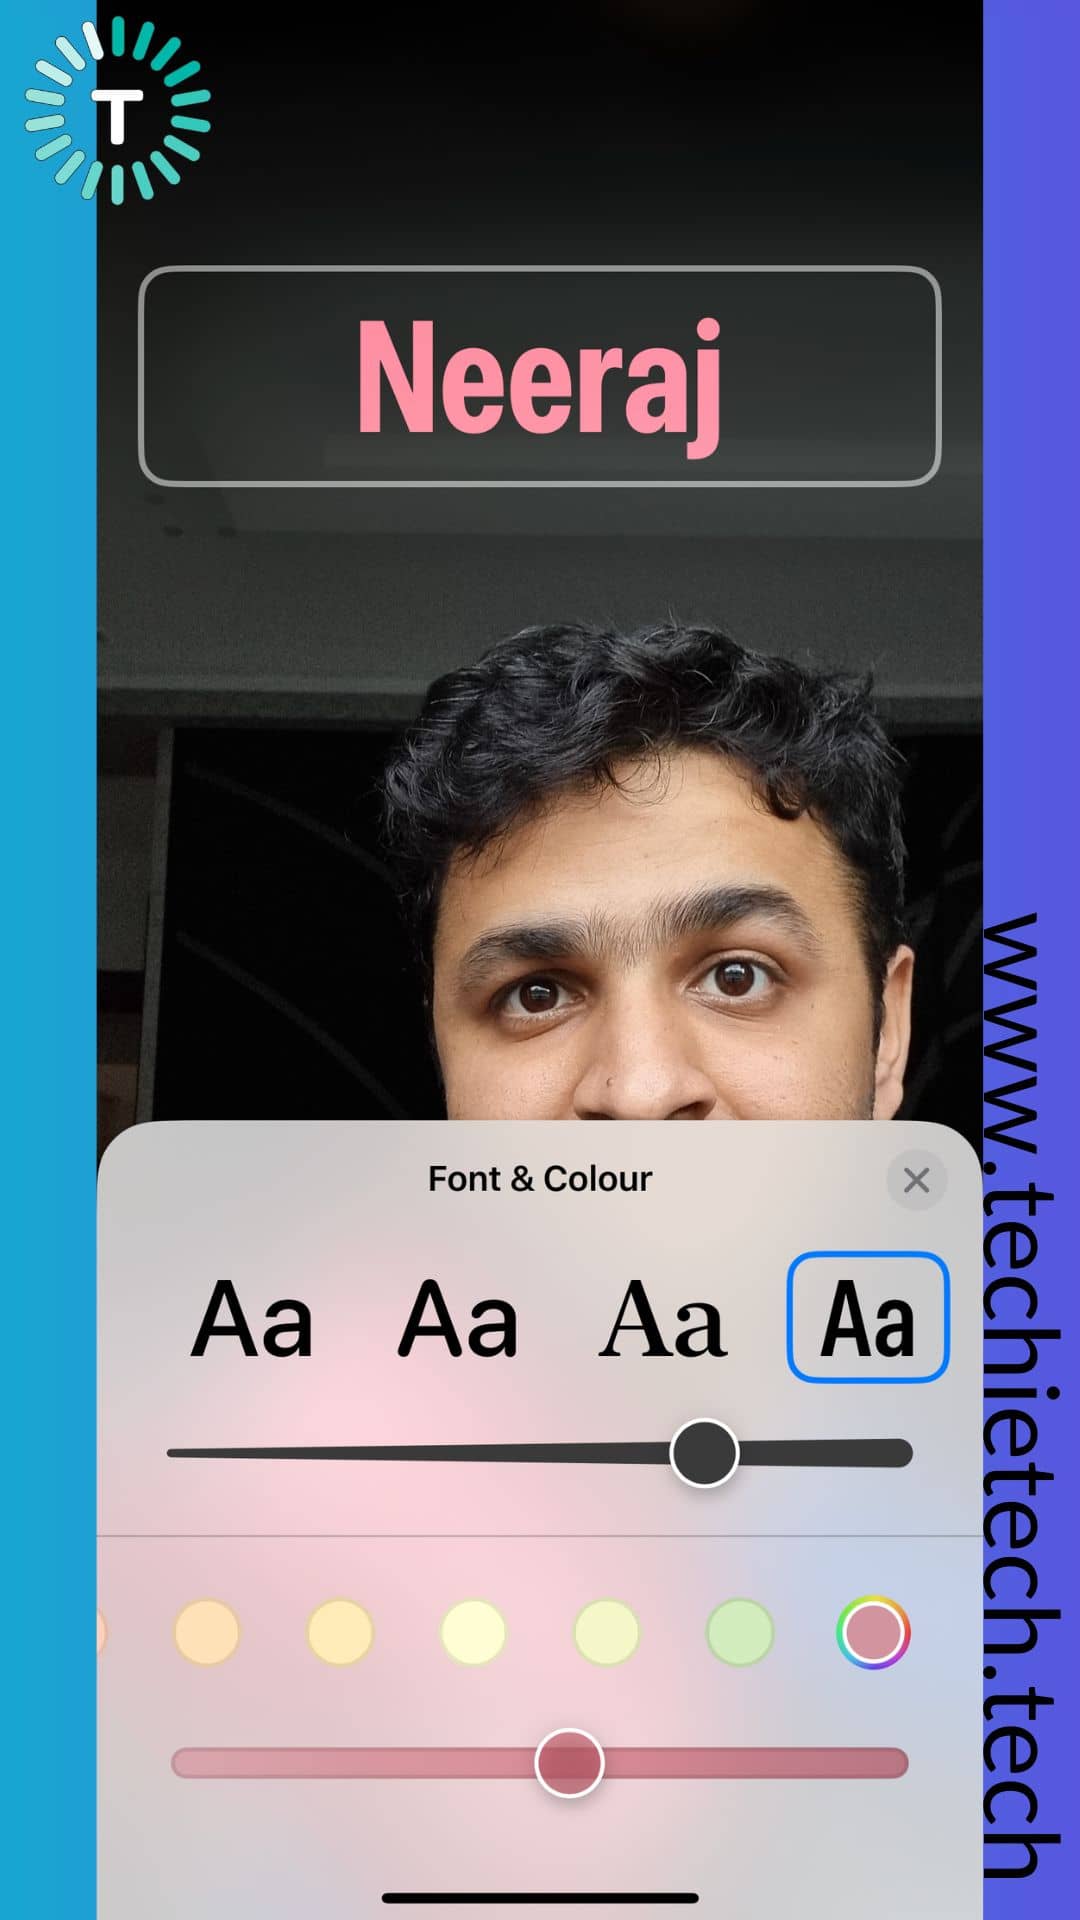
Step 11: Now select the text style of your choice, we have selected the last text style,
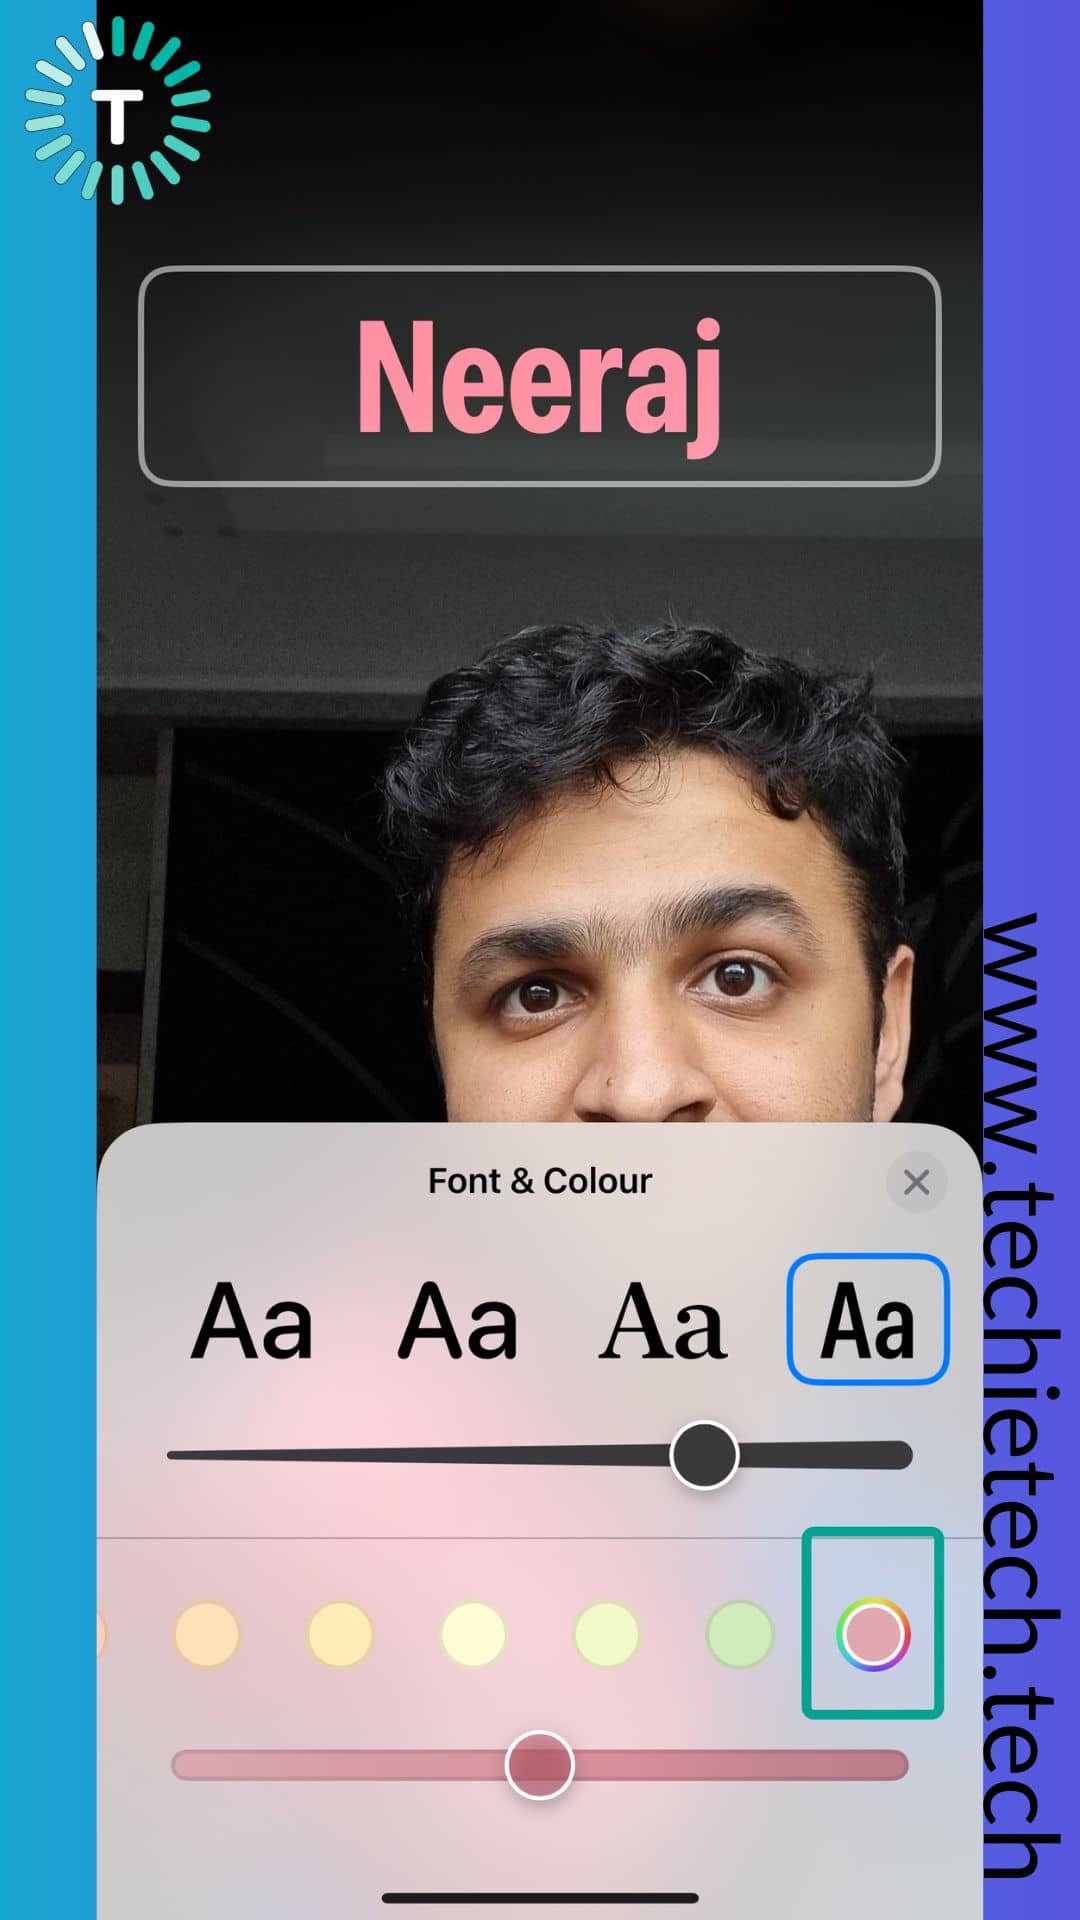
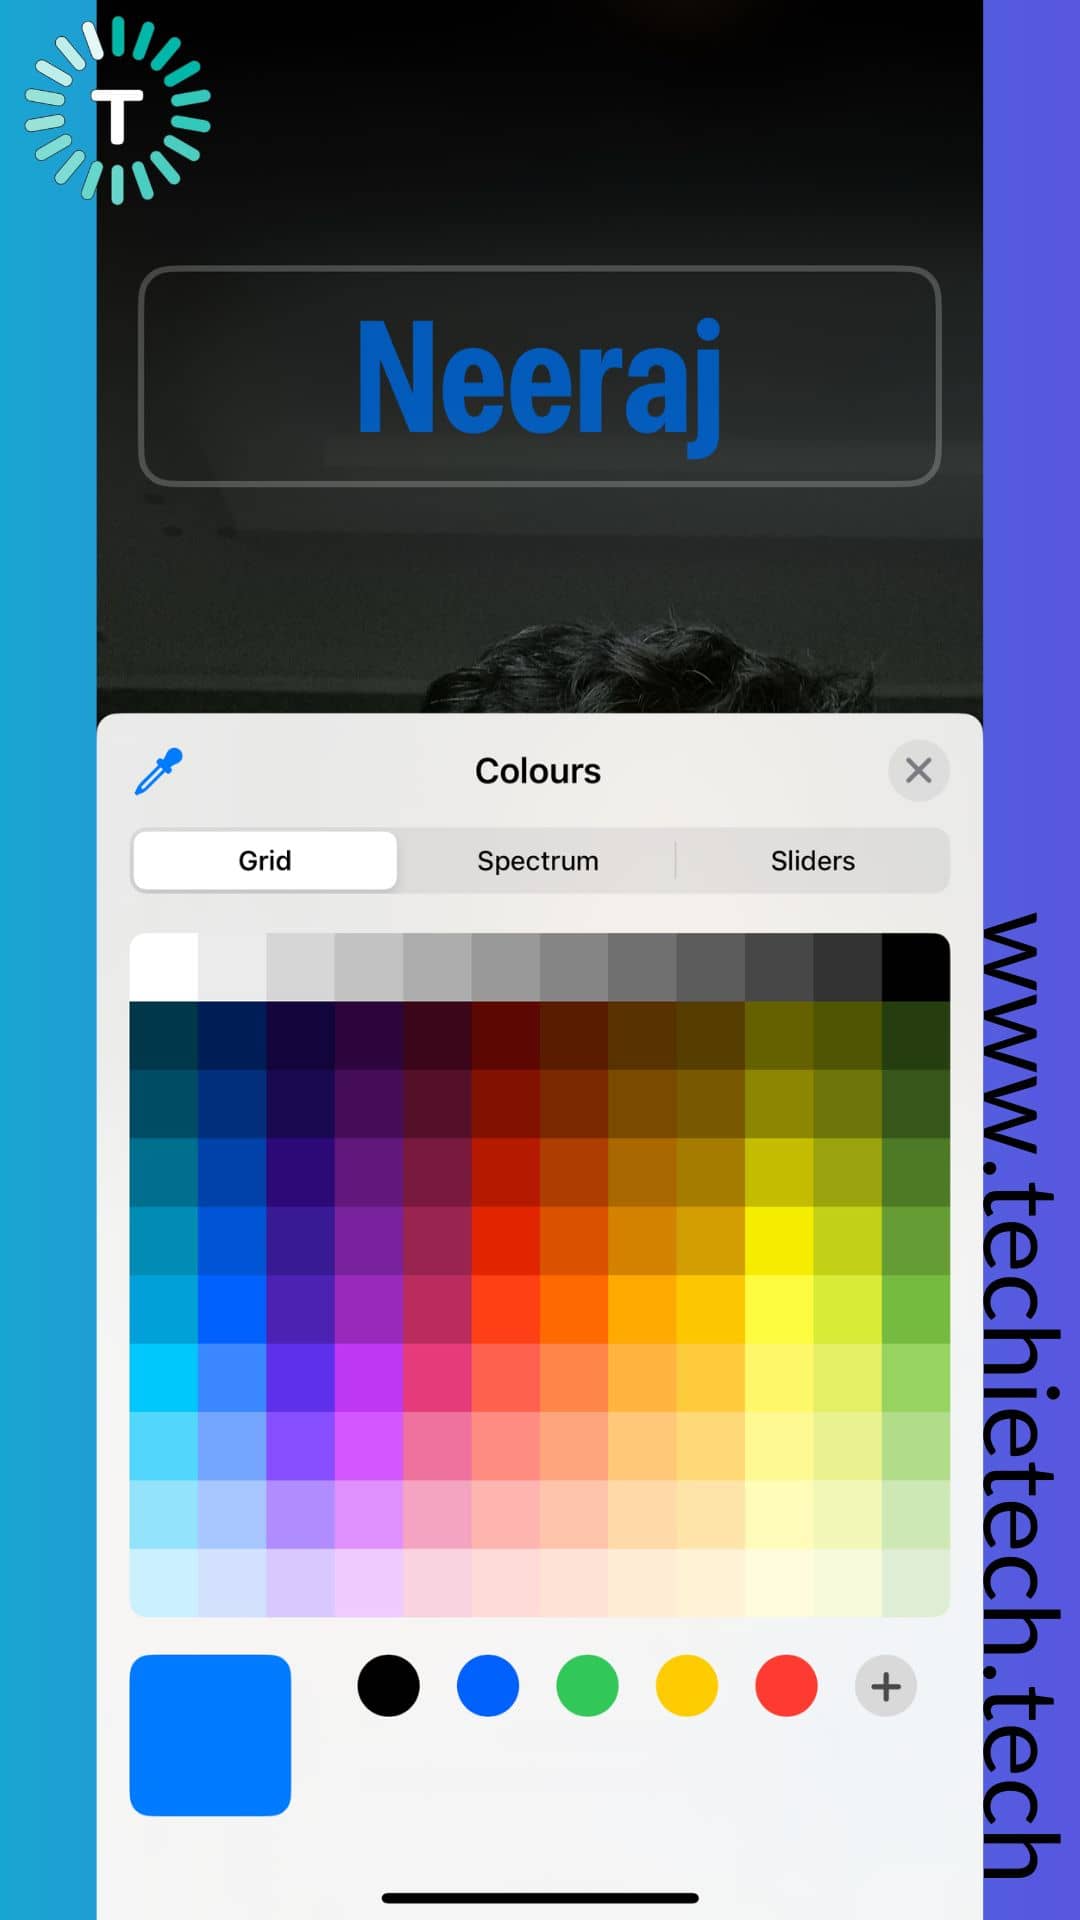
Step 12: You can choose the text color by tapping the color picker option. Similarly, you can also change the boldness of the text,
Step 13: After you have finished styling the text, tap Done,
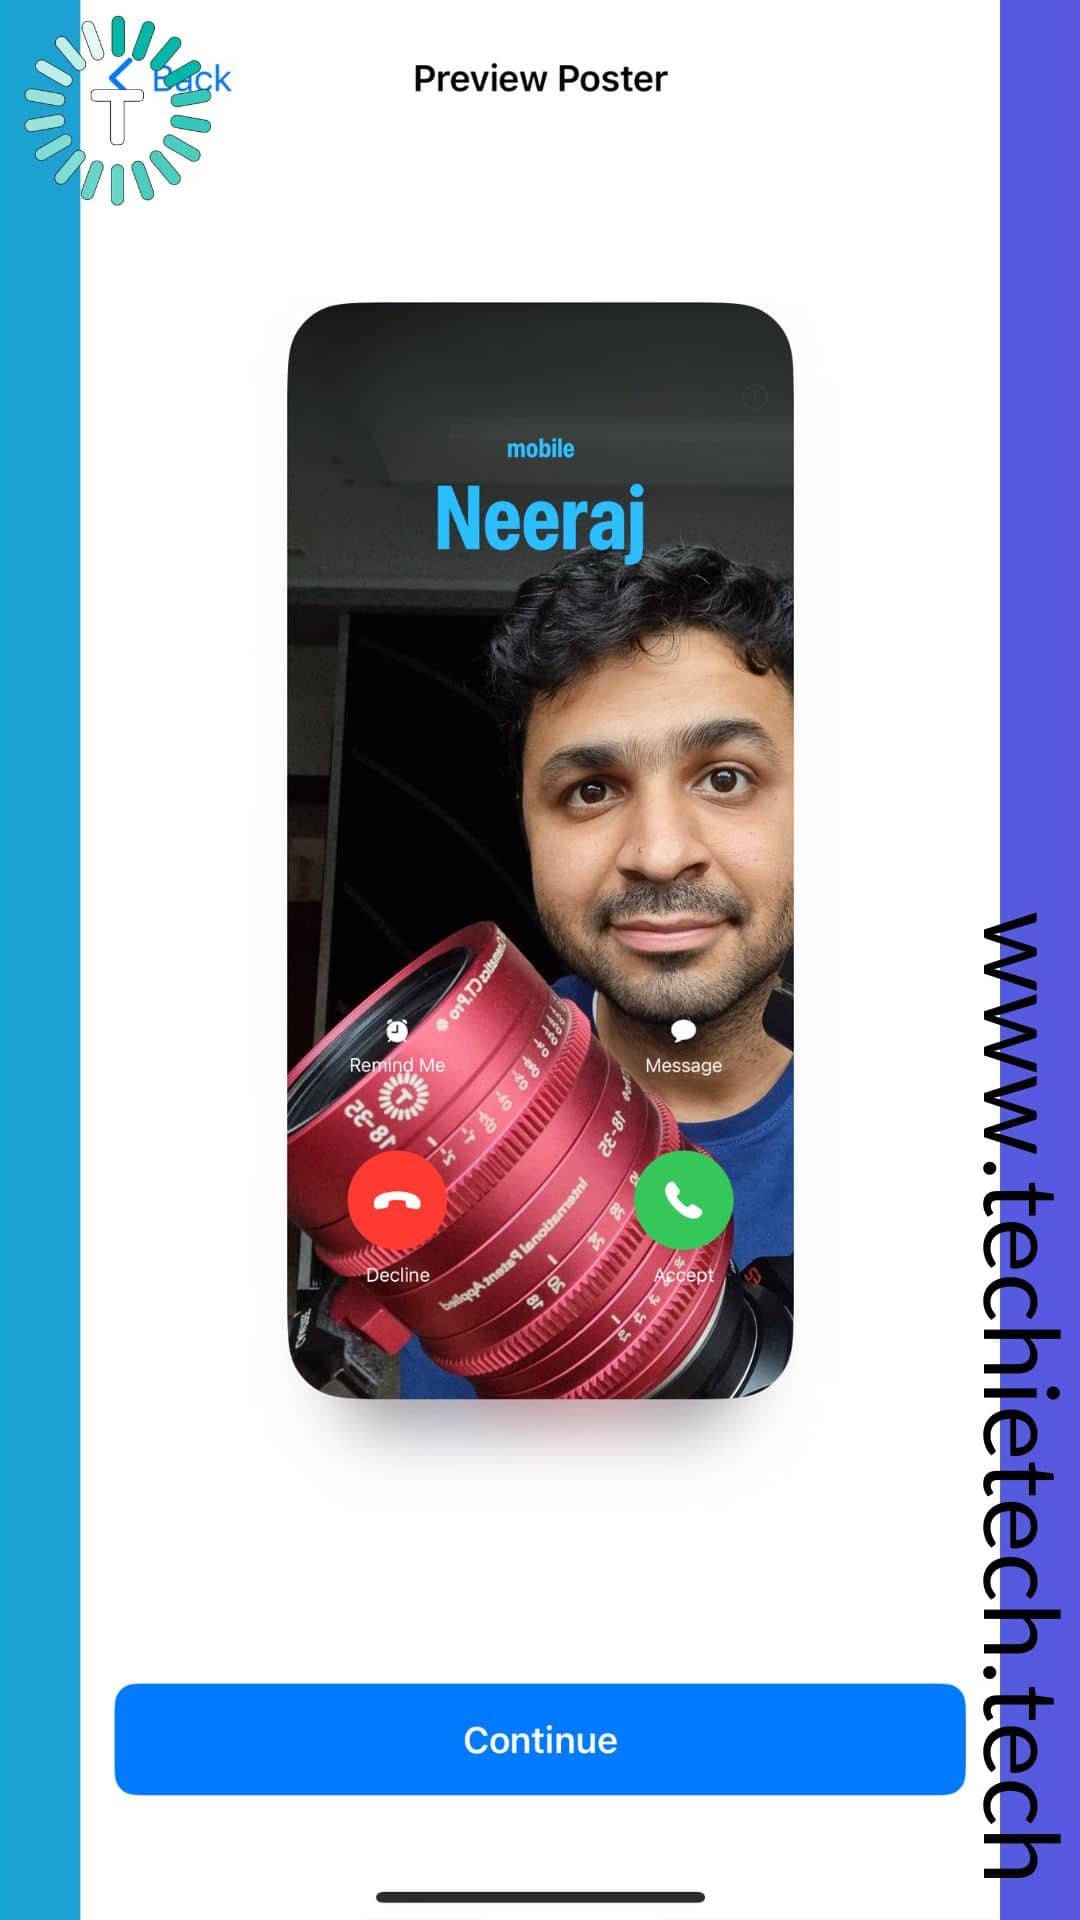
Step 14: Tap Continue when you see the Preview Poster,
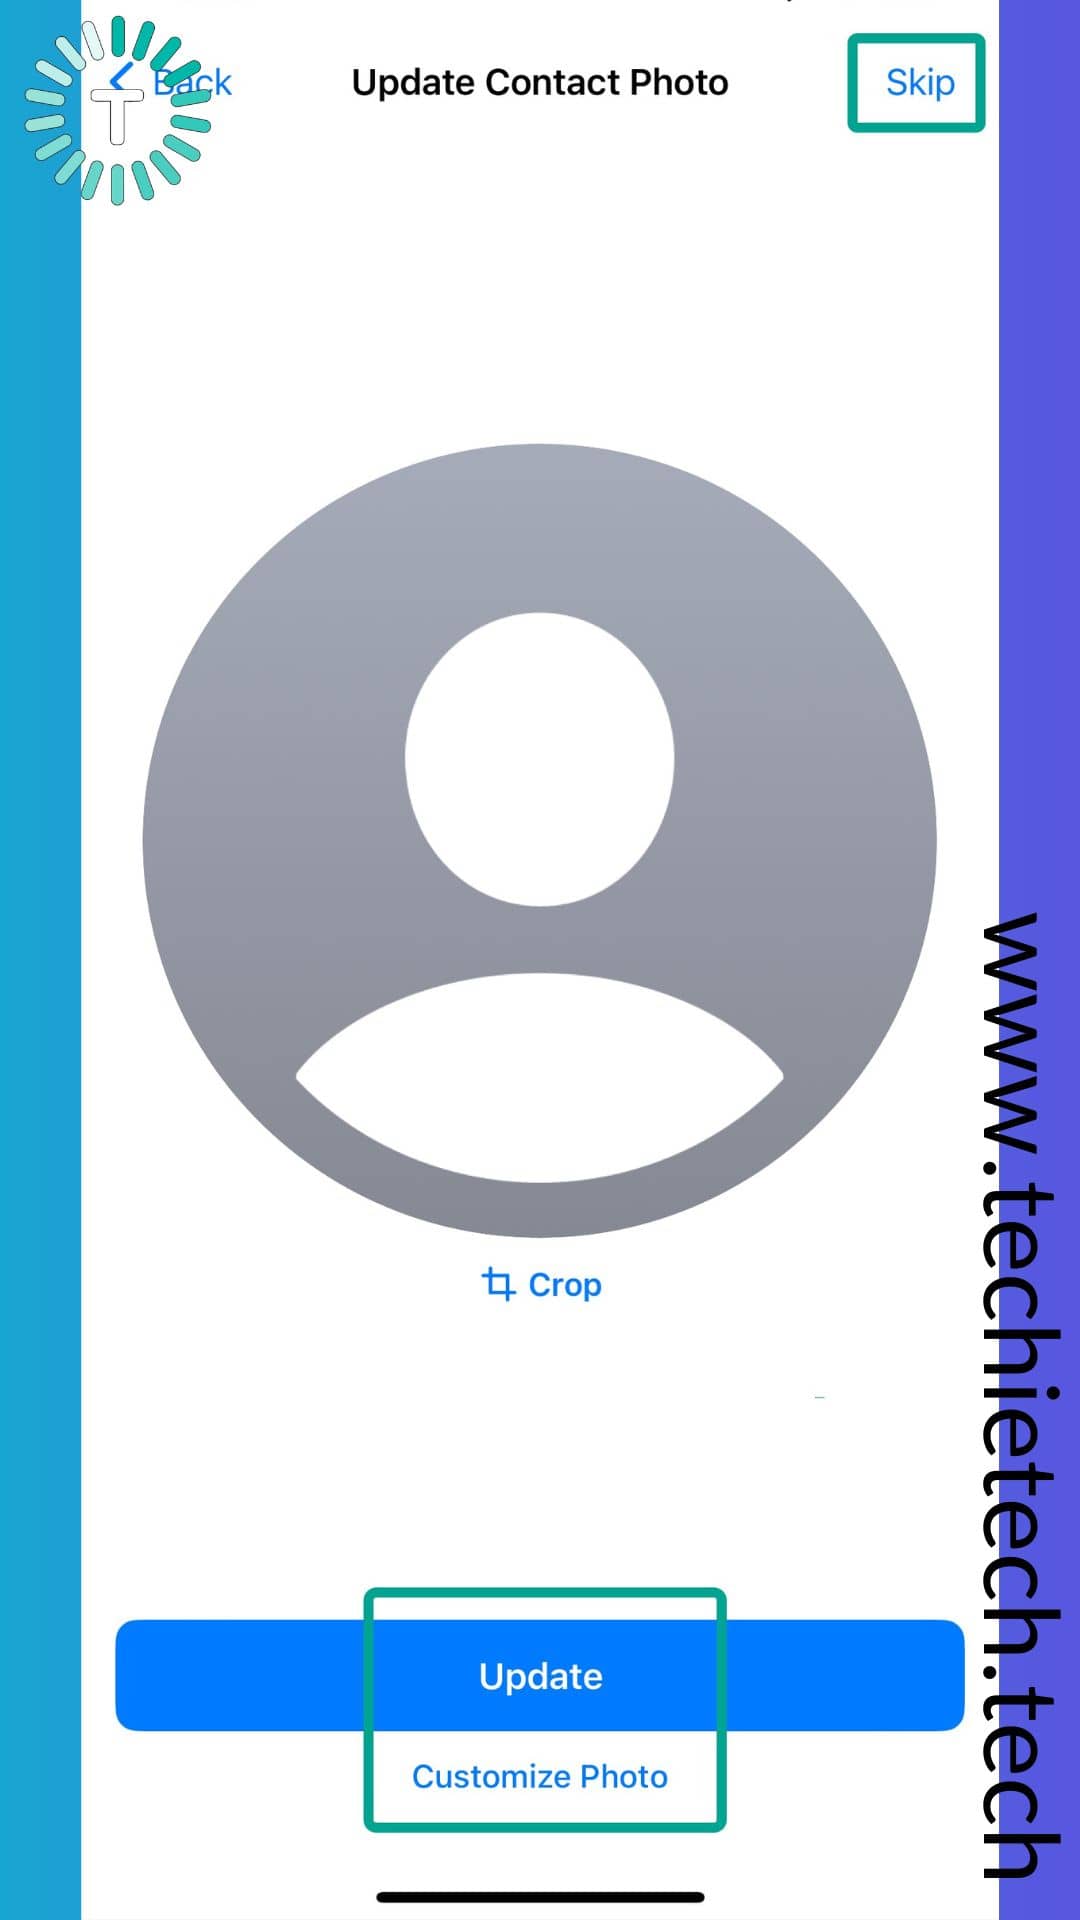
Step 15: On the next screen, you can choose to Update the Contact photo or Skip it altogether. Please note, the contact photo is different from Contact Poster. Contact photo is the small circle that appears in iMessage and other apps.
Step 16: Lastly, tap Done from the top right.
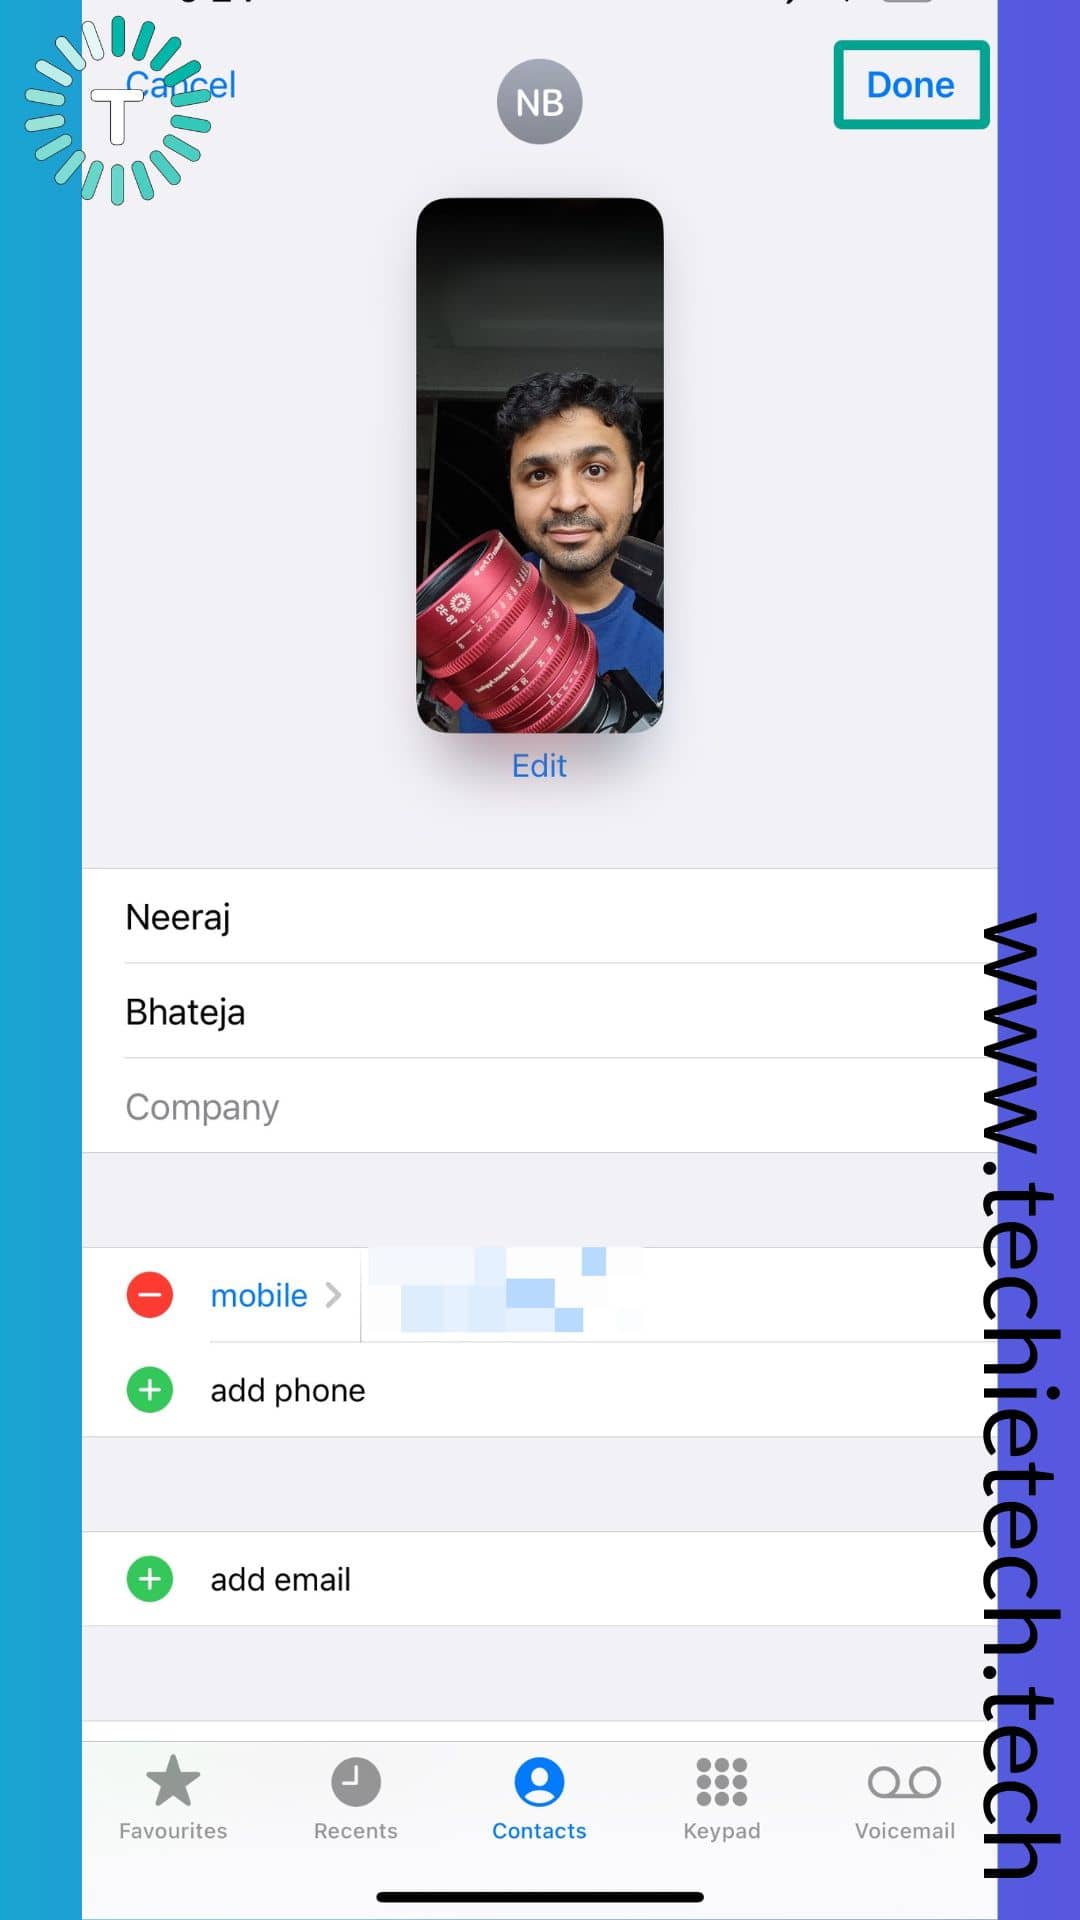
That’s it, a Contact Poster using your photo will be created after you have completed Step #15.
But, wait. Do you want to create a Contact poster using Memoji instead of using your photo? Yes? We have got you covered.
Also read: macOS Sonoma announced: Here are the top 6 features
How to create Contact Poster using Memoji
Other than using Monogram, or Photos, Contact Posters can be customized using Memojis, too. If you are new to the Apple ecosystem, and wondering what Memoji is, it’s just Apple’s lingo for avatars that you may have seen on Android. But it uses FaceID’s sensors for a more accurate representation of your facial features.
Note: You can follow the same instructions up to Step #5 as mentioned in the above section, then continue with the instructions given below:
Here’s how to create Contact Poster on iPhone using Memoji:
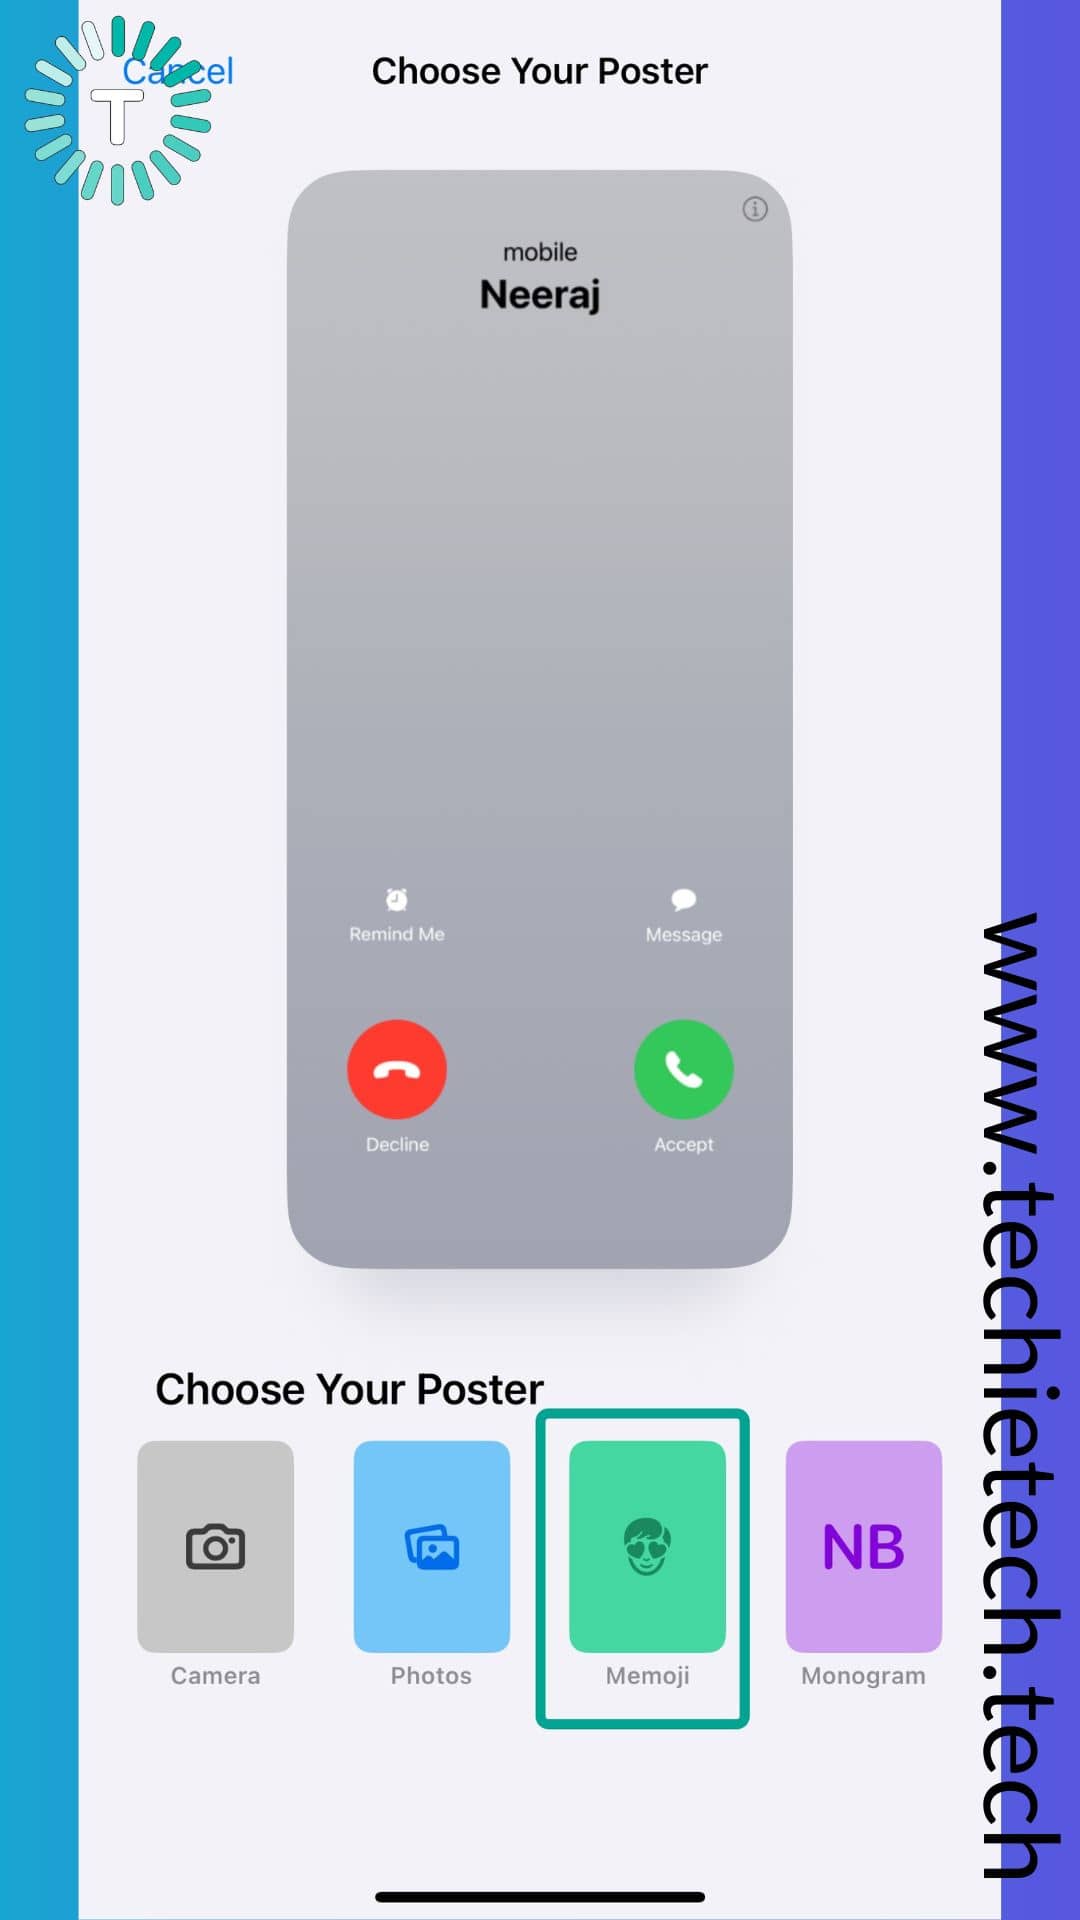
Step 6: Tap Memoji,
Step 7: On the next screen select the Memoji of your choice, and tap Next. You can also tap on the camera icon to capture a new Memoji without leaving the app.
![]()
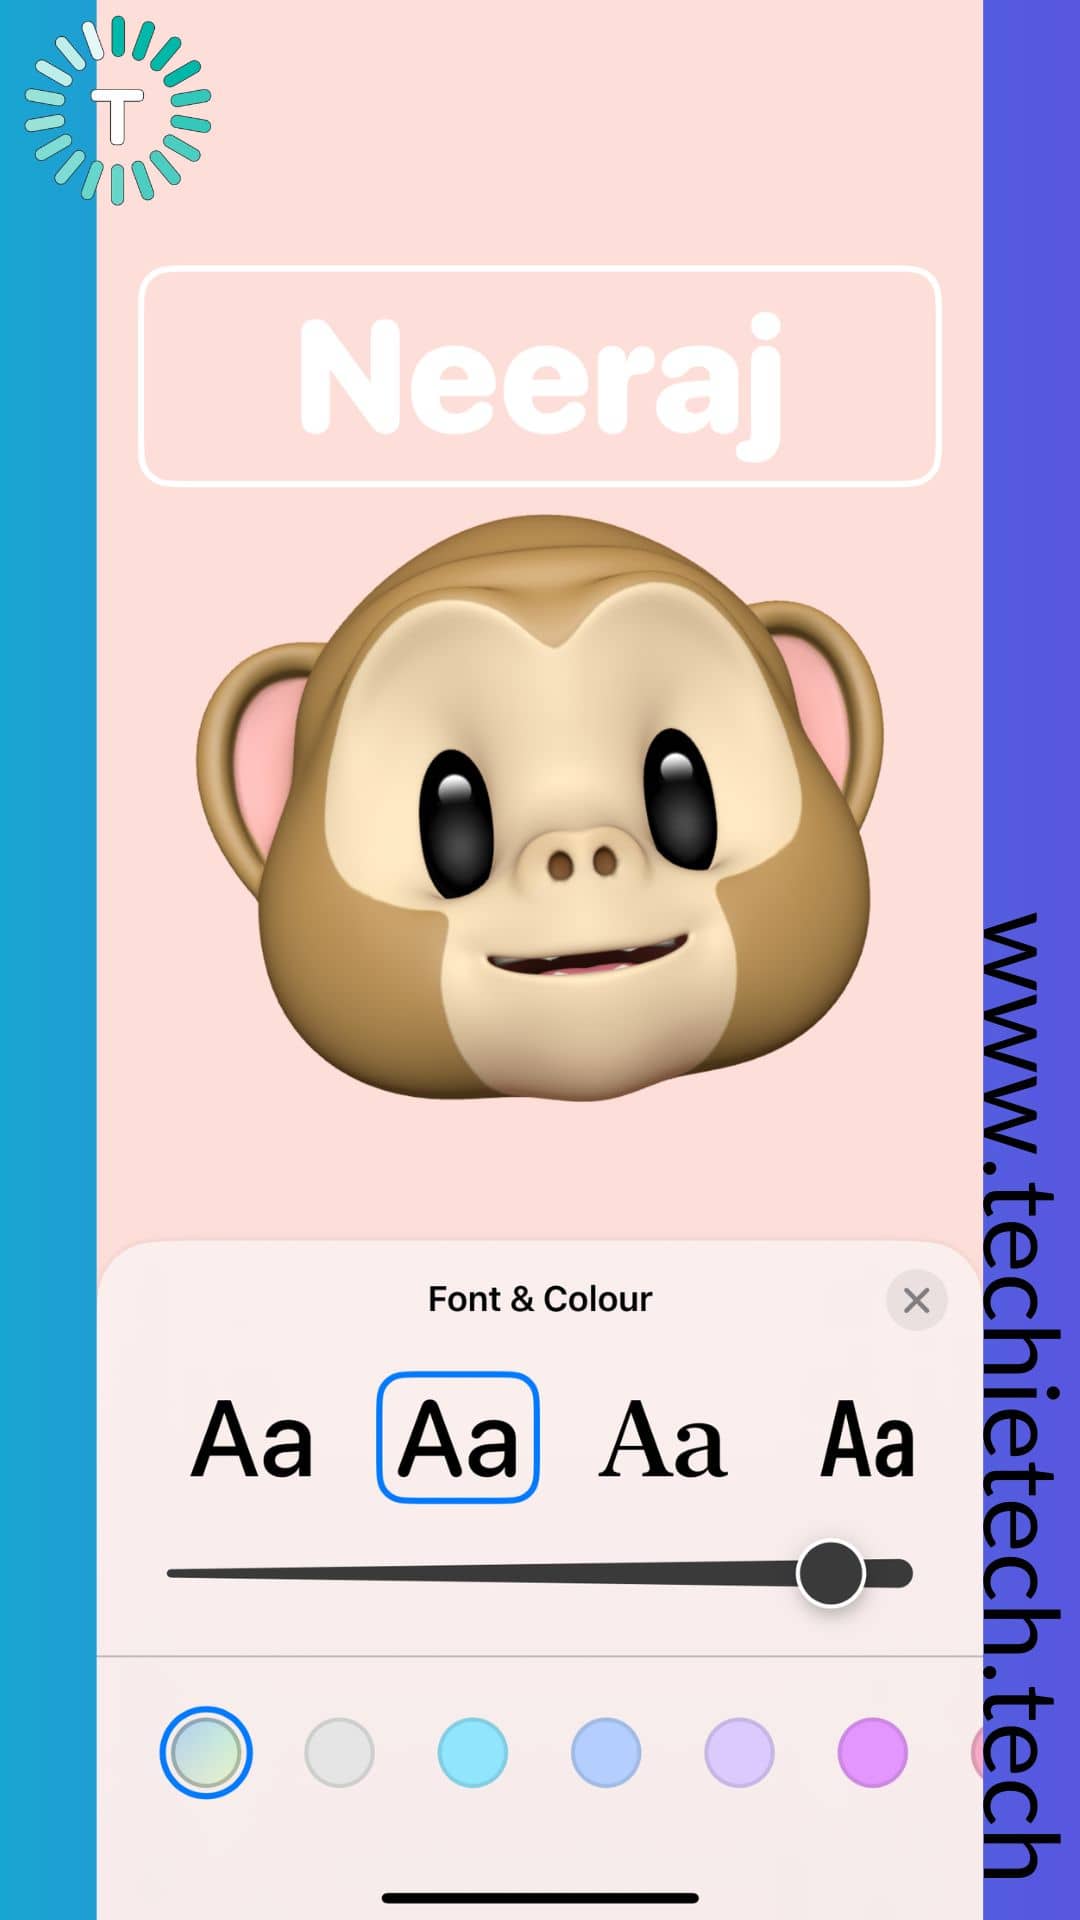
Step 8: You can customize the text using the given font and colors, just like we discussed above,
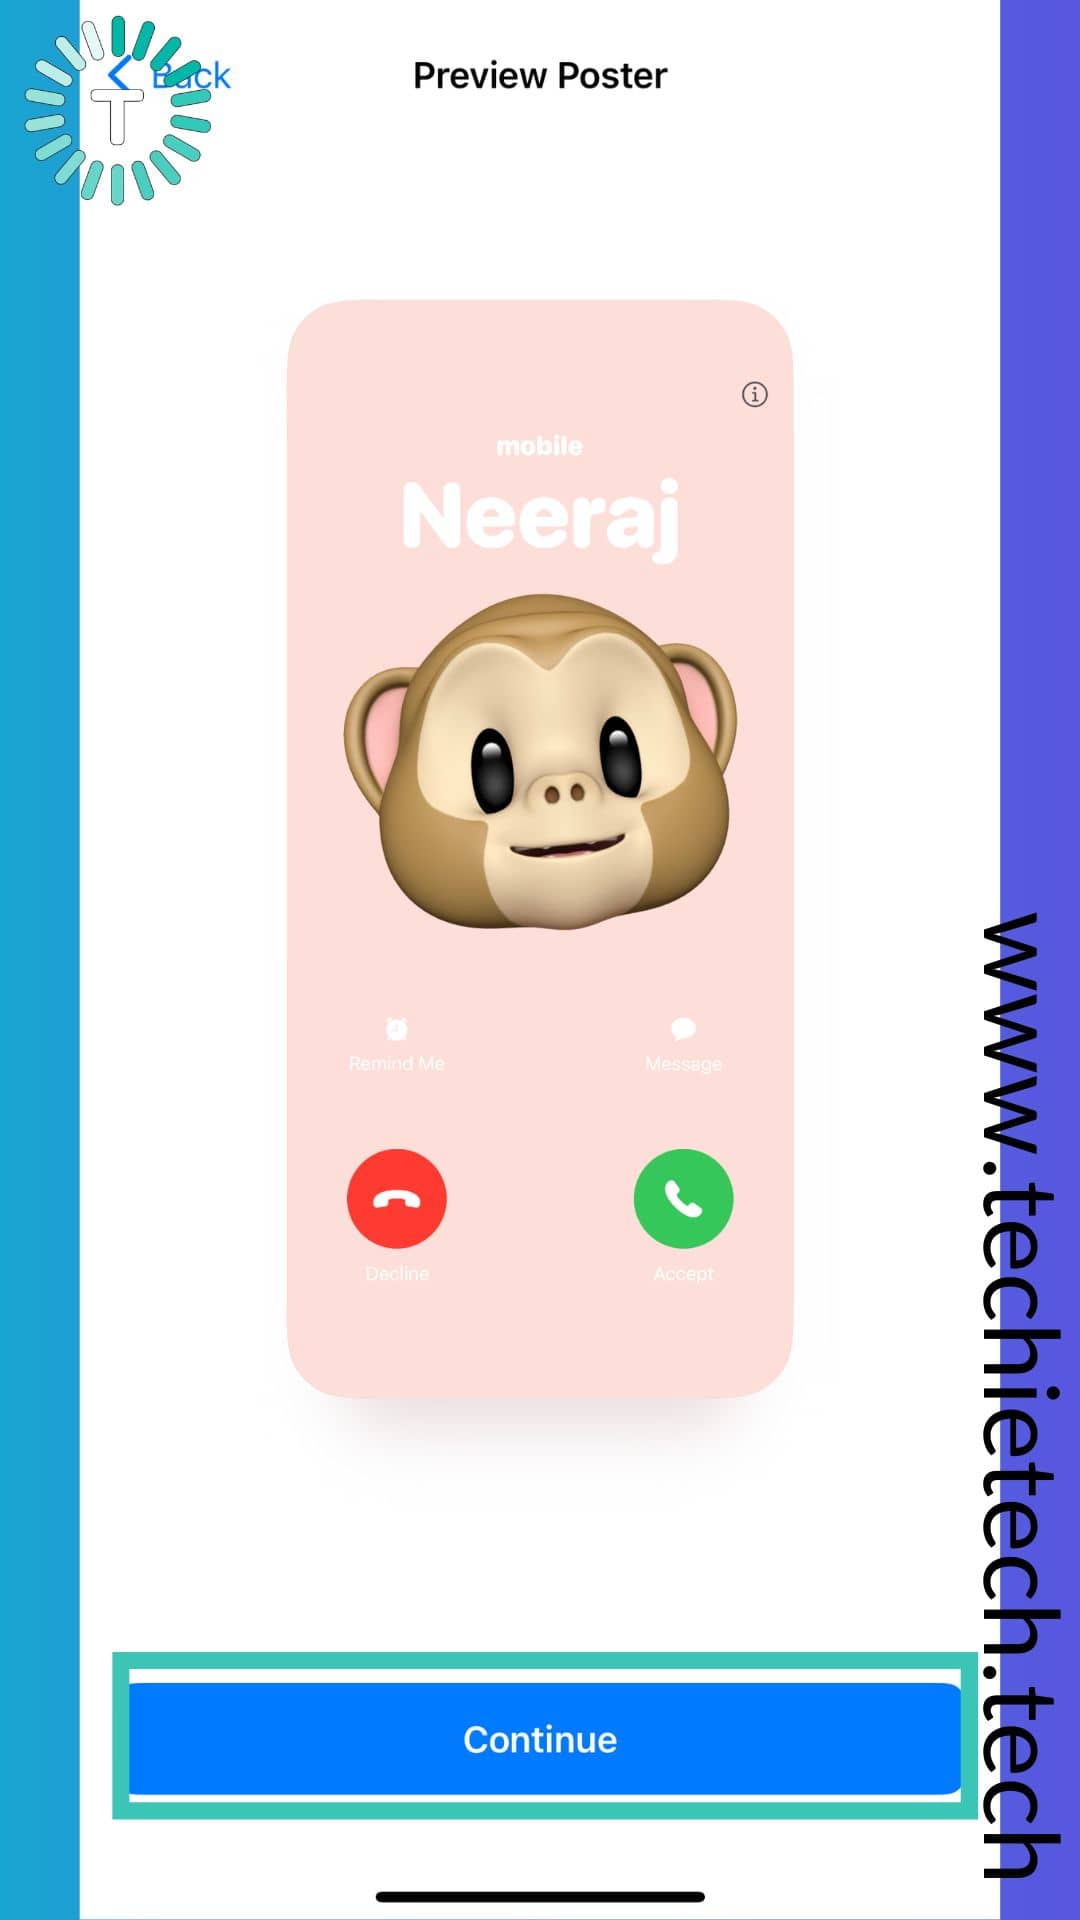
Step 9: On the Preview Poster screen, tap Continue,
Step 10: Lastly, tap Done.
Also read: Best AI Apps for iPhone You Can Download Now (Free & Paid)
How to Share Contact Poster using iPhone running on iOS 17
Once you have created your Contact Poster you can easily share it with your family and friends using AirDrop and NameDrop. NameDrop is a new iOS 17 feature that allows a hassle-free sharing experience between two iPhones (and Apple Watches) just by bringing them close to each other.
If you want to share Contact Poster using AirDrop, follow the steps given below:
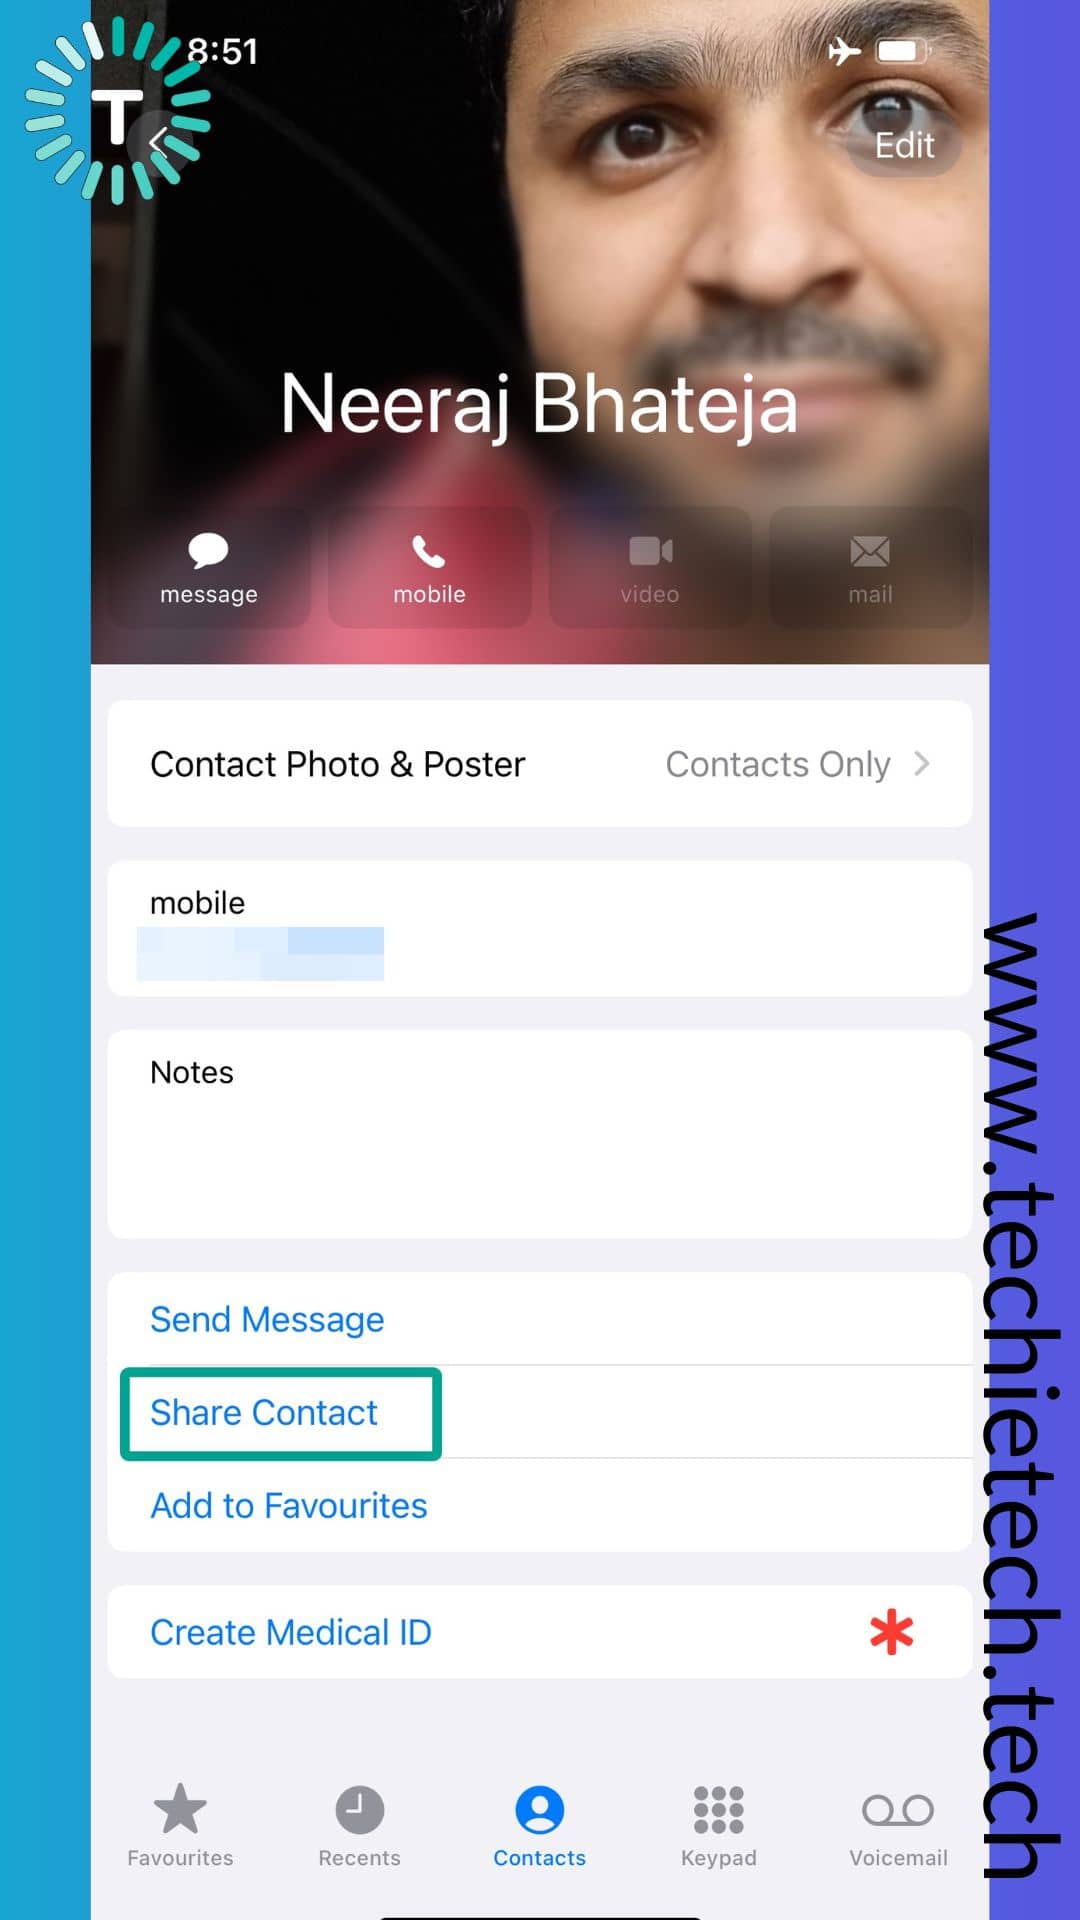
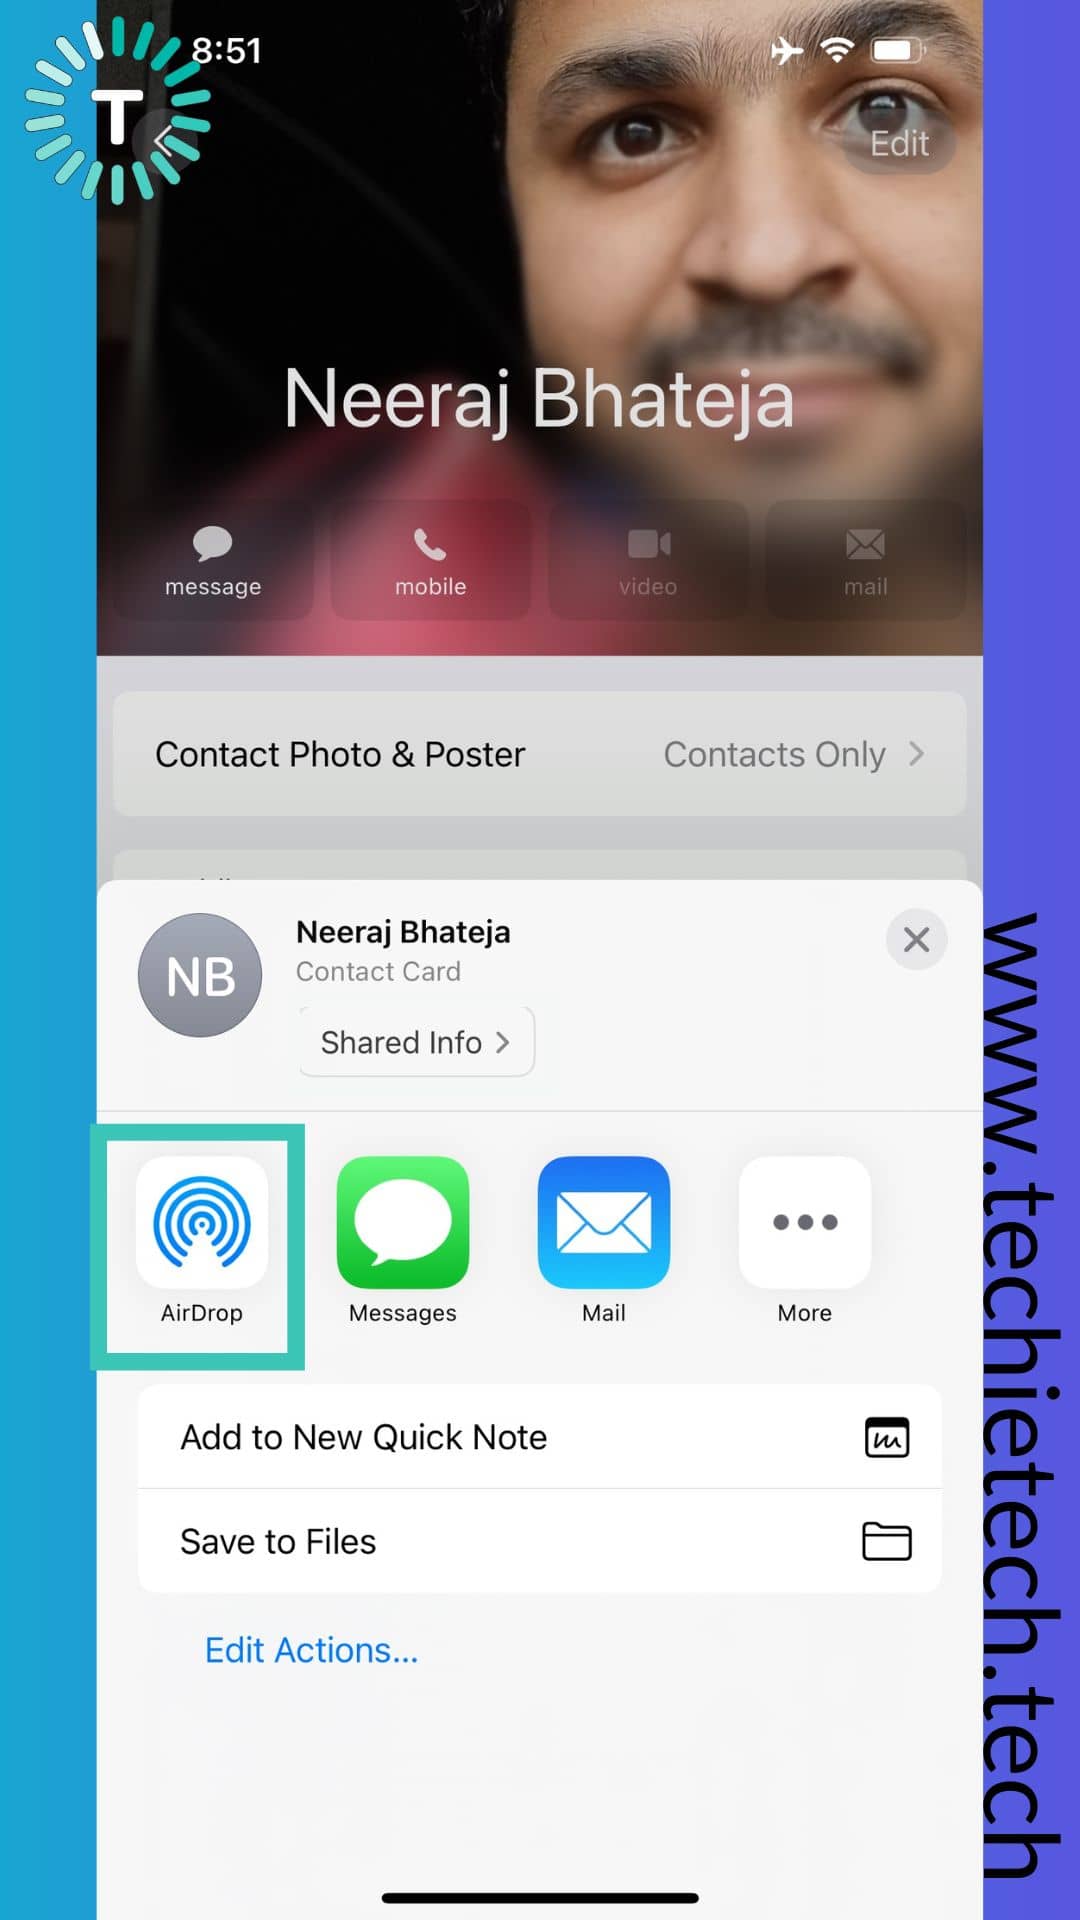
Step 1: Open your contact profile from the Phone app, find Share my contact and tap on it,
Step 2: Now, tap AirDrop,
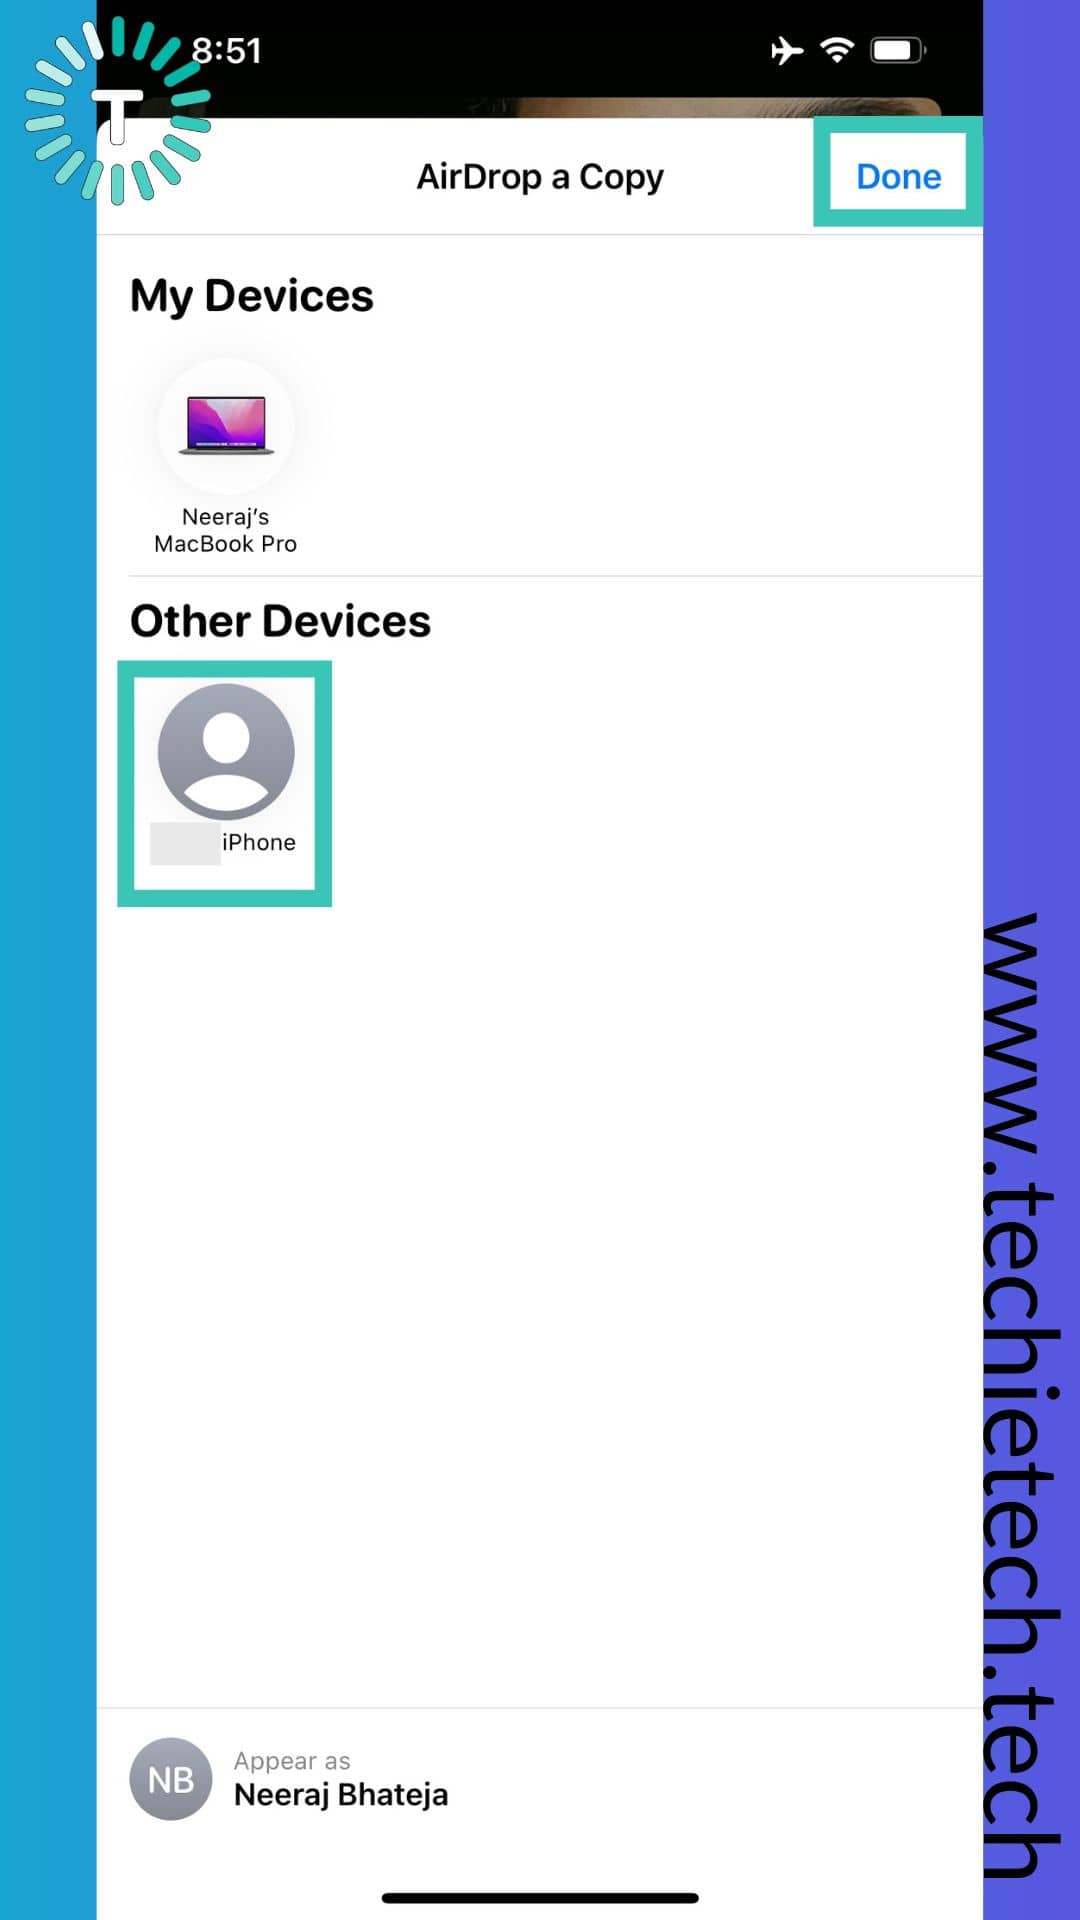
Step 3: Then, wait for the receiver’s device to show up, then tap on it, and tap Done.
If you want to share Contact Poster using NameDrop, follow the steps given below:
Step 1: Open NameDrop,
Step 2: Bring your iPhone closer to the receiver’s device, a pop-up will appear
Step 3: Lastly, choose whether to just want to receive their contact or share your Contact Poster, and you’re done.
Also read: How to Setup Passkeys for Gmail [on Web, Android, and iPhone]
How to Delete A Saved Contact Poster on iPhone with iOS 17
No doubt this feature is contagious, and you might end up making several Contact Posters for yourself. So, if you ever want to delete the Contact Posters on your iPhone running on iOS 17, make sure to follow the steps given below:
Note: Follow steps 1-3 from the “How to Create Contact Poster on iPhone Using Your Photo” section, then follow the steps as under.
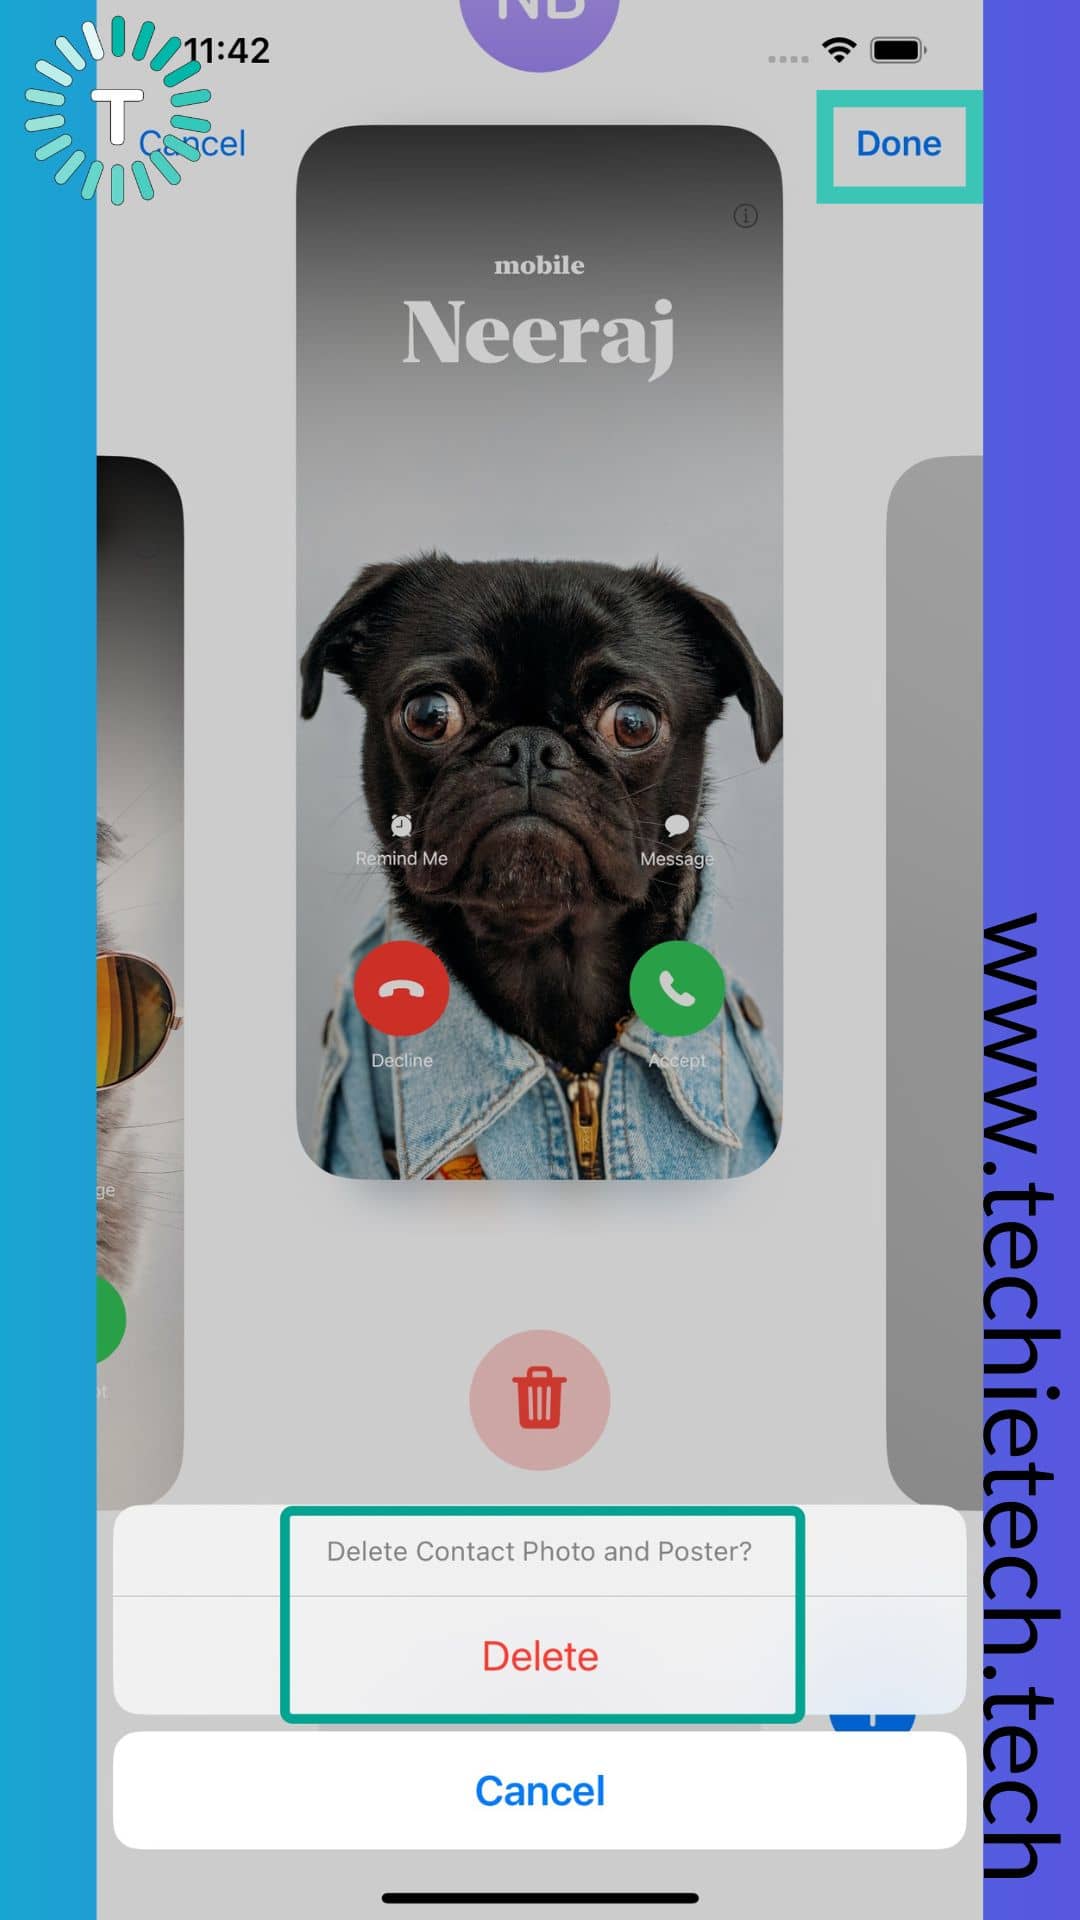
Step 4: Swipe up on a template that you want to delete, and tap on the ‘Bin’ icon,
![]()
Step 5: Tap Delete when prompted, then tap Done to finish the process.
Also read: 20 facts about iPhone we bet you didn’t know
That’s all for now in this guide where we discussed how to create Contact Poster for customizing the call screen on your iPhone. We have also mentioned step-by-step instructions about deleting and sharing the Contact Poster on iPhone running on iOS 17, as well. Also, we recommend you go through the top iOS 17 features announced at WWDC 2023.
Banner Image Source: Apple