From time to time, users experience internet issues with their new and old smartphones. And, iPhone 11 is no exception. This doesn’t mean that your iPhone is the real culprit every time. There are different factors you need to consider when you’re trying to resolve such connectivity issues. It is possible that the issues might be arising from your internet service provider’s end. On the other hand, there are fairly equal chances that your iPhone might be the one causing trouble.
Honestly, internet issues can be annoying for most of us. So, it is important to quickly find a solution for the same. In this post, we will walk you through different troubleshooting methods to help you fix your iPhone 11’s Wi-Fi connectivity issues.
Disclaimer: Proceed at your own risk, TechieTechTech will not be responsible if anything goes wrong with your device.
How to Fix iPhone 11 Wi-Fi Problem?
Internet problems on iPhone 11 are something that we face on a regular basis. Here’s a list of common Wi-Fi problems:
- iPhone 11 Wi-Fi connected but not working: If you face this issue, check if the Internet light is blinking on the router. If yes, the problem is most likely with the iPhone.
- iPhone not connecting to Wi-Fi automatically: It is very much possible that this problem is related to the Auto-Join Wi-Fi feature of the iPhone 11. To resolve this issue you can jump to the fourth method.
- iPhone 11 connected to Wi-Fi but no internet: This problem is most likely associated with the network device/router. However, to confirm this, you should check if the internet is working on the other connected devices or not. If not, jump to the fourteenth method; if yes, you need to resolve this issue starting from the very first method given below.
- iPhone won’t connect to Wi-Fi (incorrect password): If you come across an issue where Wi-Fi is not connecting and prompting incorrect password even though the password is correct, it could be the reason for corrupt Wi-Fi network settings. For this, you need to follow the third method. In case the problem persists, start from the first method.
- iPhone unable to connect to Wi-Fi: This issue can be related to both the iPhone and the router. So, we suggest you read and follow all the solutions and check if it gets resolved.
Below are the methods to fix the Wi-Fi issues on iPhone 11. So, make sure you check the internet connectivity after trying every method.
1. Toggle Wi-Fi Off and On
If Wi-Fi is not working on your iPhone 11, the first thing you need to do to resolve this problem is turning
OFF the Wi-Fi and then turning it back ON. You need to do this in the first place as it helps in rectifying the minor issues. If you haven’t done that already, make sure to follow the steps given below:
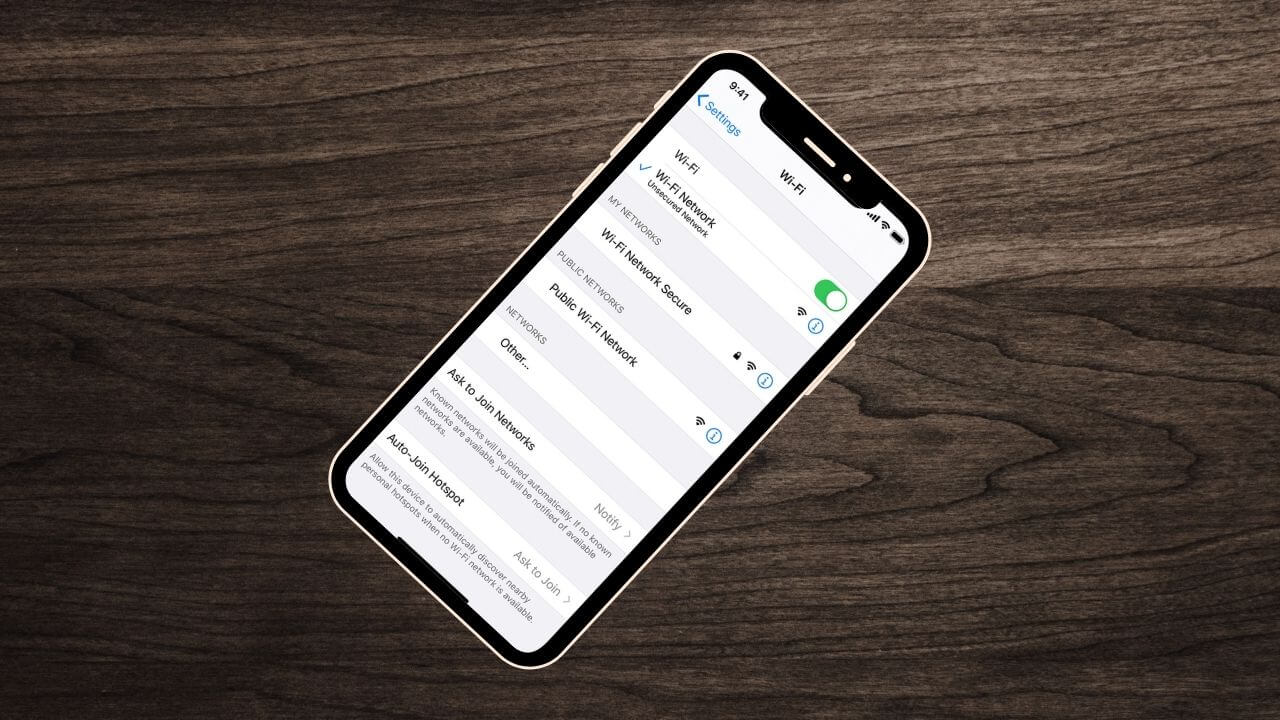
- Tap on the Settings
- Select Wi-Fi
- Toggle the Wi-Fi switch to turn it OFF (This step will disconnect your phone from the Wi-Fi network)
- Wait for a few seconds, and toggle the switch again to turn back the Wi-Fi ON.
Now, check if the internet connection is back. If not, move forward with the following methods.
2. Restart your iPhone
If you are experiencing Wi-Fi connectivity issues on iPhone 11 for the first time, then it’s most probably a software glitch. It can be easily fixed by restarting your device. You can restart the iPhone 11 by following the given steps:
- Press and hold the Side and Volume Up keys for few seconds
- Wait till the Slide to Power OFF bar appears, then release the keys
- Swipe/drag the bar to power off your iPhone
- After 25-30 seconds, press and hold the Side button until the Apple logo appears.
Once the phone is rebooted, try reconnecting to the Wi-Fi, make sure you open up a web browser, and check if you can access the internet. If the problem persists, move to the next step.
3. Update to the Latest iOS
Sometimes updating to the latest iOS version can help when you fix a Wi-Fi problem on your iPhone 11. If you are not aware, software updates contain the required fixes and patches to resolve these system bugs.
There are two methods of updating an iPhone firmware:
- Updating via OTA (over-the-air)
- Updating through iTunes.
Since your iPhone is having internet connection issues, it is not feasible to proceed with the first method. It means you need to opt for the second method that is firmware update through iTunes. You’ll require a Windows or macOS device with the latest version of the iTunes app or Finder (in case you’re using a Mac running macOS Catalina).
Once you’re ready with everything, make sure to follow the steps below.
- Connect your iPhone to a computer using the original USB cable.
- Open iTunes and locate your iPhone 11
- Now, click General or Settings
- Click on the Check for Update button
- Next, you have to click Download and Update to start the update
- Make sure to enter your passcode, if prompted.
After this, follow the onscreen prompts to finish updating the iPhone 11. Check if the issue has been resolved. If not proceed with the next available methods.
If your iPhone overheats after the update or due to any other issue, make sure to read our iPhone overheating guide to fix the problem.
4. Turn on Auto-Join
If you’re not aware, then let us tell you that there’s an Auto-Join feature in the Wi-Fi settings on iPhone 11. This feature allows your phone to connect to a Wi-Fi network automatically if it’s within its range. However, the Wi-Fi must be turned
ON for this. If your iPhone is unable to connect to Wi-Fi automatically, then you need to manually connect it to the network first and then enable the auto-join feature. If this feature is disabled, then this is probably why your iPhone is not connecting to Wi-Fi automatically. Here’s how to enable the Auto-Join Wi-Fi feature on iPhone 11:
- Tap on the Settings from your home screen
- Navigate to Wi-Fi
- Tap on the Name of the Wi-Fi network for which the Auto-Join feature is not working
- Check if the Auto-Join feature is enabled. If not, toggle to Enable it.
If you find it enabled, then you should move on to the next steps mentioned below.
5. Forget Wi-Fi Network and Reconnect
Most of the iPhone users come across the Wi-Fi connectivity problem on a regular basis. They often complain that their iPhone 11 is connected to Wi-Fi but no internet is available. One of the reasons behind this could be the corrupt Wi-Fi network settings. To solve this and other major issues like when your iPhone is unable to connect and shows the incorrect Wi-Fi password error, you’ll have to
Forget and reconnect to the Wi-Fi network. Make sure you know the password of the Wi-Fi network before you proceed to remove it.
Here’s how to remove and reconnect a Wi-Fi network on iPhone 11:
- Tap on Settings from the home screen
- Select Wi-Fi and ensure that the toggle is ON
- Scroll through the list of available networks and select the Wi-Fi network you’re facing connectivity issues with
- Then, tap on the ‘i’ icon next to your Wi-Fi network
- Now, tap on Forget this network
- You will see a prompt asking to confirm the Forget network action
- Toggle Wi-Fi On/Off
- Reconnect to the same Wi-Fi network
After you are done with these steps check if the incorrect Wi-Fi password issue on iPhone 11 is resolved or not. In case this did not fix it, then we suggest you move to the next method.
Also read: How to change default Email App on iPhone on iOS 14?
6. Reset Network Settings
If the above methods didn’t fix the Wi-Fi problem, then you must proceed with Resetting the Network Settings of your device. Doing this will erase all your current network settings including server settings, Wi-Fi networks, connected Bluetooth devices, APNs, and other network-related information from your iPhone 11. It helps fix most of the network and wireless connectivity issues as it wipes off all the network settings data and gives it a fresh start.
So, here is how to reset network settings on iPhone 11:
- Tap on Settings
- Select General
- Scroll through the list and tap on Reset
- Then, tap to select Reset network settings from the available options
- Enter your Passcode, if prompted to continue with the process
- Tap on Reset network settings to confirm.
After doing this, your phone will restart on its own and load up the default network options. So, to get back online, you will have to connect to your Wi-Fi network as you did for the first time. Hopefully,
this should fix all network issues on your iPhone.
7. Turn off Wi-Fi Assist
Sometimes the Wi-Fi related issues can be caused because you have turned on the Wi-Fi assist feature on your iPhone. Basically, this feature allows your iPhone to switch to the cellular data if there’s a poor or unstable Wi-Fi network. If the Wi-Fi connection is unstable and the iPhone keeps reconnecting and gets stuck in a loop after some time. You can turn this feature off and try connecting to Wi-Fi.
Here’s how to turn off the Wi-Fi assist feature:
- Tap Settings
- Navigate to Cellular
- Find Wi-Fi Assist and turn it OFF.
8. Disable Wi-Fi Networking Services
We assume you are here because none of the methods above helped you. Now, you should try disabling the Wi-Fi networking in location services. Some users reported that they managed to fix the iPhone Wi-Fi not working problems with this method. Make sure to give this a try. Here’s how to disable Wi-Fi networking services:
- From the home screen, go to Settings
- Navigate to Privacy
- Tap on the Location Services
- Then, scroll down and tap on System Services
- Now disable Wi-Fi Networking.
Once you’re done with this process, make sure to turn your iPhone’s Wi-Fi ON/OFF or just reboot the device and check if the problem persists.
9. Disable VPN
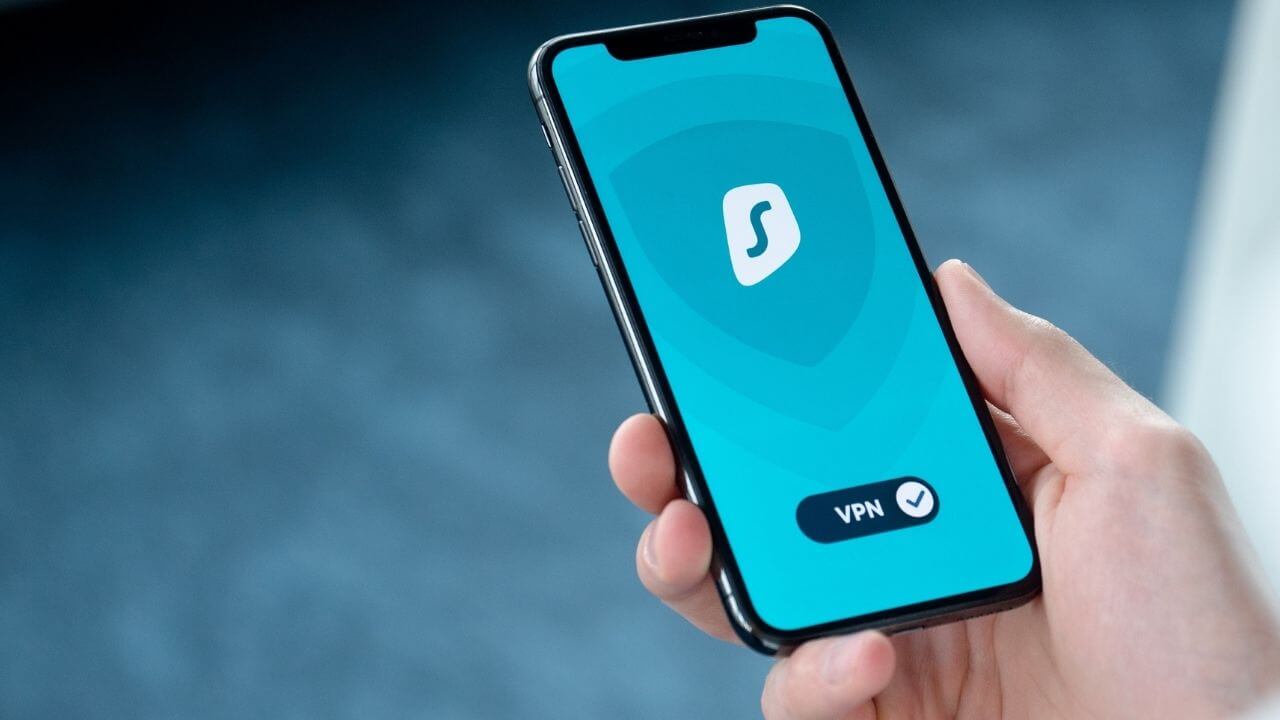
Do you use a VPN on your iPhone? If your answer is yes, then it could be the reason why the Wi-Fi on your iPhone 11 is not working. If you have enabled VPN from the settings or a 3rd party VPN app from the App Store, you are likely to face this issue. Sometimes VPN apps’ network data get corrupted resulting in Wi-Fi connection failure or a spotty Wi-Fi connection. Thus, it would be a wise choice to disable the VPN in order to resolve the Wi-Fi issue. Here’s how to disable VPN on iPhone 11:
- From the home screen, tap on Settings
- Navigate to the VPN settings
- Toggle the Status from Connected to Not Connected.
Now, check if your iPhone’s Wi-Fi is working. If the problem persists, continue reading.
10. Setup Custom DNS (Domain Name System)
A faulty or slow DNS server from your internet service provider (ISP) can be another possible reason why your iPhone is unable to connect to Wi-Fi or disconnects frequently. For this, you need to switch to Google DNS or Open DNS and check if the problem gets fixed.
Following are the steps on how to set up a custom DNS on iPhone 11:
- Tap on Settings from the home screen
- Head to Wi-Fi
- Locate your Wi-Fi Network and tap on it
- Then, tap on the numbers to the right under DHCP after locating DNS
- Now you can type Google DNS in Primary DNS and Secondary DNS separated by comma (8.8.8.8, 8.8.4.4)
- Else, you can use OpenDNS (208.67.220.123, 208.67.222.123).
11. Factory Reset your iPhone 11
Once you’re sure that the problem is not with your network and the other devices can connect to the same network. It’s highly likely that the problem is with your phone. Before proceeding to the factory reset your iPhone, make sure to backup all the important data. After you’re done with backing up all the essentials, now it’s the time to factory reset your iPhone 11.
The following are the steps on how to factory reset iPhone 11:
- Tap on Settings
- Locate and tap on General
- Scroll through the list, then tap on Reset
- Tap on Erase All Contents and Settings
- Then, tap on Erase Now
- Enter your Security lock, if prompted
- Tap on the Erase iPhone option at the bottom of the screen
- Tap on Erase iPhone again to confirm
- Now enter the Apple ID password, then tap Erase to proceed
- Set up as a new or old device, once the resetting process ends.
Now check if your Wi-Fi is working; if not, proceed with the next method.
12. DFU Restore your iPhone
If nothing seems to work, you should proceed with putting your iPhone 11 in DFU mode. DFU (Device Firmware Update) is the deepest way of restoring a device. It erases all the data from your device and resets the phone. As everything gets erased, we urge you to create a backup of the iPhone 11 before putting it in DFU mode. We are suggesting this method as a last resort to troubleshoot the software issues that are hindering your device’s Wi-Fi connectivity.
Here’s how to put the iPhone 11 in DFU mode:
- Start by plugging in your iPhone 11 in a computer
- Open iTunes (on PCs and Macs running on Mojave 10.14 or earlier versions), else open Finder (Macs running on Catalina 10.15 or newer versions)
- Press and release the volume up key
- Press and release the volume down key
- Press and hold the Power key, until the display of the iPhone goes black,
- Continue to hold the side key, then press and hold the volume down key
- Hold both keys for five seconds
- After this, release the side key while continuing to hold the volume down key
- Check if your iPhone appears in the iTunes/Finder, make sure to release the volume down key
- If your iPhone appears in the iTunes/Finder, it means it’s in DFU mode
- Now, click Restore and follow the on-screen prompts for DFU restore.
13. Visit Apple Store
If any of the above methods do not seem to work, you can simply visit the Apple store to fix the Wi-Fi issue on iPhone 11. Apple offers the best customer service. It should be an easy process if your device is on the warranty, if not it can cost you a decent amount. If you think the Wi-Fi issues are present only on your iPhone 11, and the above-mentioned steps have not helped you fix the same. Then, a visit to the Apple store should be the last resort.
14. Restart the Router
If software bugs on your iPhone are causing the problem, then the above procedures should be able to solve the Wi-Fi connection problem. In case none of them helps you fix Wi-Fi issues on your iPhone 11, then you should proceed by checking your network equipment. It might be possible that your modem/wireless router is experiencing some minor crashes that are causing the Wi-Fi connectivity problems on the iPhone. You need to deal with this problem by rebooting (power-cycling) the same. Follow the listed steps to perform the power-cycling procedure:
- Press the power button to turn OFF the modem/router
- When the device is powered off, make sure to unplug its AC adapter
- Wait for 30 seconds to a minute, plug it back in, and press the power button to turn it ON. Additionally, if you find your router overheating, then turn it off and let it cool down for at least 10 to 15 minutes.
After these steps, wait for the light indicators to become stable, and make sure the Wi-Fi and Internet indicators are green. If the Wi-Fi/Internet signals are red, it means all the devices connected to the Wi-Fi don’t have internet access. It takes a few minutes for the router to boot up. Therefore, give it at least 3-5 minutes to boot properly and connect to the internet. If this method is not working for you, then move ahead to the next step.
15. Update Router Firmware
In case the power-cycling method did not work, you might need to update the router’s firmware. First of all, you need to type in your router’s IP address in the search bar of a browser. After that, you’ll see an alert on the screen
“Your connection is not private.” Then, click on proceed <IP address> to move ahead.
You can find the router’s IP address by doing the following:
- Type command prompt in the search bar of Windows
- Then, press Enter
- Type ipconfig in the command line and press Enter
- You’ll see your router IP address next to the Default Gateway.
Once you’re done with the above steps, move ahead with the following ones:
- Enter your Username and Password (if you’re logging in for the first time, you can get these details on the manual, or it must have been conveyed to you by your internet service provider). If you still can’t find them, try looking at the bottom of your router.
- Locate Firmware or Update section
- Head to the router manufacturer’s website
- Download the firmware update file for your router
- Extract the file and move to the desktop
- In the Update section on the webpage, click on the Choose File/Browse option
- Select the router update file that you moved to the desktop
- Start the Upgrade process
- Wait till the process ends
- Once the firmware is updated, reboot the router.
This process fixes most of the problems related to the unstable Wi-Fi connection.
With this, we’ve come to the end of our guide on how to fix the iPhone 11 Wi-Fi problems. We urge you to comment below to let us know if these methods worked for you.
In case you are facing problems with voice calls or network data on your device, make sure to check our guide on how to fix iPhone 11 no service issues.