The iPhone XR is a feature-packed device, which performs well, even in 2020. From a bigger display to an insane battery, it has everything a user would want. Having said that, it doesn’t mean you can never face any issue on your iPhone XR. Recently, many users have reported charging issues on their iPhone XR. Plus, several users have been facing similar issues with their iPhones running on different versions of iOS 13. The list includes some common issues like iPhone XR not charging when plugged in, iPhone XR not charging wirelessly, or iPhone not charging past 80%.
If you’re facing any charging issues on your iPhone XR, this guide will help you sort them out. We’ve listed several effective and practical solutions that will help you fix the common iPhone XR not charging problems. Plus, if your iPhone has started showing up the charging issues after you updated iOS, we’ll help you fix them too.
It’s worth mentioning that you can follow this guide to fix charging issues on any iPhone, iPad, or iPod Touch. So, let’s get started.
Disclaimer: Proceed at your own risk, TechieTechTech will not be responsible if anything goes wrong with your device.
Here’s our guide on how to fix the iPhone XR not charging issues
If your iPhone XR is not charging or charging very slowly
Firstly, don’t expect a phone with a zero or dead battery to respond and charge instantly. If the battery has drained completely, give it some time. Connect your iPhone to a wall charger and let it charge for about 10-15 mins, and then check if it’s charging properly or not. If the battery hasn’t drained completely, skip this and move further.
If your iPhone XR is not charging when it’s plugged in or charging very slowly than its usual speed, you can follow the steps mentioned below. Don’t forget to try charging your iPhone after each step.
1. Check the charger (Lightning cable + Adapter)
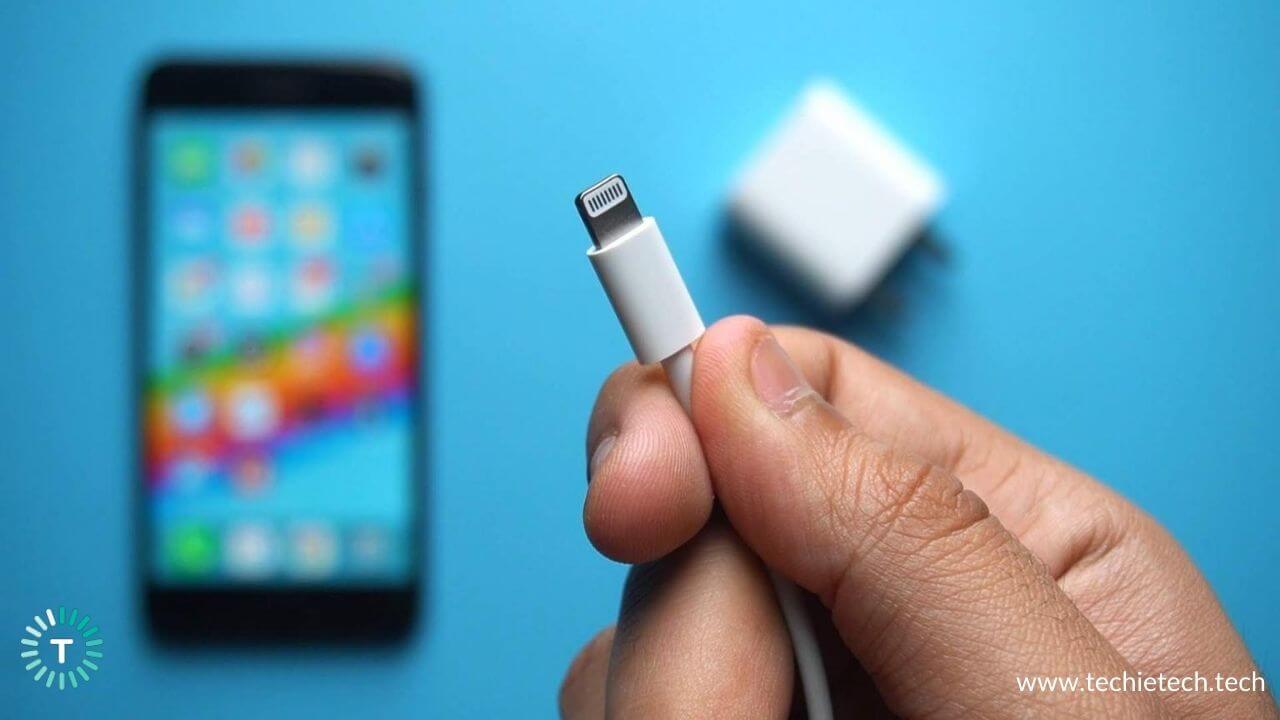
As soon as you realize that your iPhone XR is not charging properly or charging very slowly, then you must check the Lightning cable and adapter that you’re using to charge your phone. Follow the steps mentioned below:
- Please ensure that you’re using the official lightning cable and adapter that you got in the box with your iPhone XR. In case you’re using a third-party Lightning cable or adapter, make sure it’s MFi certified (Made for iPhone, iPad, iPod). Using non-MFi certified accessories can harm your Apple devices over time. If you’re not using an official or MFi certified charger, it’s recommended to replace them.
- Now, you must check your Lightning cable for any visible signs of damage, like exposed wire, bends, or breakage. Also, make sure that you’ve plugged the cable properly into your iPhone and the adapter. If the Lightning cable turns out to be damaged, you must use another Lightning cable or get yourself a new one. Again, make sure it’s either made by Apple or MFi certified.
Also read: Best fast chargers for iPhone XR, XS, and XS Max
2. Try a different power source
When you’re sure that your charger is perfectly fine, try a different power source to charge your iPhone. Sometimes, a damaged power source could be responsible for the charging issues on your iPhone. Also, due to fluctuations in electricity, the power source might not be able to deliver stable power to charge your phone properly. Therefore, it’s a good idea to try a different wall power outlet to charge your iPhone.
3. Clean the Lightning port
Over time, dust and debris can accumulate inside the Lightning port of your iPhone XR, and it might cause charging issues. To be on a safer side, use a torch or a flashlight to look inside the Lightning port of your iPhone and clear away dust or any other particles with a clean toothbrush or an anti-static brush. Make sure that you never use a needle or any other pointed object to clean the port as it can severely damage the Lightning port. Once the charging port is clear, a smooth connection will be restored between the cable and your iPhone. Now, connect the cable properly to your phone and try charging it.
4. Close Out your apps
Many users have a habit of keeping a lot of apps open in the background. Even Apple executives have clarified that iOS is smart enough to optimize those apps to consume minimal battery. But there are certain apps like PUBG Mobile, iMovie, etc. that require a lot of resources even when they’re in the suspended state or running in the background. Also, if you keep a lot of apps open at the same time, it can also cause overheating problems on your iPhone. Therefore, you must close those apps to prevent any charging issues on your device.
We usually hold the faulty hardware responsible for charging issues on our devices, right? But that’s not always true. Sometimes, there can be some software bugs or errant apps that are giving you trouble. If you’ve started facing charging problems on your iPhone XR after you updated iOS or downloaded a particular app, then some software related bug might have tinkered with the normal charging process of your iPhone. In such cases, you must focus on finding software bugs. There are some effective ways to fix software issues on your iPhone XR.
5. Update/Delete apps
If you notice that you started facing charging issues on your iPhone XR after installing a particular app, then that app could be interfering with your phone’s normal charging process. In such a case, you must first try to update that app, if no update is available, the best you can do is to uninstall that app.
Also, while you’re keeping a watch on the apps, it’s a good idea to check the battery consumption by each app on your iPhone. If an app is using too much power, it’s not good for your device. Follow the steps mentioned below on how to check the battery consumed by each app on your iPhone XR:
- Head to Settings
- Tap Battery
- Scroll down and you’ll see a list of apps along with the battery consumed by each app.
- When you tap an app, you’ll see the amount of time a particular app spends running in the background.
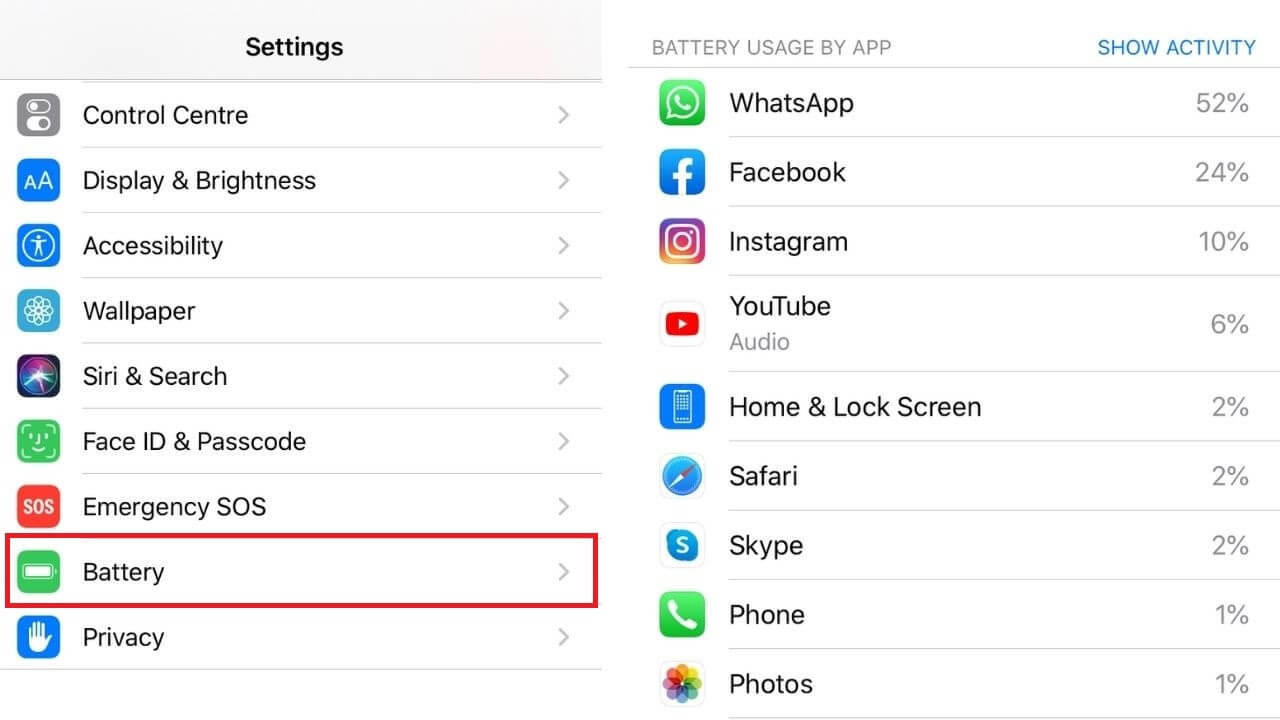
If you see an app that’s using too much battery on your iPhone, you must first look if there’s an update available for that app, or else you can delete that app.
If you’re facing battery reporting issues like battery dropping from 100% to 90% within minutes of usage, make sure to
check out our guide on how to calibrate the iPhone battery.
6. Force Restart your iPhone XR
Many iOS users have successfully fixed the charging issues on their iPhones by doing a force restart. Sometimes, corrupted system data, software bugs, or some misbehaving apps can cause charging problems on your iPhone. Fortunately, a force restart can handle them all, without deleting any data on your device. This trick is particularly helpful if your iPhone was charging properly and then suddenly started showing up issues.
- Quickly press and release the Volume Up button.
- Quickly press and release the Volume Down button.
- Hold the Power/Side Button even if you see Slide to Power Off.
- After you see the Apple logo, release the Power/Side button.
Once the process is complete, charge your iPhone for a while. If this has fixed the iPhone XR not charging problems, then it’s certain that some software errors were causing those issues on your device. On the flip side, if you still face slow or no charging issues on iPhone XR, keep reading and try the other methods mentioned below.
7. Restore your iPhone XR in iTunes (Standard Restore)
If you’re done with the process of force restart and nothing has worked for you, then you can resort to this option. This method will reset and restore your iPhone to default settings while eliminating the system errors that could cause the iPhone XR to not charge properly or charge very slowly. As
this method will permanently delete all the stored data, including apps, saved passwords, and restore your iPhone to the factory settings, you must back up important data to iTunes or iCloud beforehand.
Follow the steps mentioned below to restore your iPhone XR in iTunes:
Before you begin, make sure that you’ve got the latest version of iTunes on your computer, to avoid any system errors.
- Open iTunes on your computer or a laptop.
- Using the Apple Lightning cable connect your iPhone XR to the computer.
- If you see a pop-up saying “Trust this Computer” or if you’re asked to enter the passcode, follow the onscreen instructions and continue.
- Choose your iPhone XR, when it appears in iTunes.
- Browse through the Summary section on the left panel, find and select Restore[iPhone] option.
- You might be asked to read and review the information to confirm iOS restore. Now, iTunes will initiate the system reset and download the latest software version for your iPhone.
Once the process has completed, try charging your iPhone and check if it has fixed those issues. If not, then you must restore your iPhone in recovery mode to wipe out more complex bugs on your device.
8. Restore your iPhone XR in recovery mode
If you’re not able to eliminate the system errors using standard restore, then you may resort to recovery mode restore. This method will put your iPhone in recovery mode, eliminate major system errors, and restore the iOS to its working state.
Here’s how you can restore your iPhone XR in recovery mode:
- Using the Apple Lightning cable connect your iPhone XR to the computer.
- Quickly press and release the Volume Up button.
- Now, quickly press and release the Volume Down button.
- Press and hold the Power button. Keep holding it as your iPhone restarts. Don’t release the button even if you see the Apple logo on the screen.
- When you see, Connect to iTunes logo on the screen, release the Power button.
- Now, go to iTunes on your computer and you should see a message saying that your connected iOS device is in recovery mode and gives you the option to update or restore.
- Choose Restore to remove everything from your phone’s system and restore iOS through iTunes.
- Follow the on-screen instructions to complete the restore process. You can either restore your data from a previous backup or set up your iPhone as new.
It’s worth mentioning that if you choose the Update option, your computer will try to re-install the software without erasing your data.
If the download takes more than 15 minutes and your device exits the recovery mode screen, let the download finish, then put follow the same steps to put your iPhone back in the recovery mode.
To exit recovery mode, press and hold the Power button until Connect to iTunes logo disappears and your iPhone restarts.
Once you’ve restored your iPhone XR, you must be able to charge it using a wired or a wireless charger, without any issues. If this doesn’t happen, you must seek some professional help.
9. Head to Apple Store
If you’re done with the restore process and still facing iPhone XR charging errors when plugged in or slow charging issues, then there’s some issue with the Lightning port or internal components of your iPhone. In such cases, the best you can do is to head to the Apple store and get your iPhone checked. Please don’t look for other cheaper alternatives as it might damage your iPhone beyond repair.
Looking for the best USB-C to Lightning cables to fast charge your iPhone? Don’t forget to check our best-selling selection.
How to fix iPhone XR not charging wirelessly?
There can be instances like when you place your iPhone XR on a wireless charger, the battery icon disappears and charging stops right away, or your iPhone won’t charge when placed on a wireless charging pad or a stand. If your iPhone XR is not charging wirelessly, follow our 4 effective workarounds that can help you fix wireless charging problems on your iPhone XR & other iOS devices.
1. Restart your device
Here comes an old-school yet effective hack that can help you fix those minor issues that accumulate over time. It can help you fix iPhone XR not charging wirelessly problems too. Therefore, you must give it a shot before trying out other methods. Once your iPhone restarts, try charging it wirelessly again, to check if the issue has resolved.
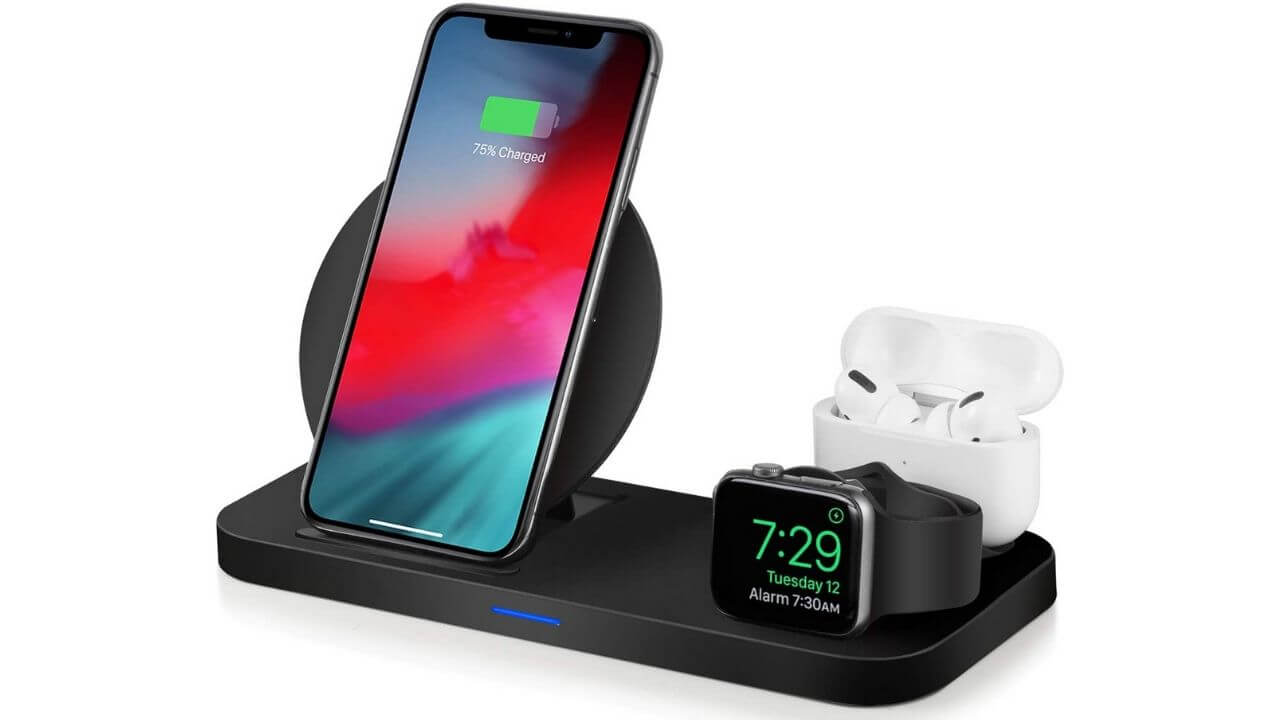
2. Use an efficient wireless charger
You’ll find hundreds of wireless chargers for your iPhone that are available in the market right now. There are a ton of options available, right from the standalone chargers to multi-device wireless stations, but not all of them are capable of charging your iPhone efficiently. We’ve mentioned some tips that will help you while you’re using a wireless charger for your iPhone:
- Always use a Qi-enabled wireless charger.
- You must ensure that you’re not using a damaged/ faulty wireless charger.
- Something may be wrong with your wireless charger and not the iPhone itself. To double-check, try using a different wireless charger or adapter, if you’re able to charge your iPhone, then it’s evident that the previous charger is the culprit. In case, you don’t have another wireless charger, you can try charging another wireless charging compatible smartphone with that charger. If the charger turns out to be faulty, replace it.
- If you’re using a wireless charging pad, make sure you’ve placed your iPhone on the sweet spot. Many wireless chargers do not charge your device if it isn’t placed in a proper indentation.
- If you’ve placed your phone on a wireless charger and you get a call or other notification, your phone will vibrate and might change its position. This can cause the charger to stop supplying power to your device. To make sure that you don’t get into such issues, you must either turn off the vibration or use a good case that supports wireless charging.
Also read: Best multi-device wireless charging stations
3. Are you using the right case?
If you’re charging your iPhone XR wirelessly with a case on it, make sure of the following two important things:
- The wireless charger supports case-through charging. Also, check the maximum thickness of the case that’s supported by the charger.
- The case must be compatible with the wireless charger. Make sure the thickness of the case lies within the acceptable range of the charger.
You must double-check both the things to enjoy a hassle-free charging experience. Also, don’t forget to remove the metal accessory on your case(if any) as not all wireless chargers can work with them.
4. Update iOS
When you’re trying to fix iPhone wireless charging issues, make sure your device is running the latest version of iOS. It will help fix iPhone XR charging issues and brings down the possibility of other bugs and glitches too.
1. Go to Settings > Software Update
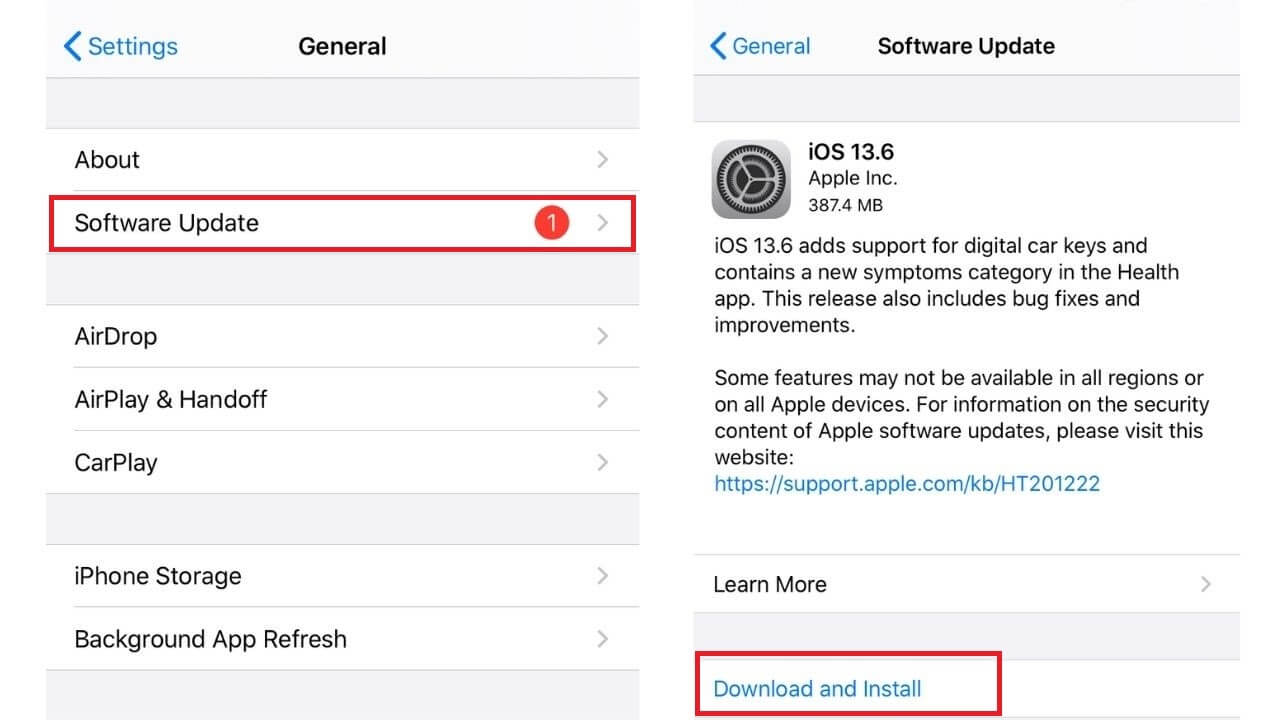
2. If any update is available, download and install it.
Make sure you have enough storage space available on your iPhone to download the update. Or else, free up the storage by moving your data to your PC or a laptop.
You can follow the same steps to fix wireless charging issues on any compatible iPhone.
Don’t miss our roundup for the best wireless chargers for the iPhone 11 series. It’s worth mentioning that you can use the listed chargers with any wireless charging compatible iOS devices, from iPhone 8 and 8 Plus to the latest iPhone SE 2020.
If iPhone XR stops charging after 80%
If you feel that your iPhone XR stops charging properly after a certain percentage, then you need to follow a different approach to fix these issues. We’ve listed the possible reasons along with their practical solutions to fix such charging issues.
How to fix iPhone XR not charging after 80% issue?
1. Reason: Your iPhone is too warm to charge
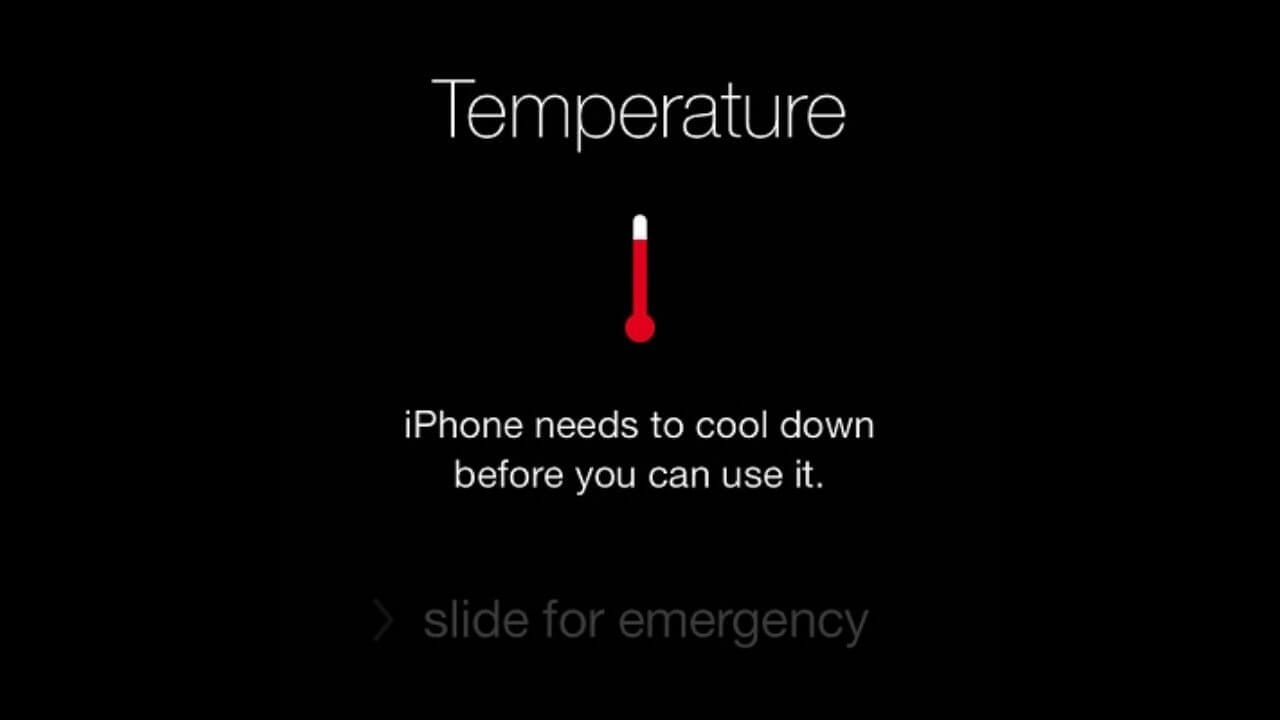
If your device is exposed to direct sunlight, if you’ve left your iPhone in a car on a sunny day, or if you’re playing heavy games at a stretch, and then you put it on the charge, your iPhone will automatically stop charging past 80%. This is because your iPhone XR stops charging if it exceeds a certain temperature threshold. Such high temperatures can even put the battery at risk. Therefore, iOS will mitigate this problem by not allowing your iPhone to charge after 80%. If your iPhone is too hot, you might get a temperature warning.
Solution: Cool Down your iPhone
As soon as you realize that your iPhone is too warm, follow these steps:
- Turn OFF your iPhone
- Unplug the charger
- Remove the case
- Move it to a cooler location
- Allow it to cool down on its own
You might think of putting the iPhone inside a freezer or a refrigerator to fasten the process of cooling down, but don’t even give it a try. Also, never blast cooled air to your phone. We’ve explicitly mentioned it because sudden changes in temperature can cause condensation, which can damage or destroy your iPhone.
If your iPhone is still too warm, make sure to check our detailed guide on how to cool down an overheating iPhone.
2. Reason: Optimized Battery Charging
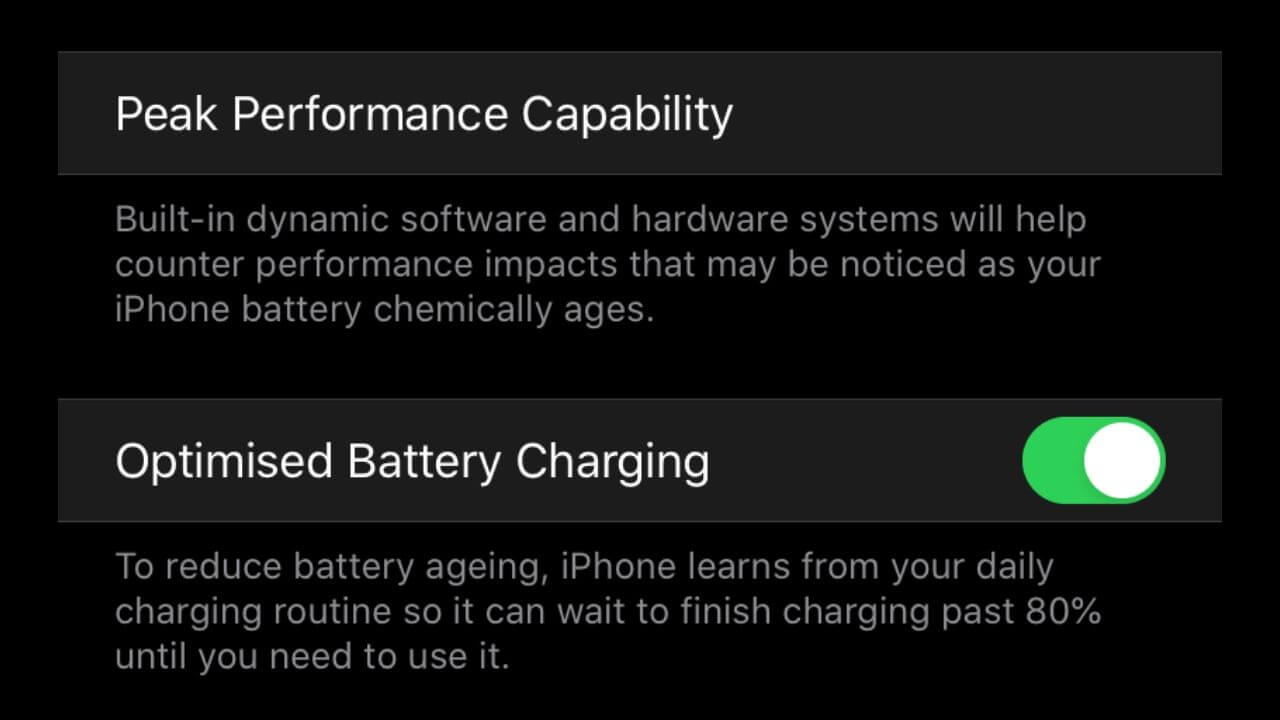
Apple had introduced Optimized Battery Charging in iOS 13 intending to avoid overstressing the batteries and extend its lifespan. If the iPhone’s battery gets too warm during charging, then iOS 13 might not allow the phone to charge above 80%. This is done to slow down the process of battery aging. That’s the reason why your iPhone XR charges all the up to 80% and then suddenly stops there. By default, this feature is enabled in iOS 13. Therefore, if you’ve started facing charging issues after updating to iOS 13, try disabling this feature.
Solution: Turn off Optimized Battery Charging feature
The Optimized Battery Charging feature helps to extend the battery life of your iPhone, but it can also limit charging above 80% in some situations. By default, the Optimized Battery Charging is enabled in iOS 13. You can disable this feature and check if you’re able to charge your iPhone to 100% or not.
Follow the steps mentioned below to disable Optimized Battery Charging feature on your iPhone XR:
1. Go to Settings > Battery
2. Tap Battery Health
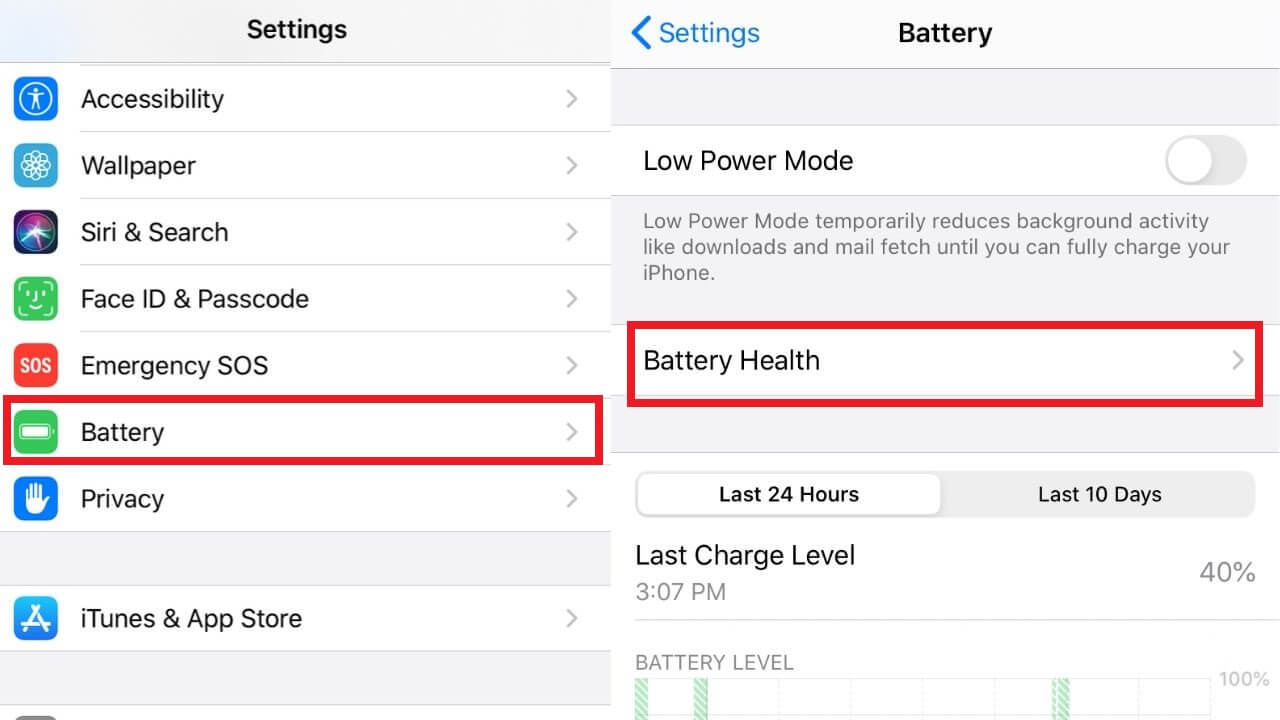
3. Turn Off Optimized Battery Charging

If you still face the same issues, turn ON this feature.
Also read: 20 tips to improve iPhone battery health.
How to fix the “Accessory not supported” alert on iPhone XR?
The possible reasons why you get the “Accessory not supported or certified” alert on your iPhone XR are:
- Dust or debris has accumulated in the lightning port.
- You’re using a damaged or defective accessory
- You’re neither using the original Apple accessory nor an MFi certified accessory.
- The lightning port is damaged
All three causes, except for the last one can be resolved at your end. If you find the lightning port of your iPhone XR is damaged, you must head to the Apple store.
How to charge your iPhone XR after “Accessory not supported/certified” alert is displayed
If you’re not able to charge your iPhone XR after “Accessory not supported” alert is displayed on your phone, follow the steps mentioned below:
1. Remove dust or other particles from the lightning port
Have a look inside the lightning port of your iPhone and clear off any dirt or dust particles with a soft toothbrush or an anti-static brush. Like we’ve mentioned in the above section, never insert a needle or any other pointed object in the charging port of your iPhone, as it can severely damage the port. Once you’ve cleaned the lightning port, plug the charger firmly to your iPhone and check if the alert has gone.
2. Restart your iPhone
This simple hack works like wonders in many situations and it can help you fix the charging issues too. Therefore. When you see the “Accessory not supported or certified” alert on your iPhone, try fixing this issue with a reboot. Try OFF your iPhone, wait for a few seconds, and turn your device ON. Once your device restarts, check if the issue has been fixed.
3. Use a different Lightning cable or adapter
- First, if you’re using an official charger, you should examine your Lightning cable for visible signs of damage like exposed wires, bends, breakage, or bends. In case, the Lightning cable is damaged, try a different cable. If you find no issues with the Lightning cable, then first ensure the cable has connected properly to your iPhone and the adapter. If all of these seem to be perfect, try a different adapter.
- When you’re using a third-party accessory, make sure that it’s MFi certified. If they are not, replace them with either an official or MFi certified accessory.
- If your accessories are fine, you must try another power source to charge your iPhone. A damaged power source could also be an underlying cause of the charging issues.
4. Update iOS
Make sure that your iPhone is running the latest version of iOS by following the steps mentioned below:
- Go to Settings
- Tap Software Update
- If any update is available, download and install it.
- Head to Apple store
If the lightning port of your iPhone XR is damaged or if you’ve tried the above steps and still the “Accessory not supported” alert appears, then there can be some issues with the internals of your iPhone. In such cases, you must head to the Apple store, without looking for any other options.
Apart from the iPhone XR, you can use the same steps to fix “Accessory not supported” alert on other iPhone models too.
How to charge your iPhone XR after getting wet/ after liquid is detected in the Lightning port?
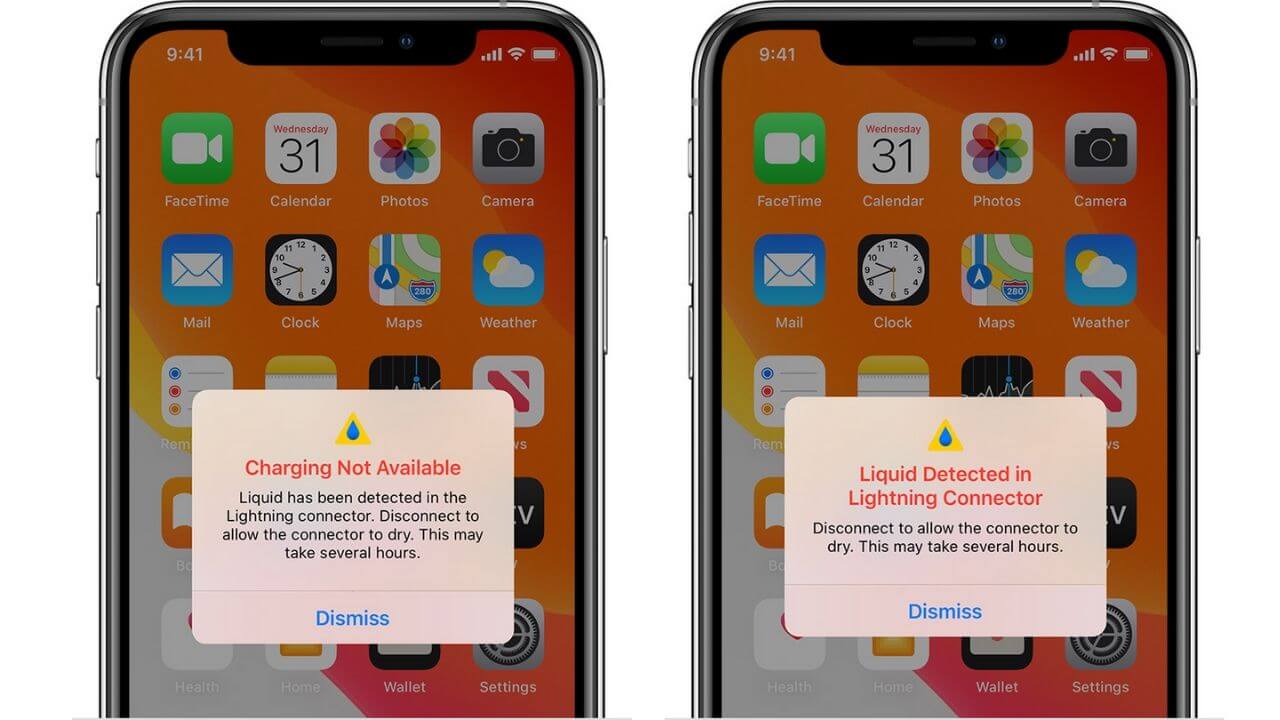
The iPhone XR is water-resistant, but it does not mean that your device cannot suffer from liquid damage. After all, there’s a difference between water-resistant and completely waterproof. So, water/liquid can still seep inside the ports of your smartphone. If you’re not able to charge your iPhone XR after it got wet, or your device is showing up the alert saying- “Charging not available” or “Liquid Detected in the Lightning connector”, follow the steps mentioned below.
If your iPhone XR or Lightning cable is wet
When your iPhone gets wet, the charging and accessory connections are not available until both the port and accessory are dry. This is to protect your iPhone and accessories from any further damage.
In such cases, you must unplug all the accessories from your iPhone and don’t plug them back until both the iPhone and accessories are completely dry.
How to dry an iPhone?
There are many different options when it comes to drying an iPhone. We’ll show you the correct way to do it.
- Hold the iPhone in your hand with the charging port facing downwards. Now, tap your iPhone gently against your hand to remove excess liquid.
- Wipe your phone with a soft, lint-free cloth. You can use a lens cloth.
- Allow your iPhone to air dry for at least 30 mins.
- Now, try connecting the charger or a Lightning accessory.
- If the liquid detection alert shows up again, that means your iPhone is not completely dry. There’s still some liquid in the Lightning port or under the pins of your Lightning cable.
- Keep your iPhone in a dry area with some airflow for up to 24 hours. You can try charging your phone in between to check if it’s working.
Apple recommends not doing any of these things while drying your iPhone:
- Never use compressed air, a hairdryer, or any other external source of heat to dry your device
- Do not insert a foreign object like a cotton swab or a paper towel inside the Lightning port.
- Many people may swear by putting the phone overnight in a bag of uncooked rice, but Apple does not recommend this process. The small particles of rice can cause further damage to your phone.
The best way is to keep your iPhone in a cool area with some airflow and let it dry on its own.
How to charge a wet iPhone?
If there’s an emergency and you want to charge your iPhone while it’s wet, you can follow either of the following methods:
1. Use a wireless charger
If you want to charge your iPhone XR while it’s wet, a wireless charger can offer great help. Make sure you don’t miss out on these important things:
- The back of your iPhone is completely dry.
- Always use a Qi-enabled wireless charger.
2. Override liquid detection
If you don’t have a wireless charger and you still want to charge your iPhone using the regular, wired charger, then there’s an option to override liquid detection and charge your phone. It’s worth mentioning that if you go for this process, you run the risk of permanently damaging your device. Therefore, be ready to take responsibility if something goes wrong with your device. Also, don’t forget that Liquid damage is not covered under the warranty.
Here are the steps to override liquid detection in iPhone:
- Reconnect the Lightning cable or accessory shortly after the warning appears.
- When you see a liquid detection alert again, Tap on the Emergency Override.
If your iPhone and Lightning accessories are not wet and still you get Liquid detection alert
If you’ve given enough time to dry your iPhone or if you’re sure the iPhone, Lightning port, and accessories are dry and you still get liquid detection alerts on your phone, then there’s something wrong with the accessories that you’re using. In such situations, you must head to the Apple store if you’re using the official Apple accessories. In case, you’re using third-party accessories, contact the accessory manufacturer.
Also read: 11 ways to fix No Service error on iPhone.
That was all for our guide on how to fix charging issues on iPhone XR. We hope it has helped you spot the possible reasons and fix those frustrating charging problems. Don’t forget to share this guide with all the iPhone users you know.
Don’t miss our guide on how to fix iPhone 11 charging issues.