
When you start a blogging website, your topmost priority is to get more traffic and subscribers. Also, it’s very important to keep a track of how your content is performing and how your audience is interacting with it. This helps you in making data-driven decisions, thus improving your work.
Google Analytics does this job for you and help you in growing your business. To track your WordPress website, you need to add Google Analytics to it.
Do you think it’s a difficult task? Don’t worry, we have simplified it for you.
Firstly, you need to sign up for a Google Analytics account and then connect it with your WordPress site.
Google Analytics
To start off, let’s understand some of the important ways in which Google Analytics can be extremely helpful in monitoring your website.
Overview of Channels: How people find you?
It shows statistics on how people are coming to your website. You get to know which channels are performing the best for you. Let’s say, if you are putting money into PPC, you can monitor your ROI.
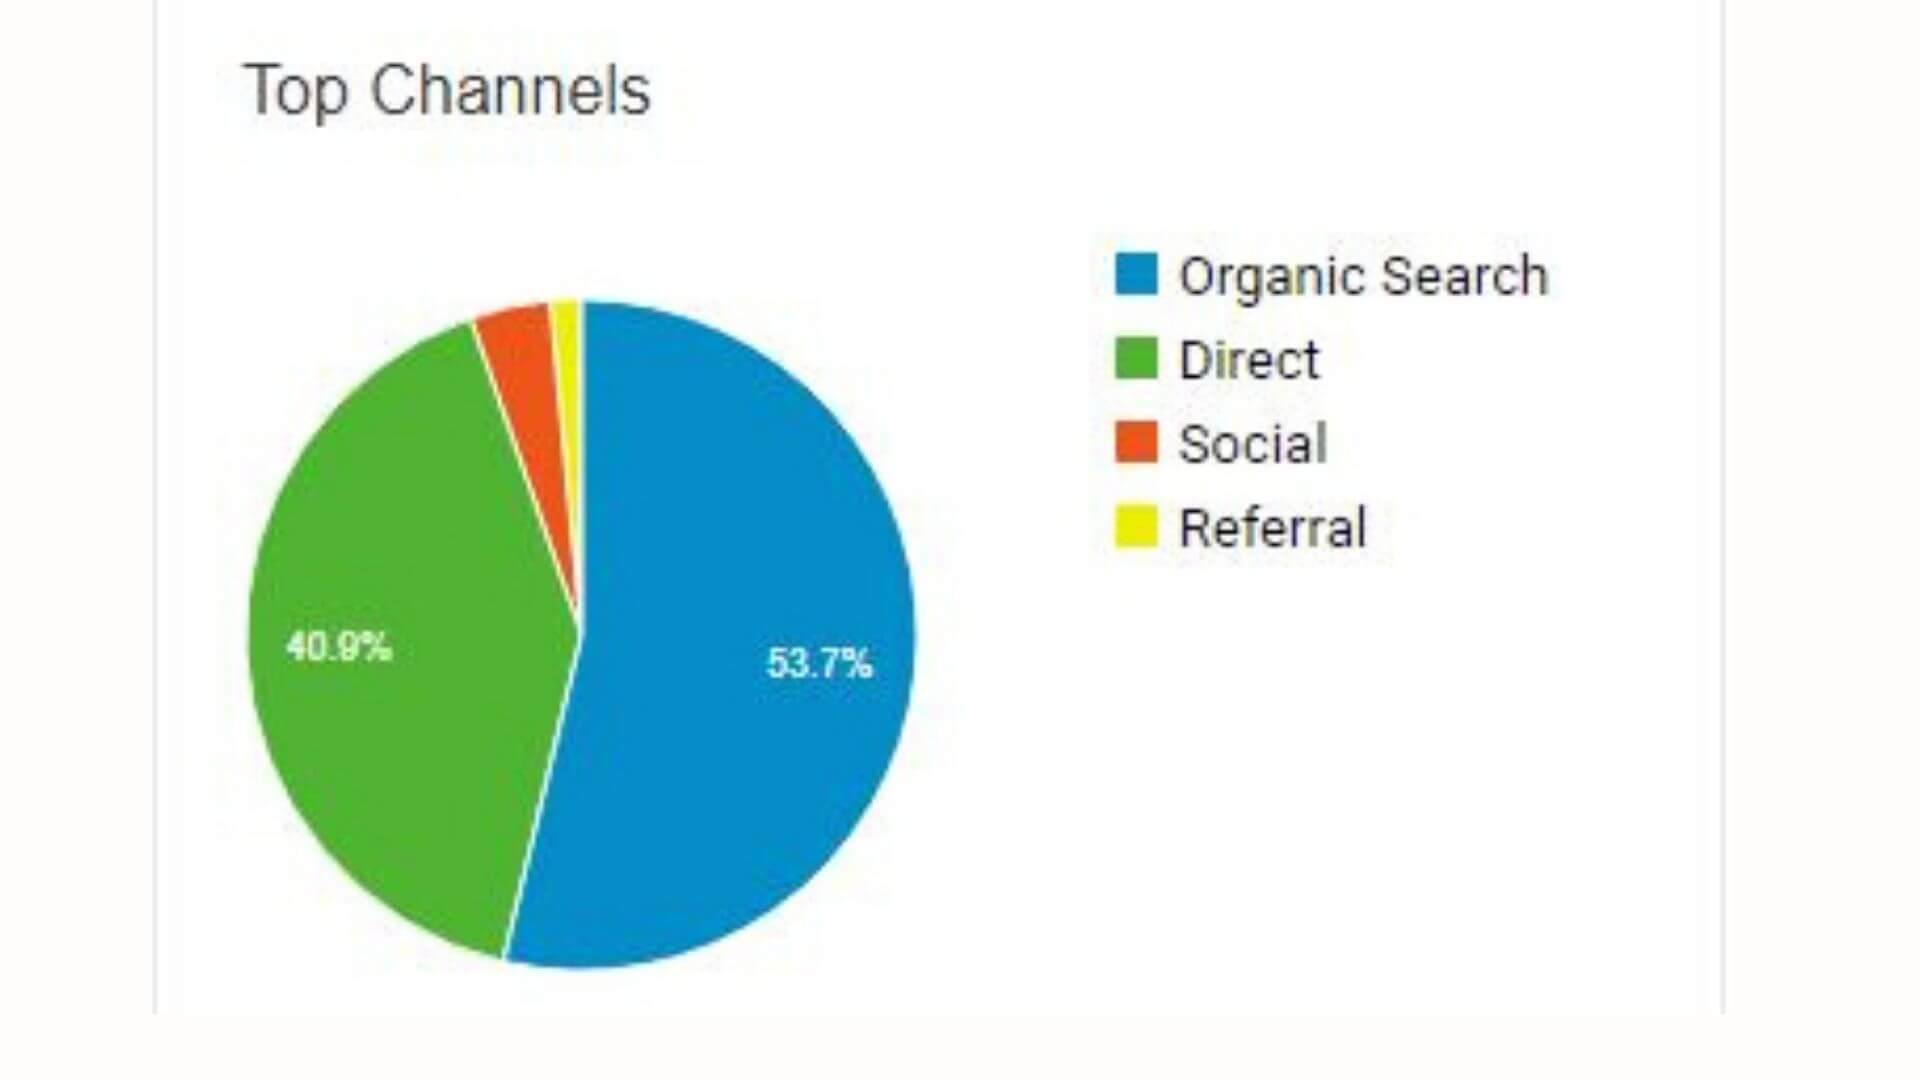
You can then tailor your strategies accordingly. For example, if Social media is giving you the maximum traffic, then you should focus more on creating exclusive content for the social media handles.
Your Audience: Who is visiting your website?
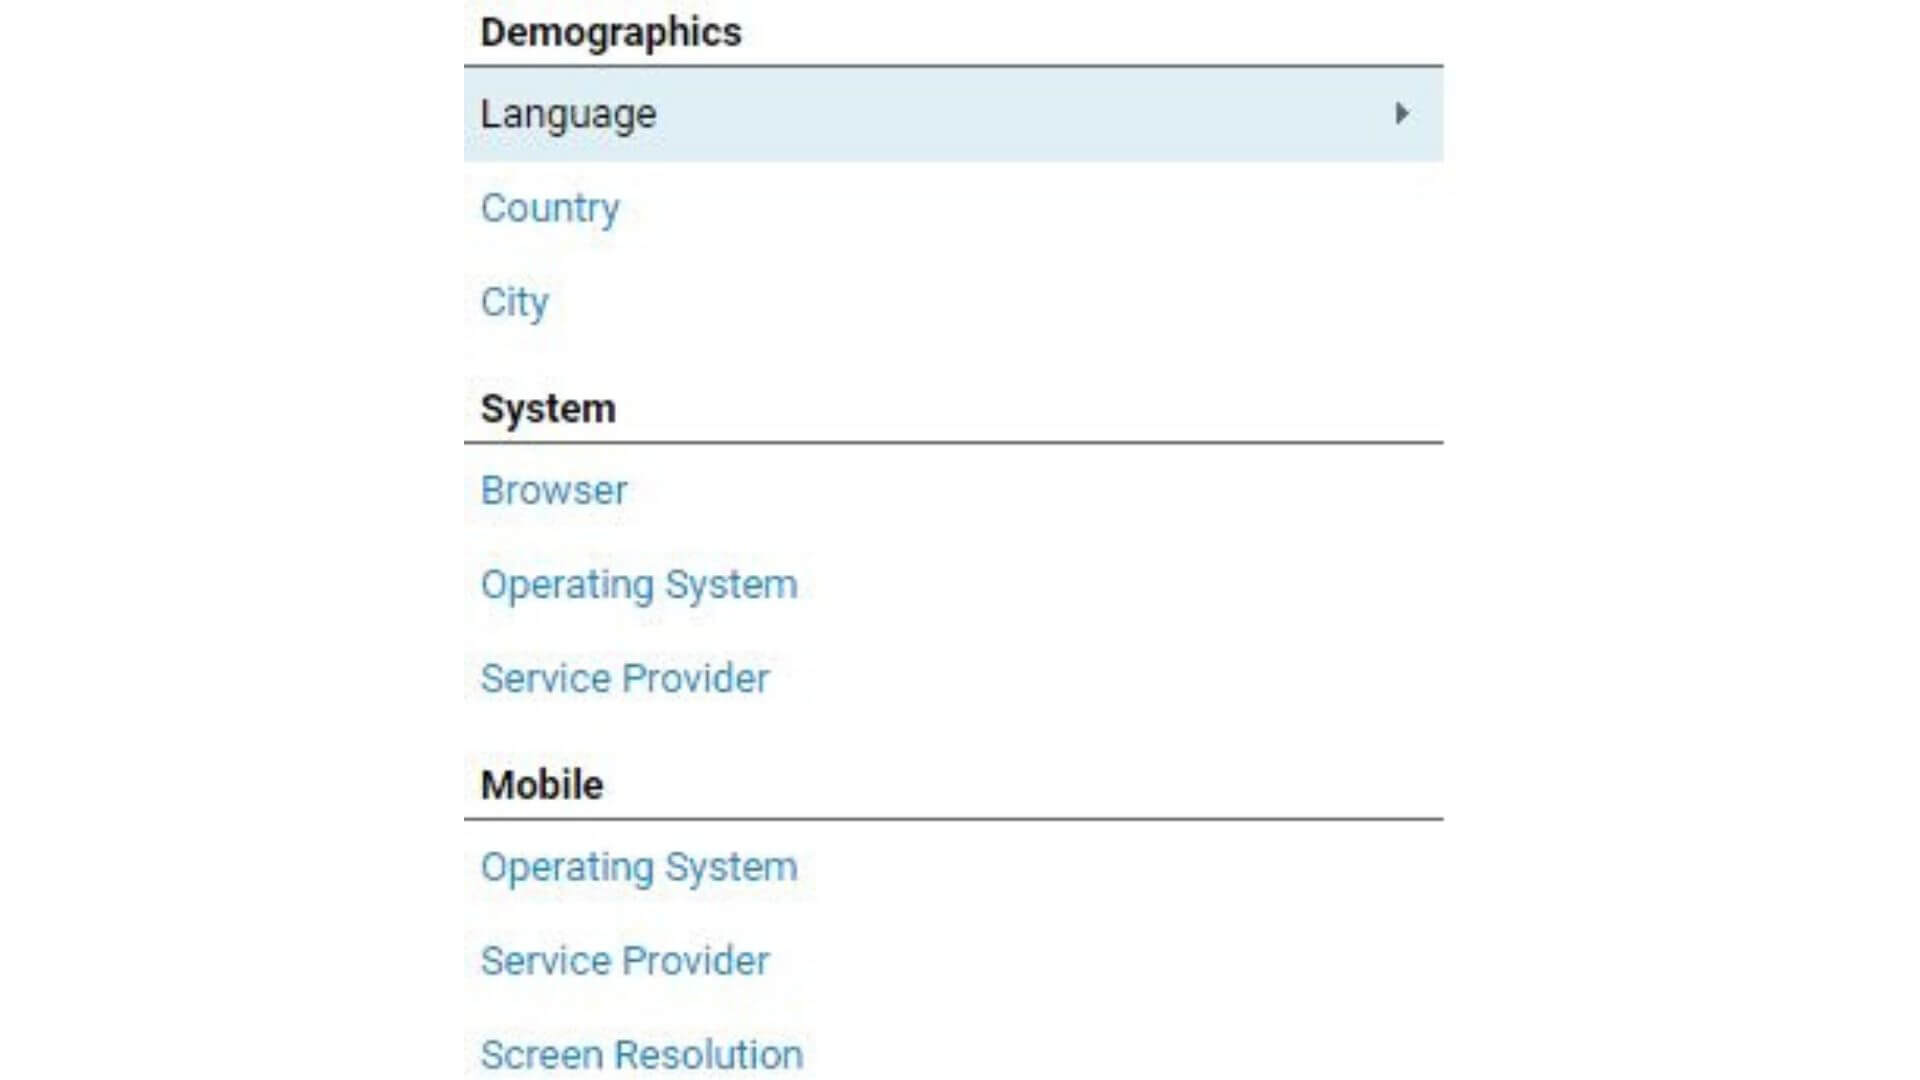
Google Analytics helps you to understand your audience. It gives statistics regarding the geographic location and demographics of your audience, what device they are using, what browser they are using, etc. For example, if most of your traffic is coming from mobile devices, then you must assure that your website is mobile-friendly. In short, you can make your website compatible with your audience.
Customer Engagement: What do people do when they come to your website?
You can track what people are doing when they come to your website and for how long they are staying. It allows you to review how well people are interacting with your website and content. These metrics give you insights of customer journey and customer interaction.
Average Session Duration: The average amount of time spent by each visitor on your website.
Bounce Rate: Percentage of people who exit from your website after viewing only one page ( no interaction with your website).
Pages/Session: The average number of pages each visitor has viewed.
The statistics also show your top-performing pages as well as the pages that need to be optimized. To decrease the bounce rates, you can optimize your landing pages.
Google Analytics Account: How to sign up?
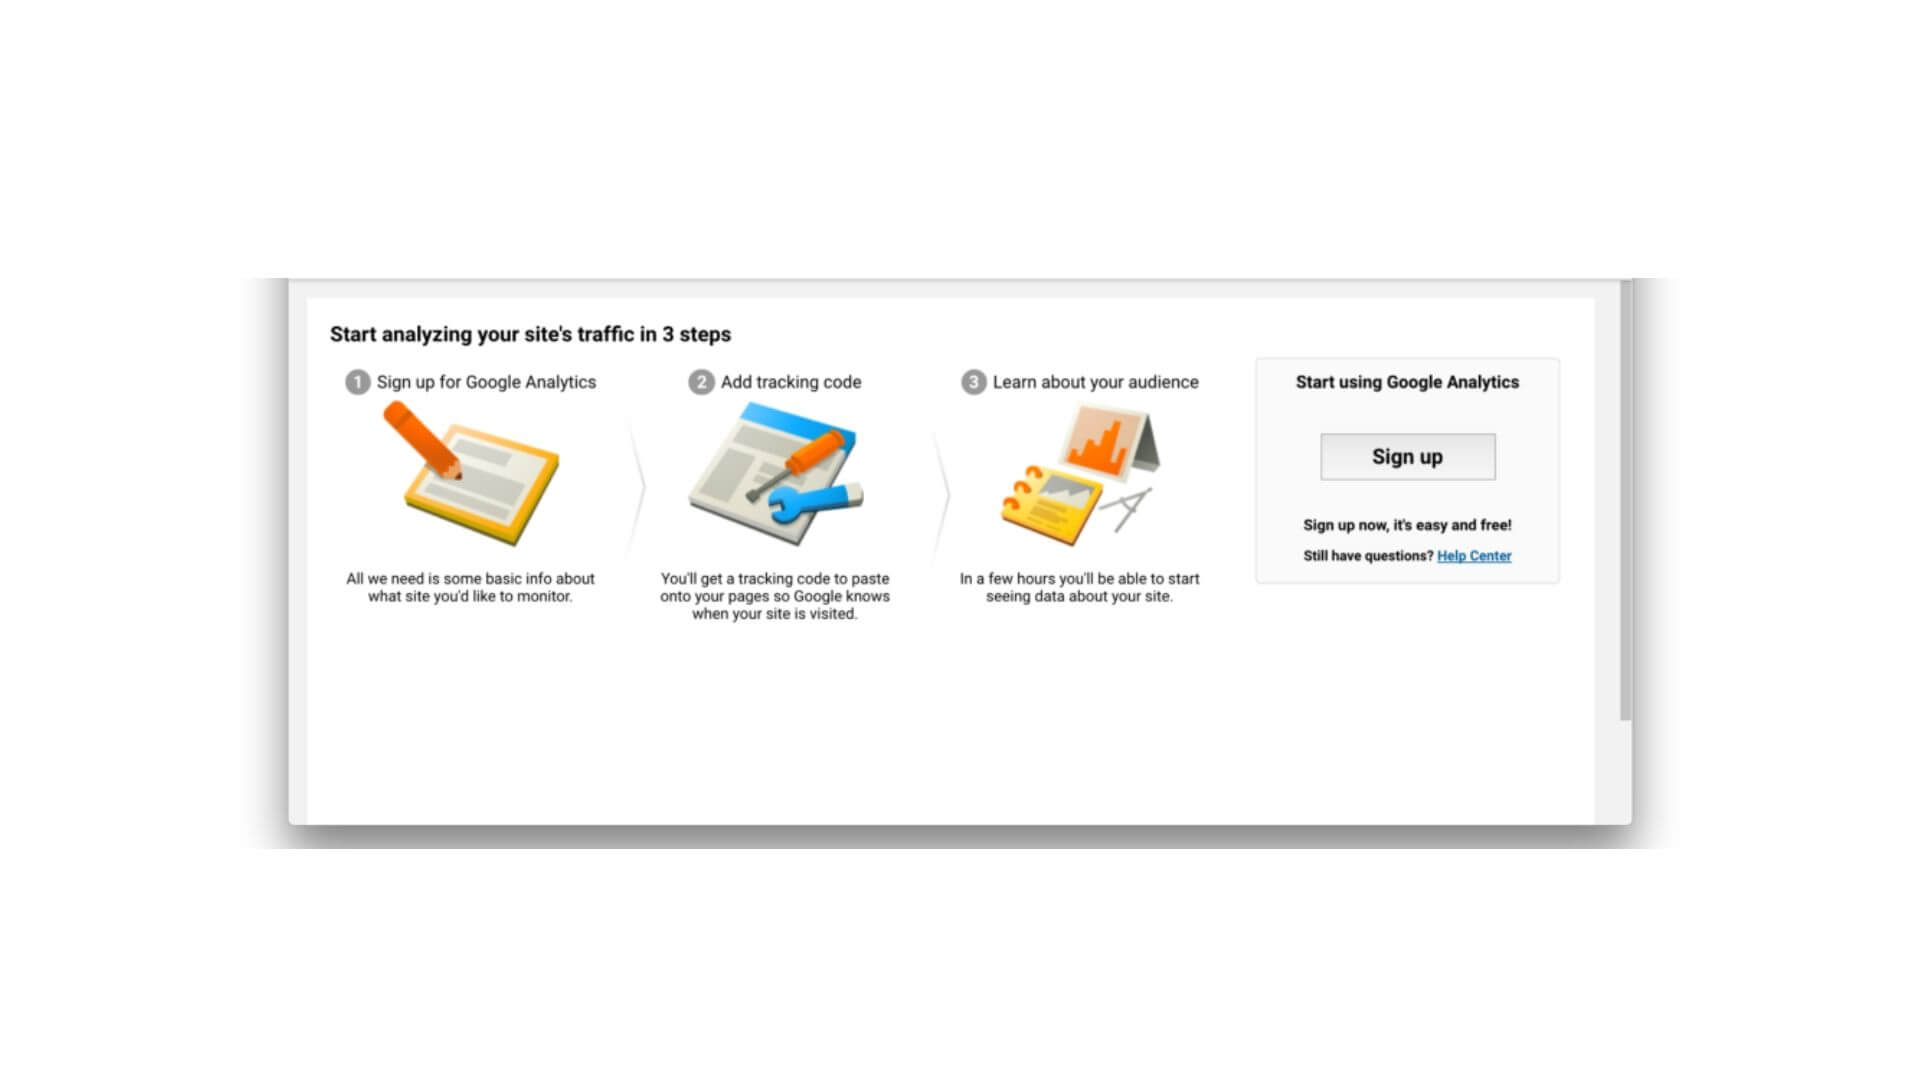
The best part of Google Analytics is that it comes for FREE. You just need a Gmail account to sign up. Here’s a simple series of steps that you have to follow:
Step 1:
Visit https://analytics.google.com/
Step 2:
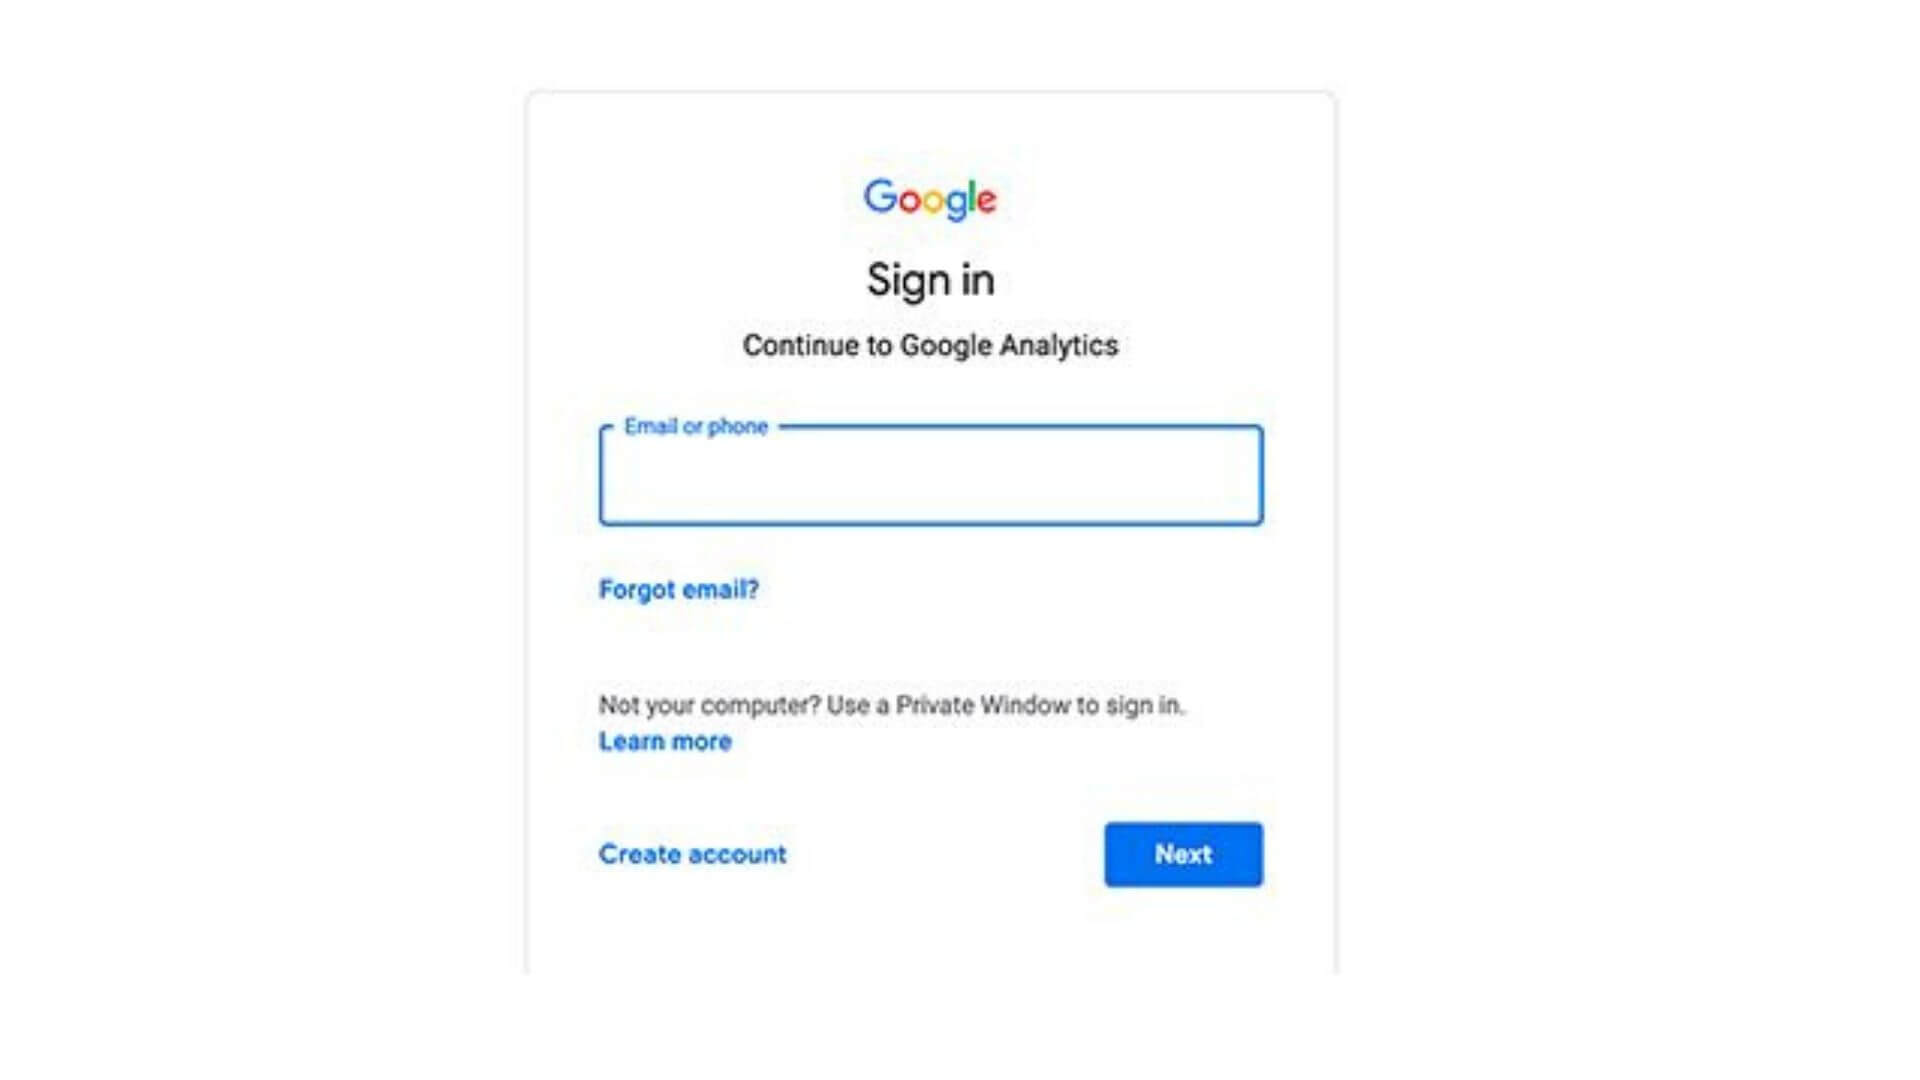
Enter your Gmail account details that you want to use to sign up.
Step 3:
You get a screen like below. Sign-up for Google Analytics with a Gmail account.
Step 4:
You’ll be asked to enter some details like whether you want to track a website or a mobile app. Enter website name, URL, country, and the time zone.
![]()
After entering the details, click on Get Tracking ID button. Agree to the terms and services to proceed further.
Now, you have your Google Analytics Tracking ID.
How to install Google Analytics in WordPress
Method 1: By using WordPress Plugins
Google has now released its official WordPress plugin named Site Kit. Learn how to install Site Kit on WordPress.
MonsterInsights Plugin
This is the most popular Google Analytics plugin for WordPress. MonsterInsights plugin is the best and easiest method, especially for beginners. It has over 2 Million users mainly because of its user-friendly approach.
The plugin is available as a free version and a paid premium version that supports advanced tracking. The process of their setup remains the same.
Firstly, you need to install and activate the plugin. Go to the WordPress dashboard, on the LHS you’ll see a Plugins option. Click on it and select Add New, then search the name.
After installing, you’ll get a success message with a link to activate the plugin.
Upon activation, a new menu item will labeled as Insights will be added to the WordPress admin menu.
Click on it to begin the MonsterInsights setup.
- Choose your website category from a business, blog, or an online store. Click on Save and Continue button.

2. Click on the “Connect MonsterInsights” button.
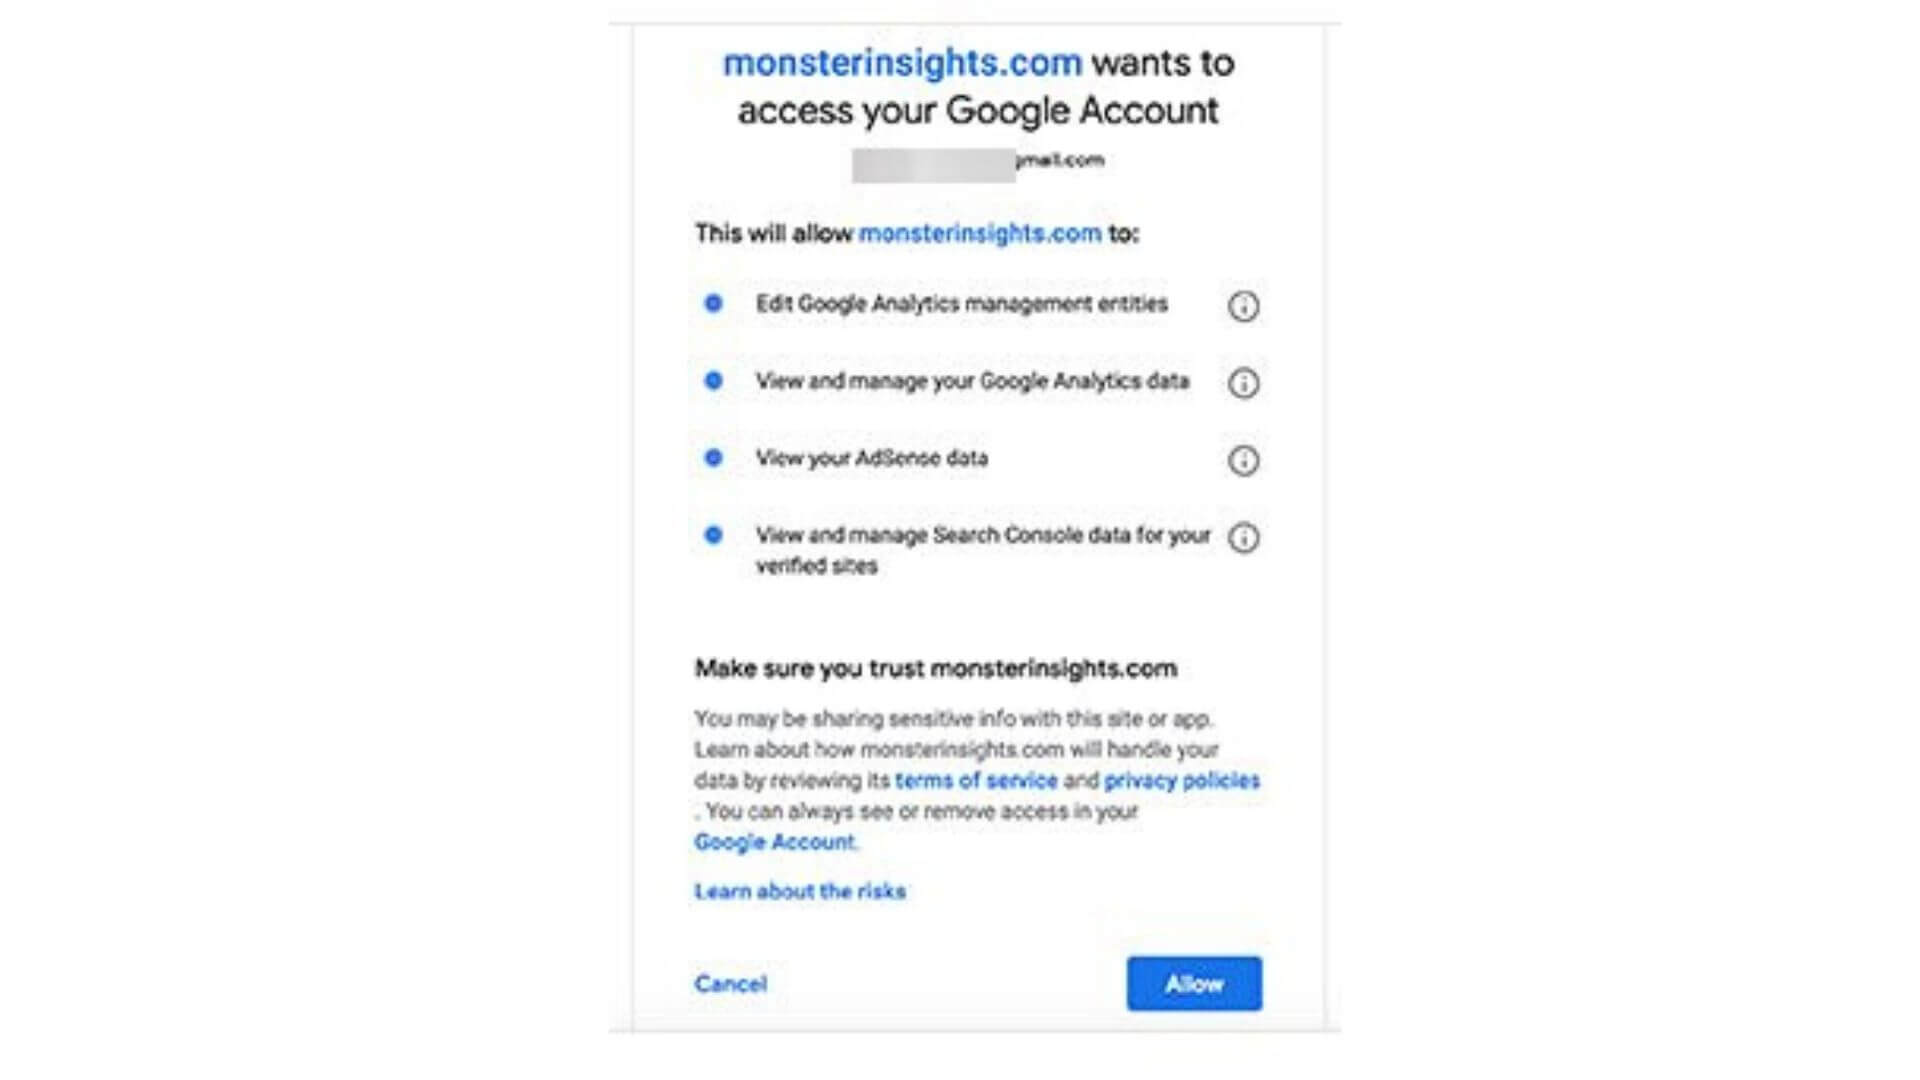
 3. Sign in with your Google account.

- After this, you will be asked to allow MonsterInsights to access your Analytics account. Click on Allow.
- Now, select the website you want to track and click on the “Complete Authentication” button.
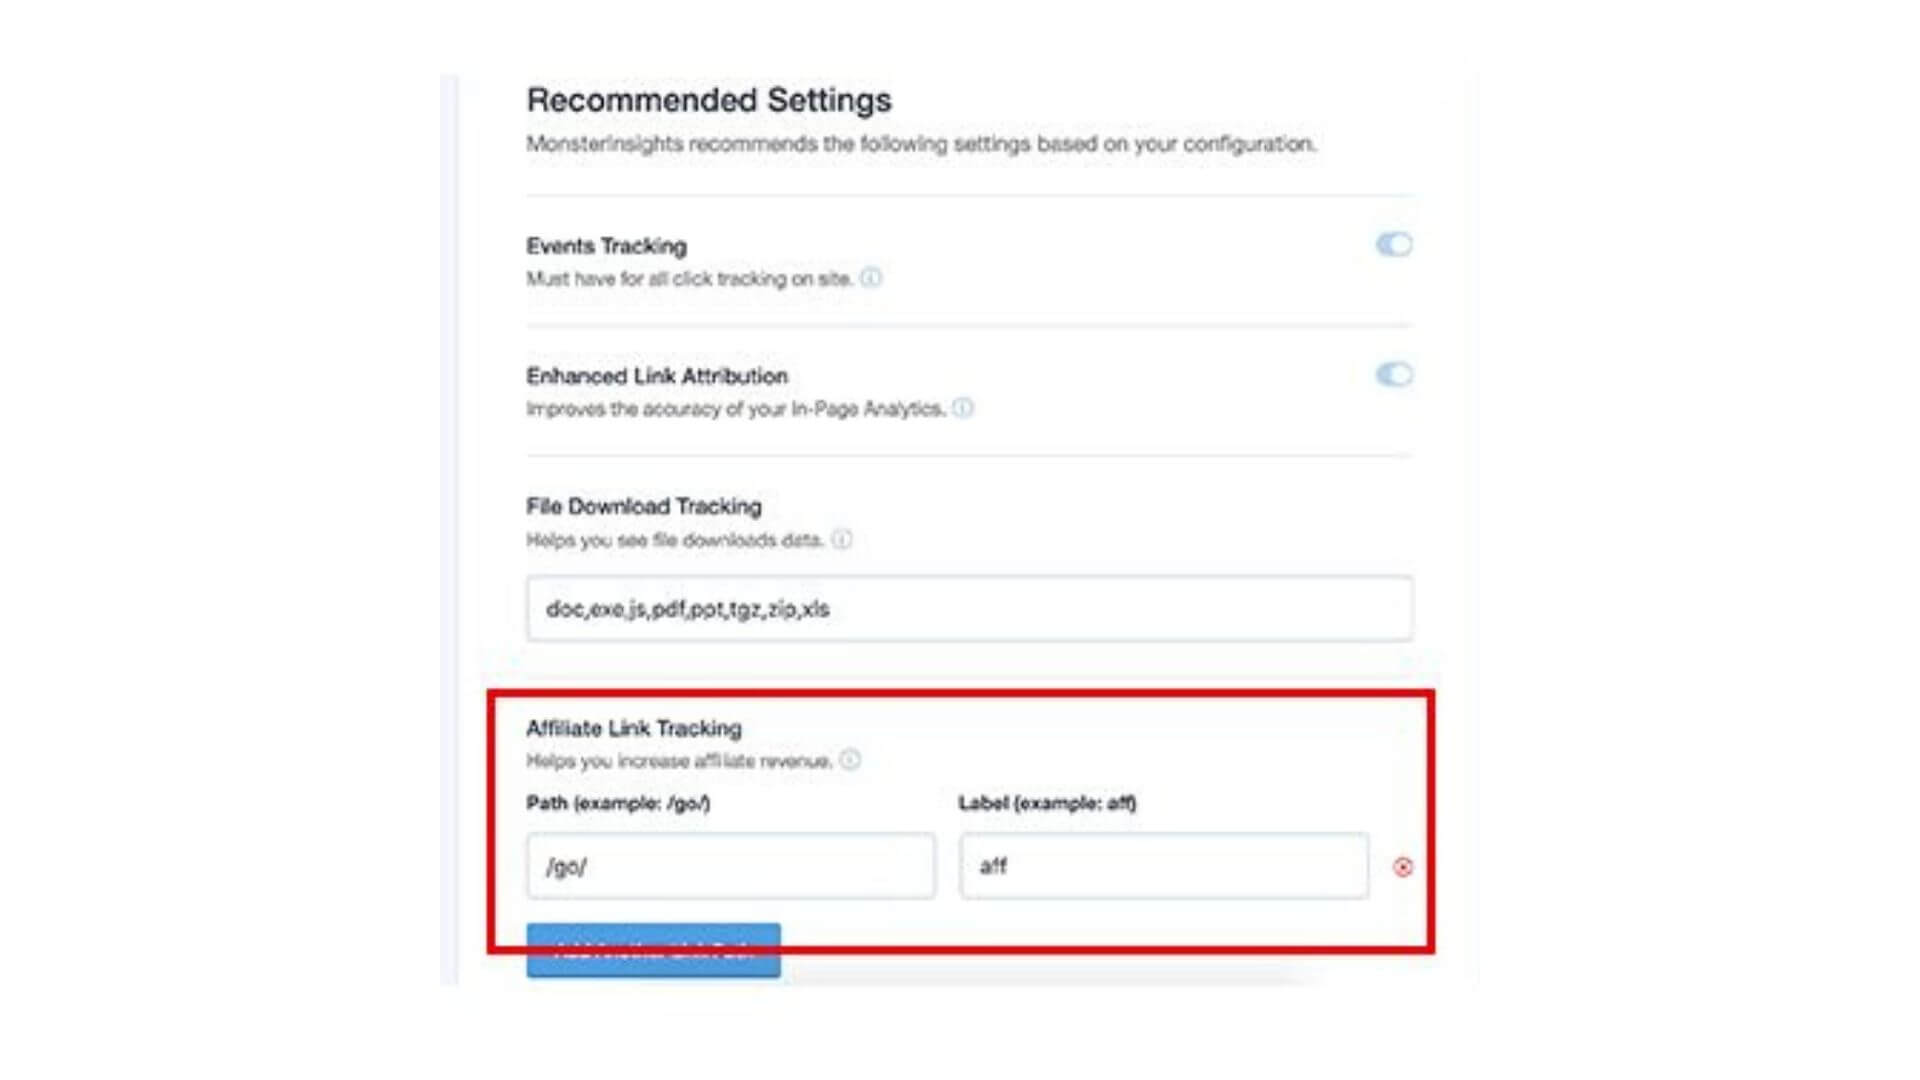
- The Plugin will now install Google Analytics on your website. Then, you need to select the recommended settings. Then default settings will go well for most websites. Click on the “save and Continue” button.
- MonsterInsights will now show you some add-ons that you can access by upgrading to PRO. You can skip this step and continue.
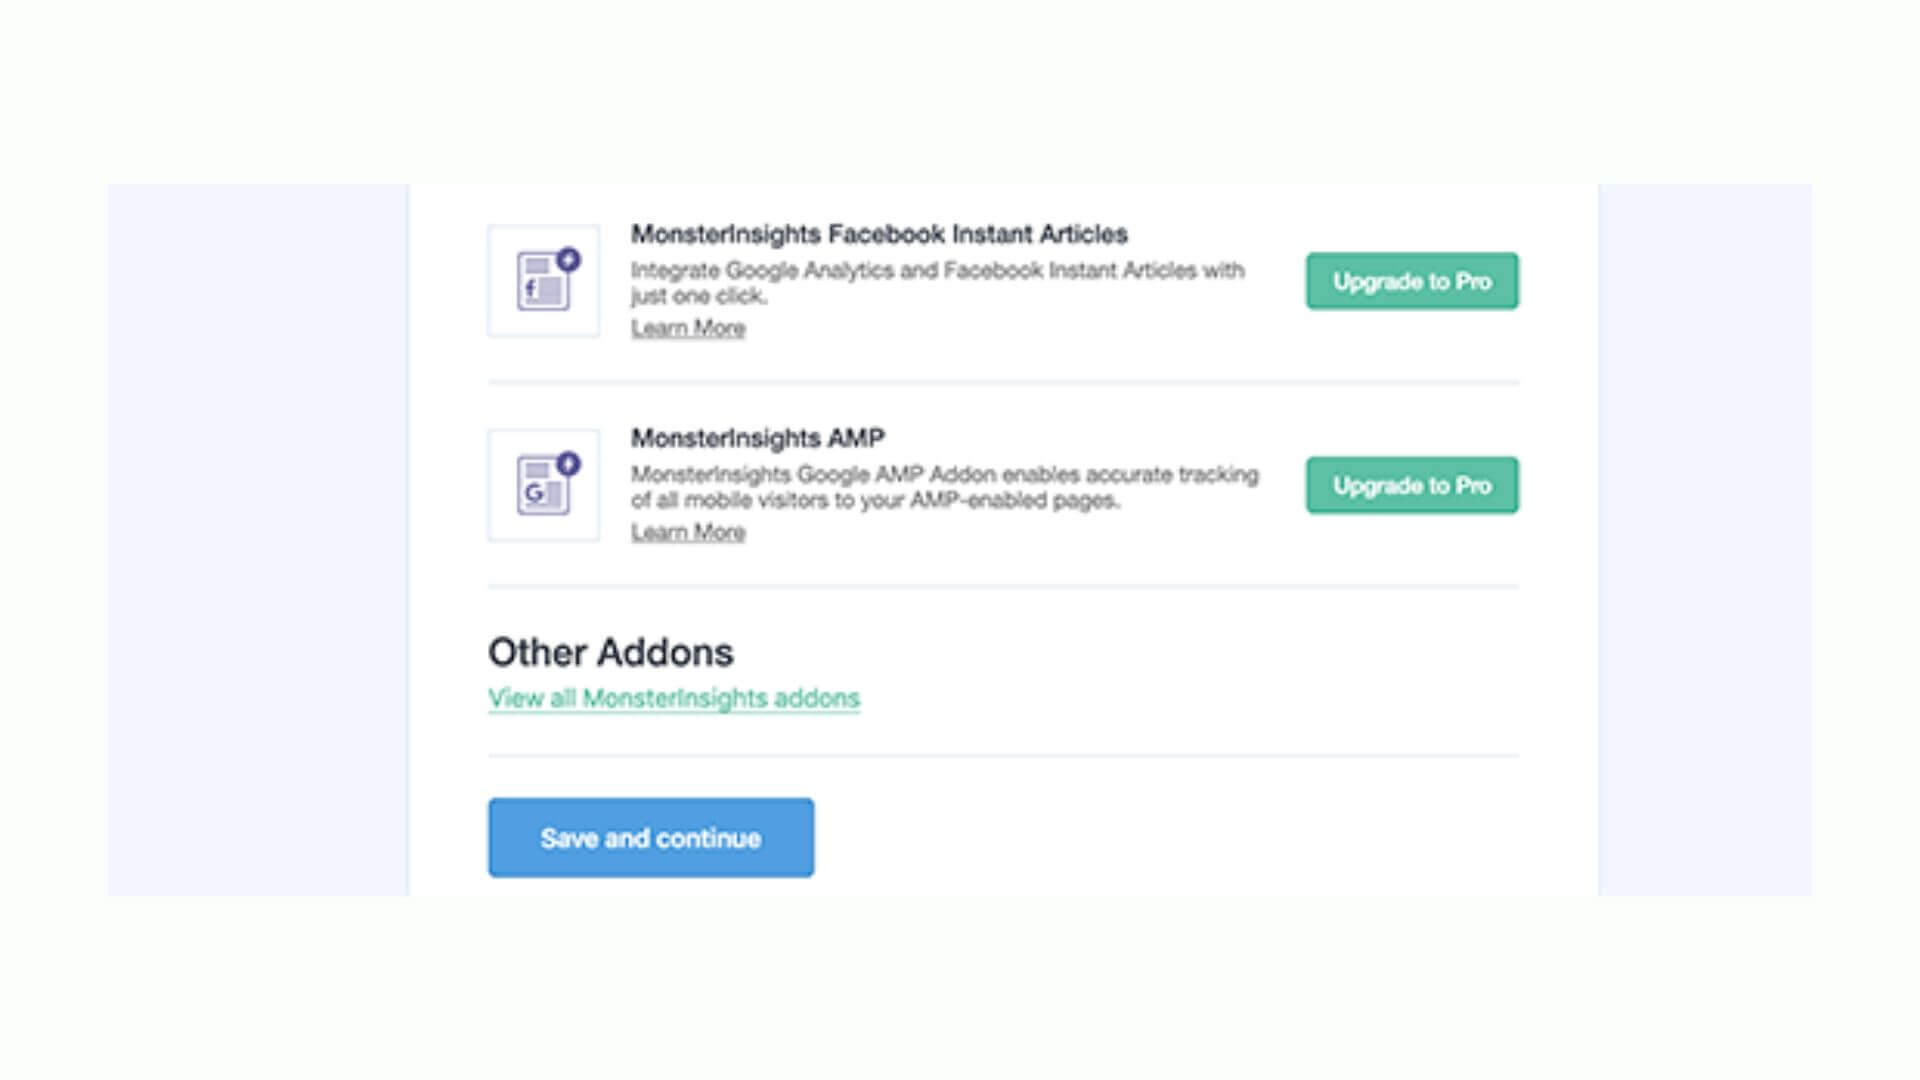
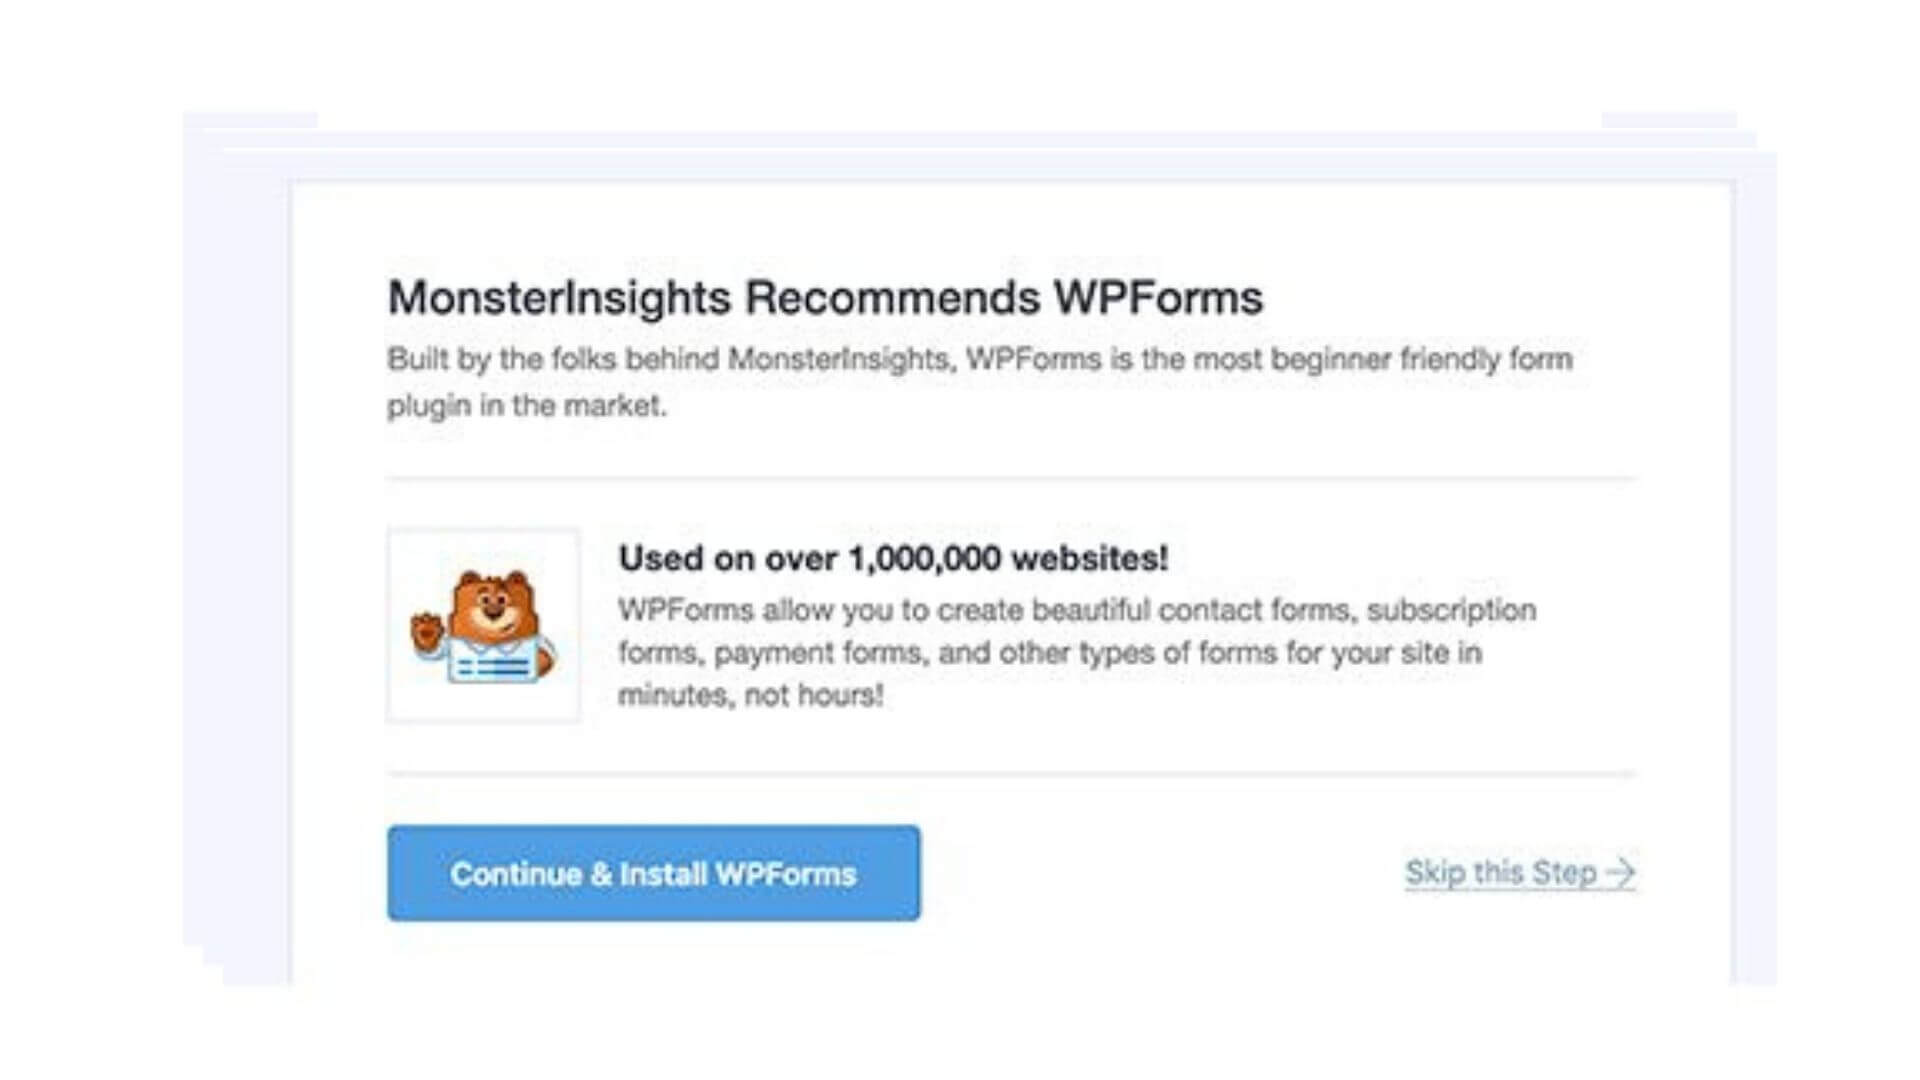
- You will be asked to install the WPForms plugin. This is an optional step, you can skip it if you want.
That’s all, you are done with the installation. You can now view Google Analytics reports inside your WordPress dashboard. Go to Insights and then select Reports to view your analytics data.
Method 2: Manually add Google Analytics to WordPress
Users who are familiar with the coding part can manually add Google Analytics to WordPress child theme. It’s essential to use a WordPress child theme, otherwise, your tracking code will be overwritten every time you update your WordPress theme.
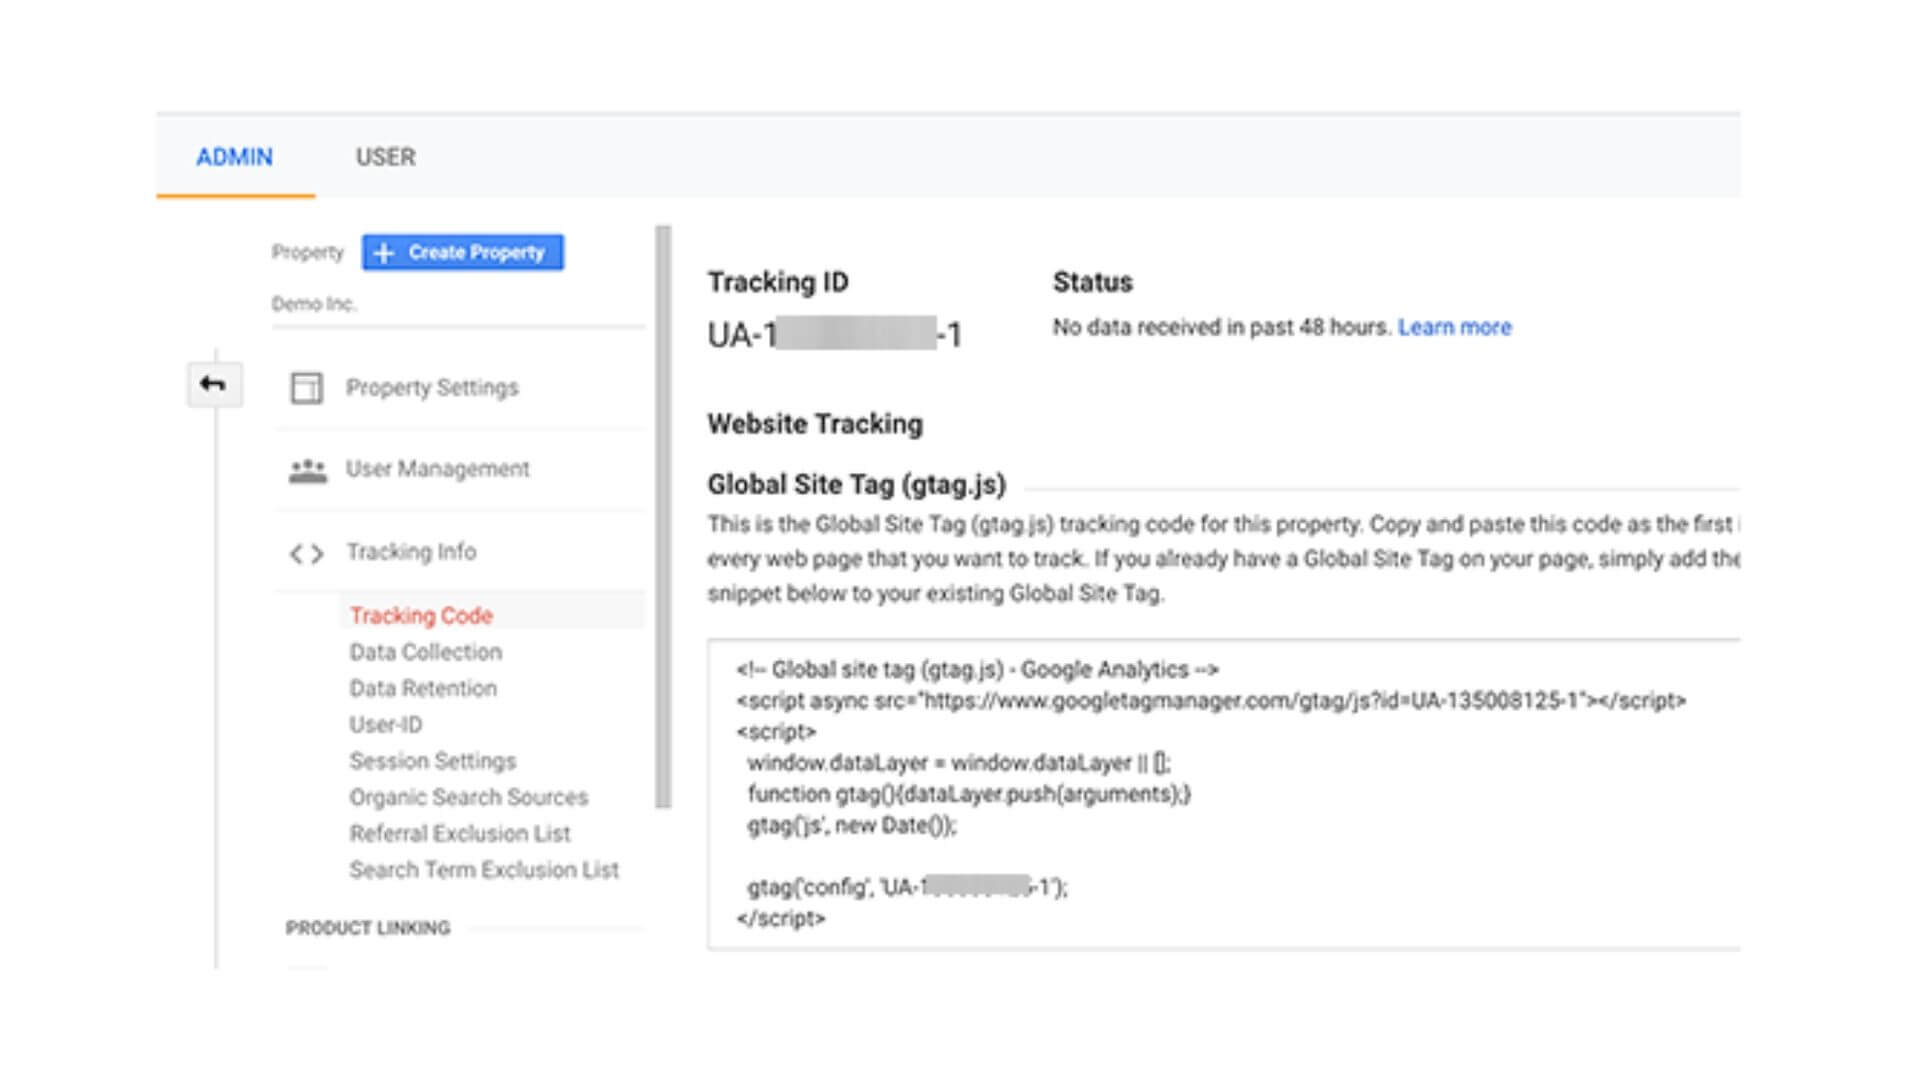
Firstly, you need to get the Tracking code. For this, follow the steps below:
- Log in to your Google Analytics account.
- Navigate to the Admin menu on the bottom-left.
- Select the Tracking Info menu
- Now, select the Tracking Code submenu.
Now when you have the tracking code, follow any one option listed below.
Option 1: headers.php file
You need to add the Google Analytics Tracking Code to the “headers.php” file in WordPress. To avoid the confusion of where to add the code, just keep a habit of adding it just before the closing of the head tag i.e </head>.
Make sure to create a backup copy of the file before you make any changes.
- Go to your WordPress dashboard.
- Navigate Appearance and select Theme Editor
- Select headers.php.
- Paste the code snippet.
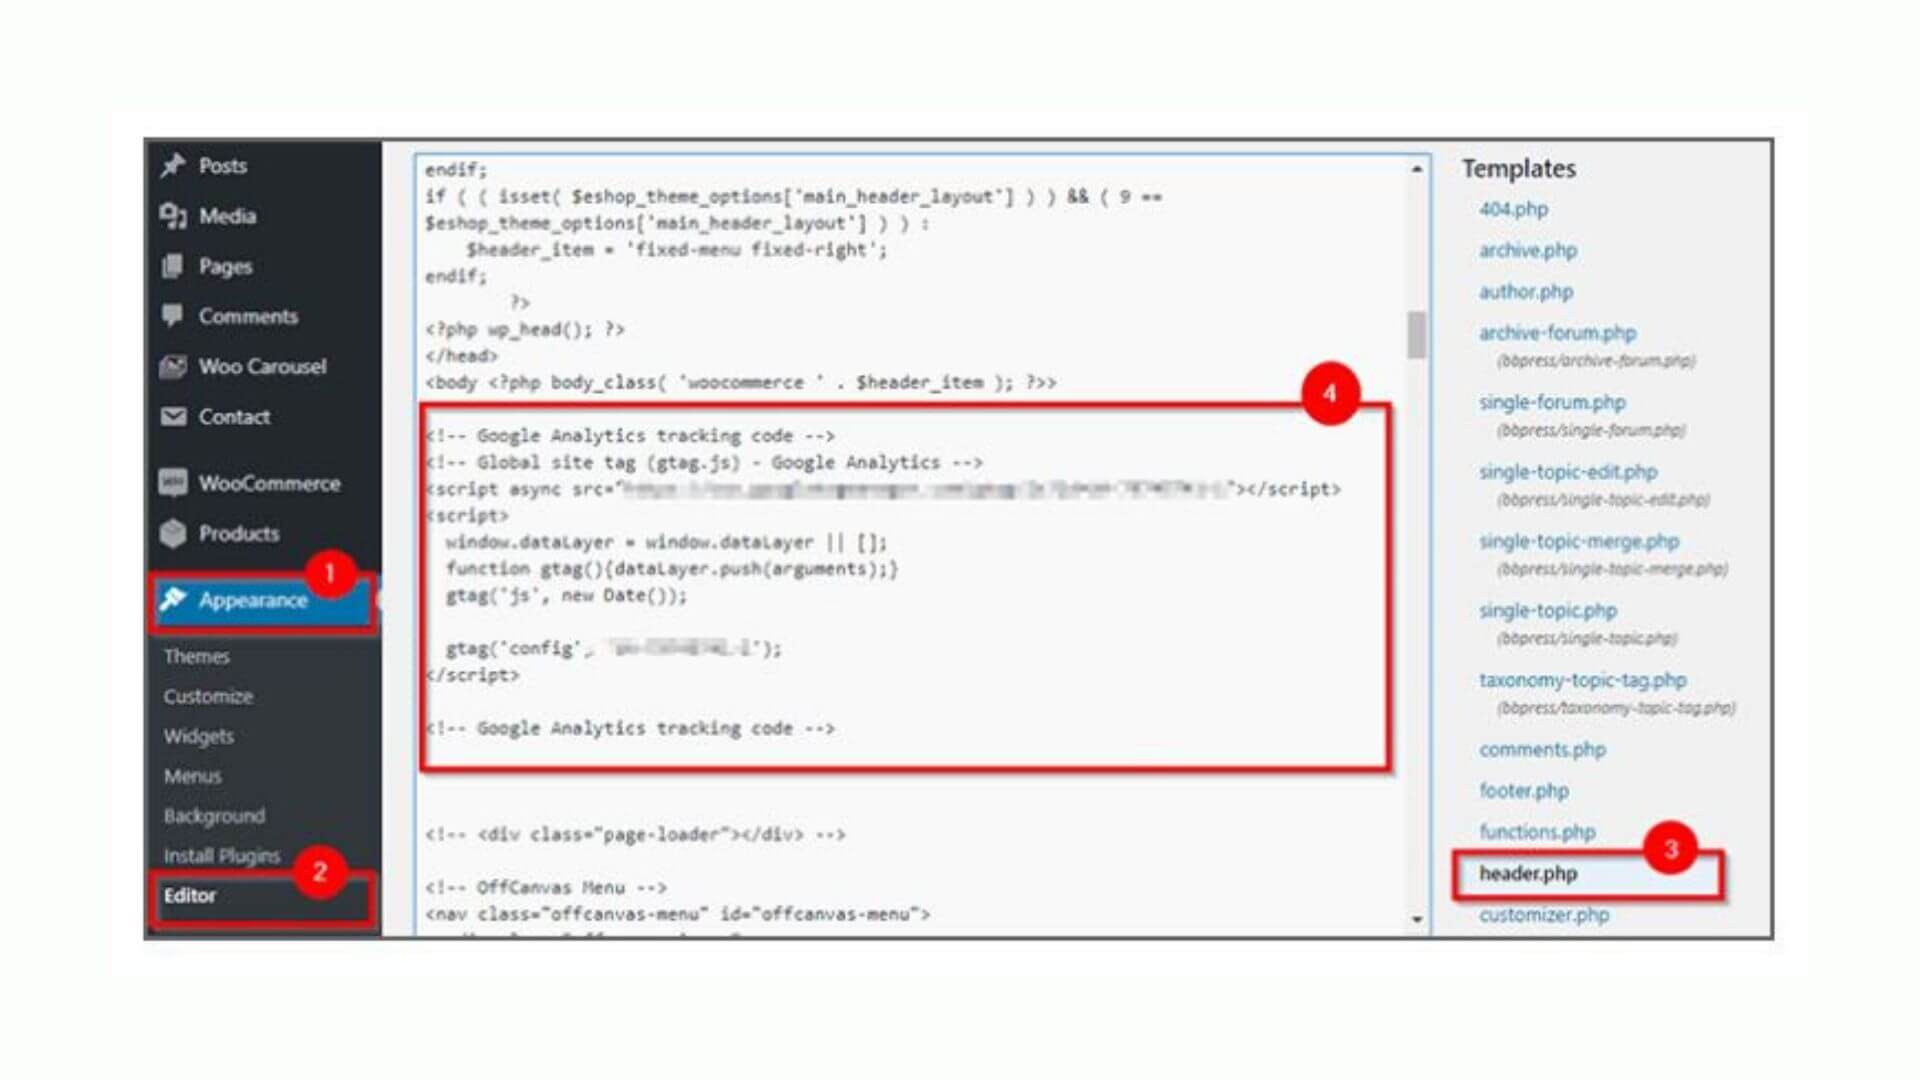
Make sure you update the file to activate the Tracking Code.
Option 2: functions.php file
Using this option, you have to create a new function that contains the code snippet.
- Go to your WordPress dashboard.
- Navigate Appearance and select Theme Editor
- Select functions.php.
- Add the following code snippet to the file and add your tracking ID.
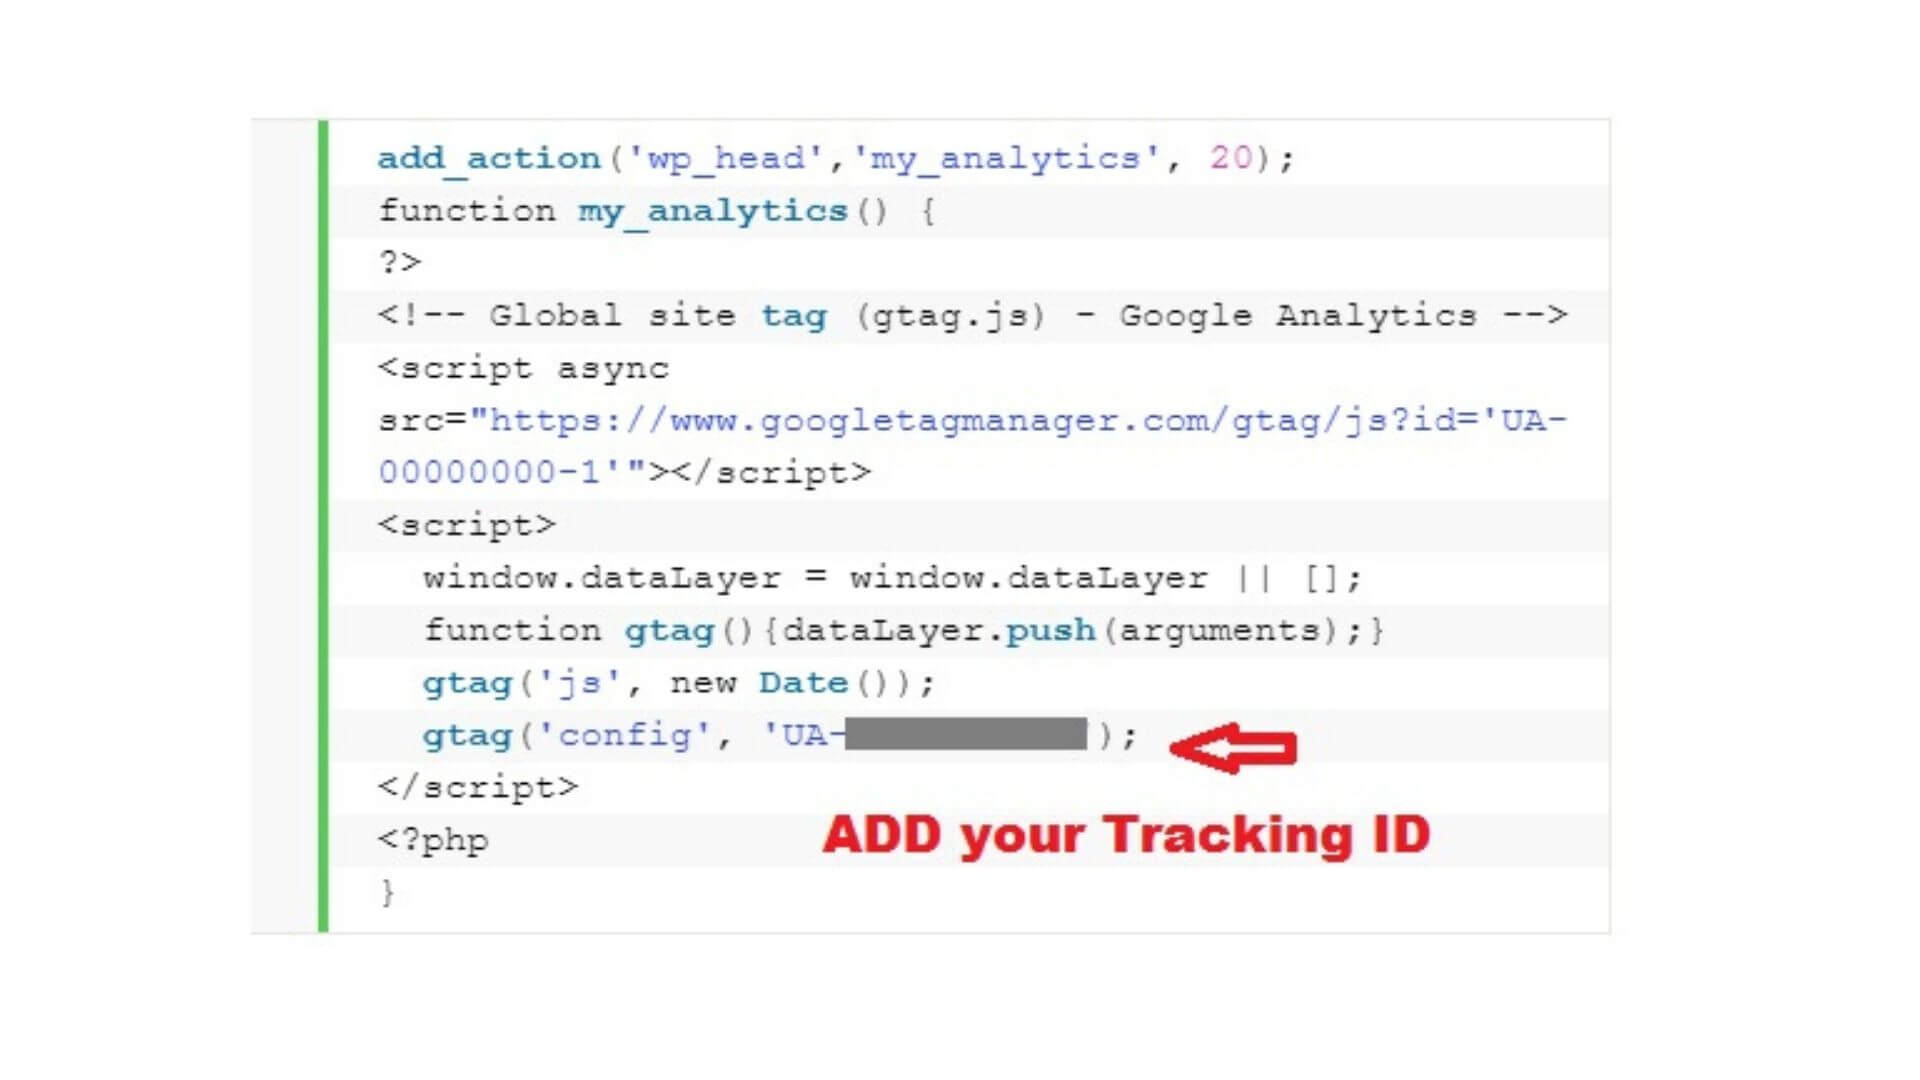
- Click on the update file option to activate the code.
Method 3: Sync Google Analytics locally
You can utilize your own server’s cache headers by syncing Google Analytics scripts locally on your servers. This reduces the number of external HTTP requests to Google and gives you full control over the caching of the file.
Complete Analytics Optimization Suite: A Set and Forget Plugin
Complete Analytics Optimization Suite or CAOS is a free plugin that allows you to host Google Analytics locally on WordPress.
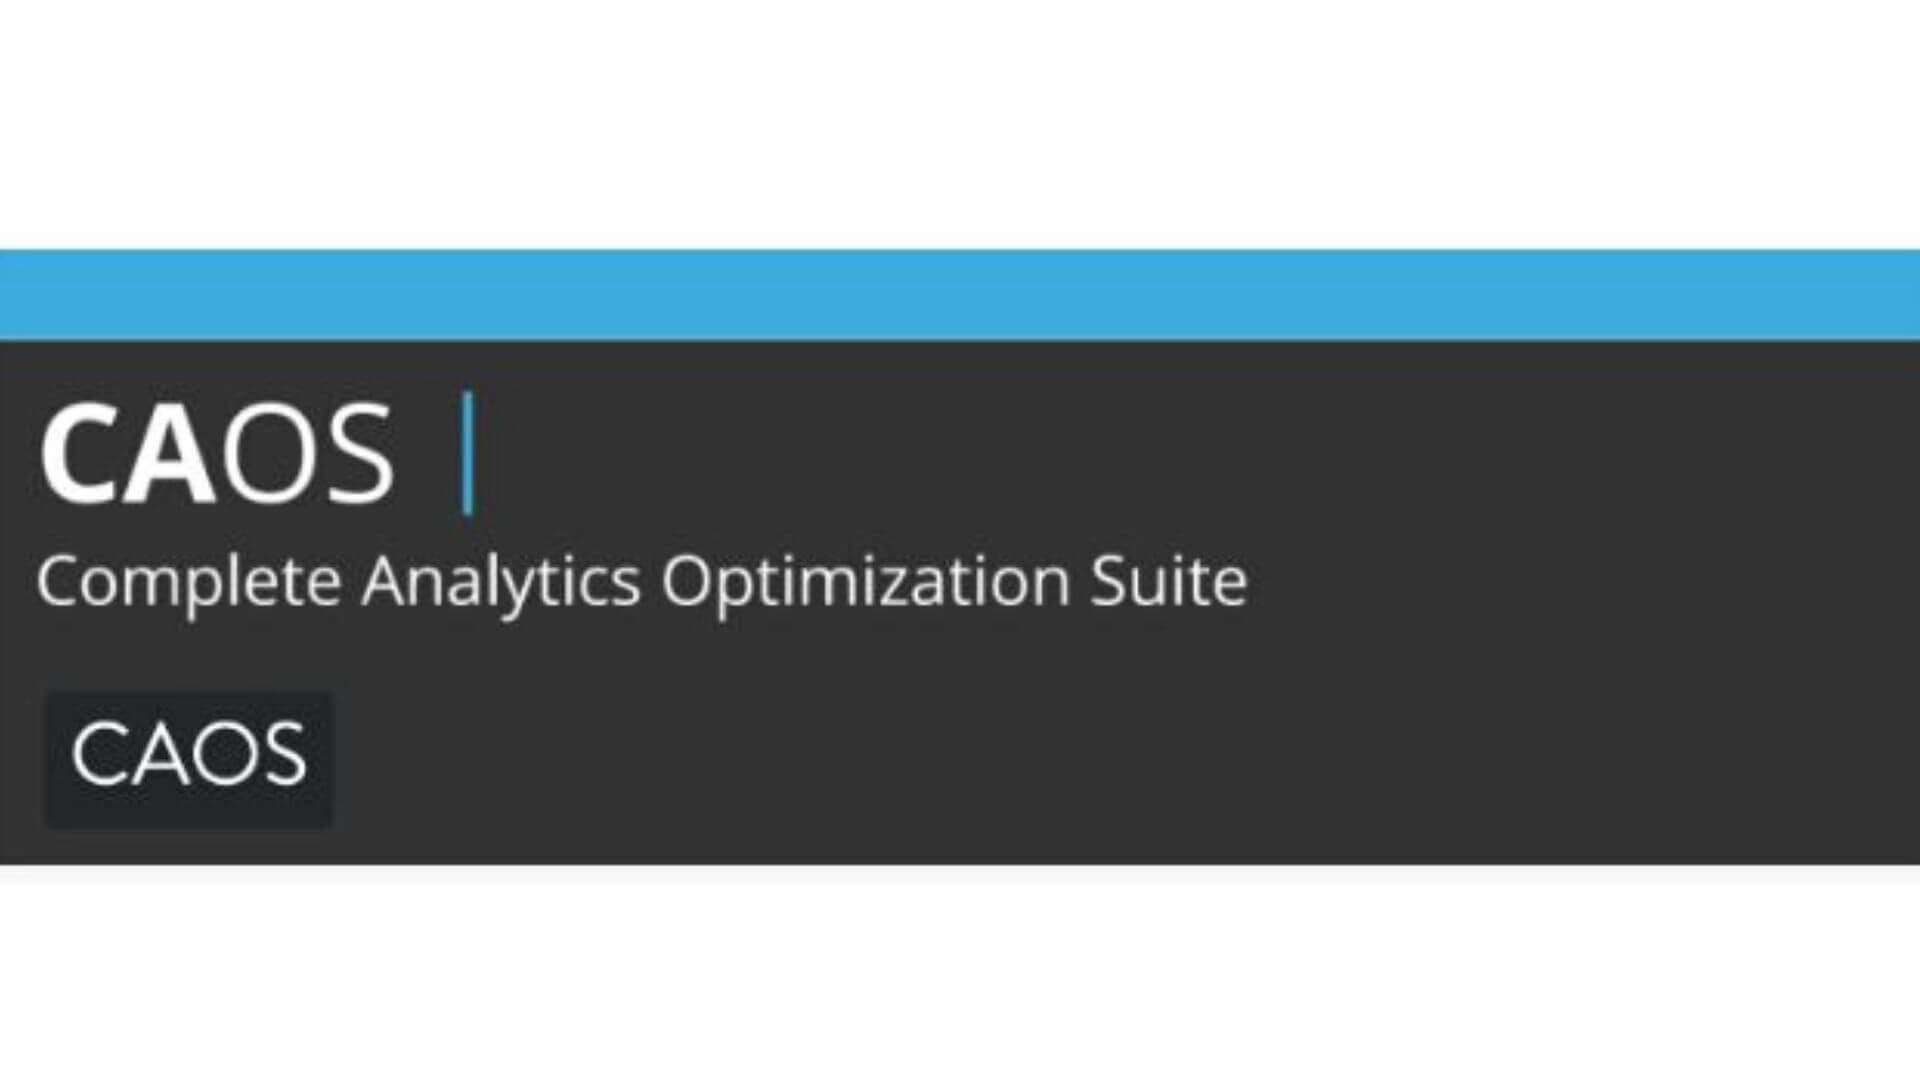
This plugin allows you to host analytics.js/gtag.js/ga.js locally and keep it updated using WordPress built-in Cron-Schedule.
- Install the plugin
- Enter your Tracking ID.
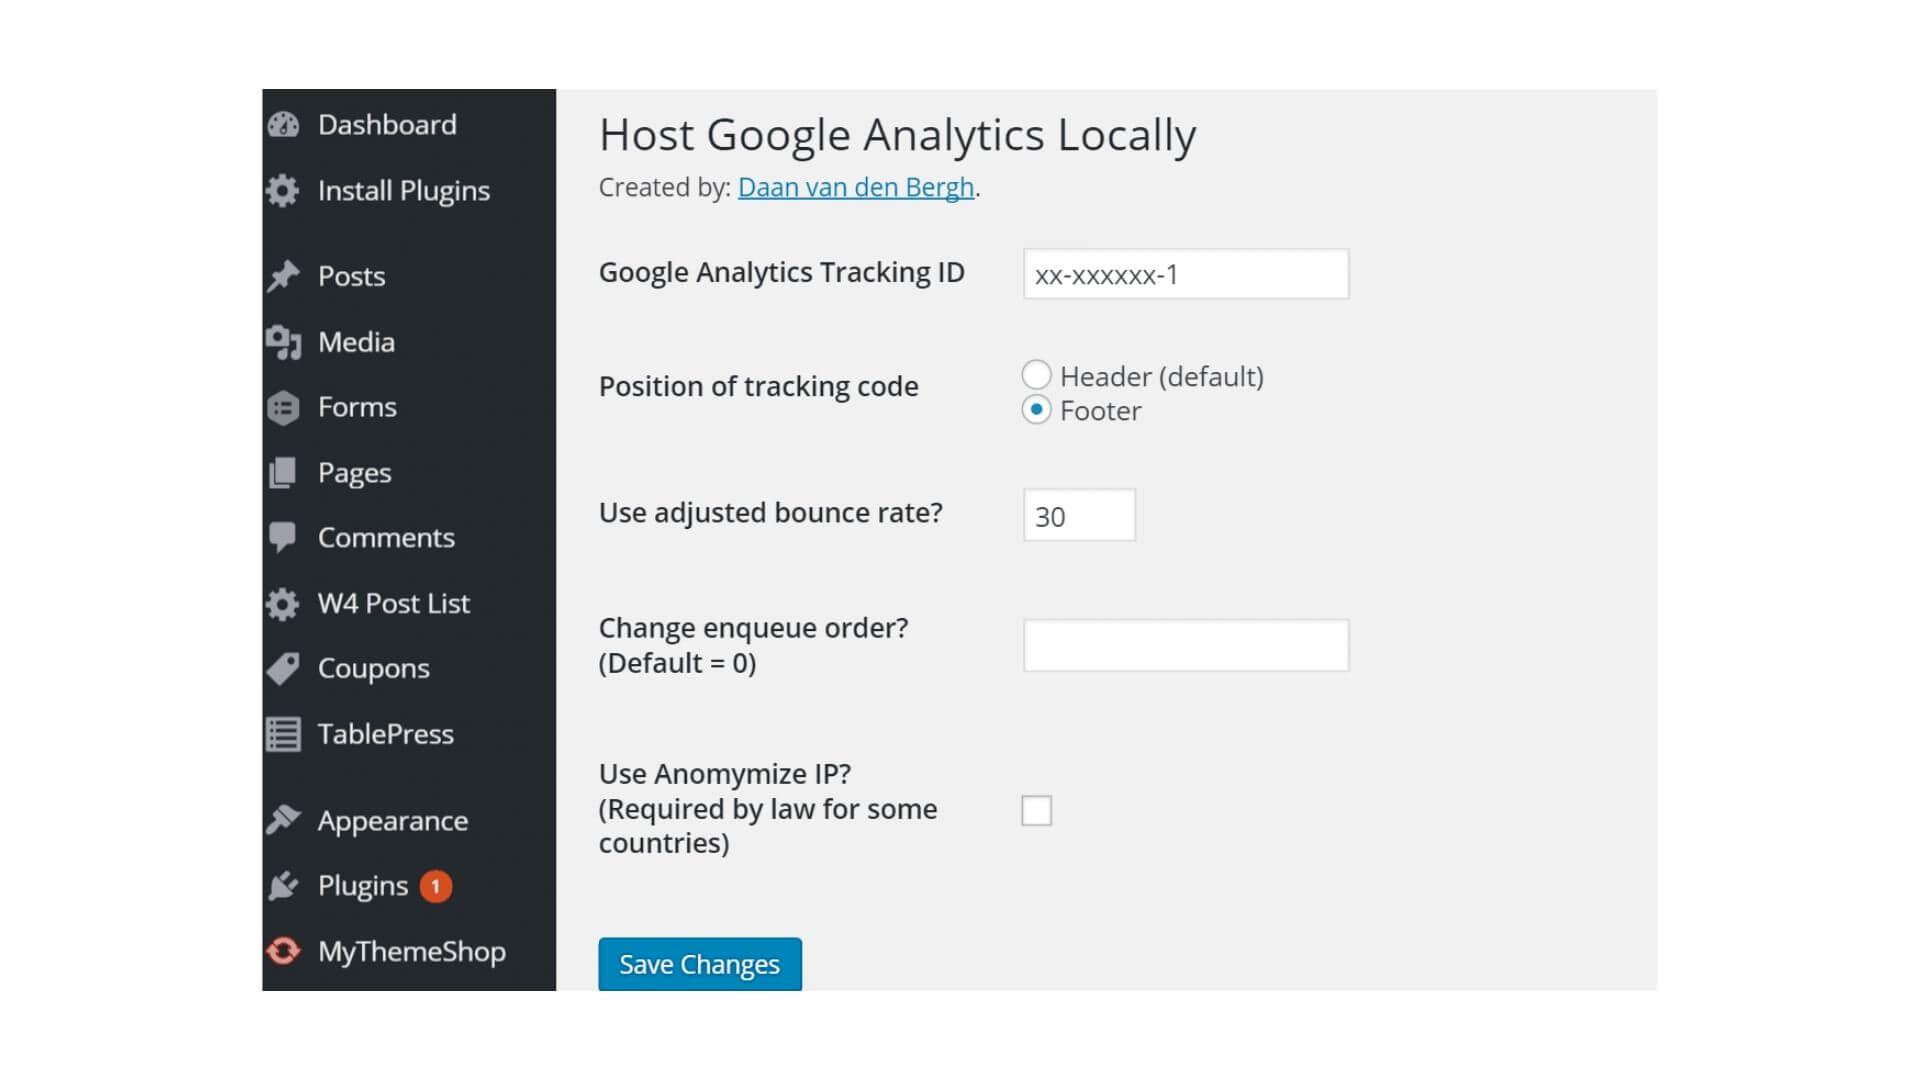
The plugin then adds the necessary Tracking Code to the header or footer of your theme. It then downloads and saves the analytics.js file to your website’s server and keeps it automatically updated using wp_cron().
There’s an added advantage that this plugin helps your website to load faster because the browser doesn’t have to make a roundtrip to download the file from Google’s external server.
Method 4: Using Google Tag Manager
Google Tag Manager is a tag management system that allows you to manage various tags and code snippets on your website. You can add and update scripts from the Tag Manager user interface instead of editing the code in WordPress directory.
You will two Google Tag Manager Installation codes and a unique GTM ID.

Option 1: Setup GTM manually
- Go to your WordPress dashboard.
- Navigate Appearance and select Theme Editor
- Select headers.php.
- Paste the first GTM installation code after the <head> element.

- Paste the second GTM installation code after the opening of <body> tag.
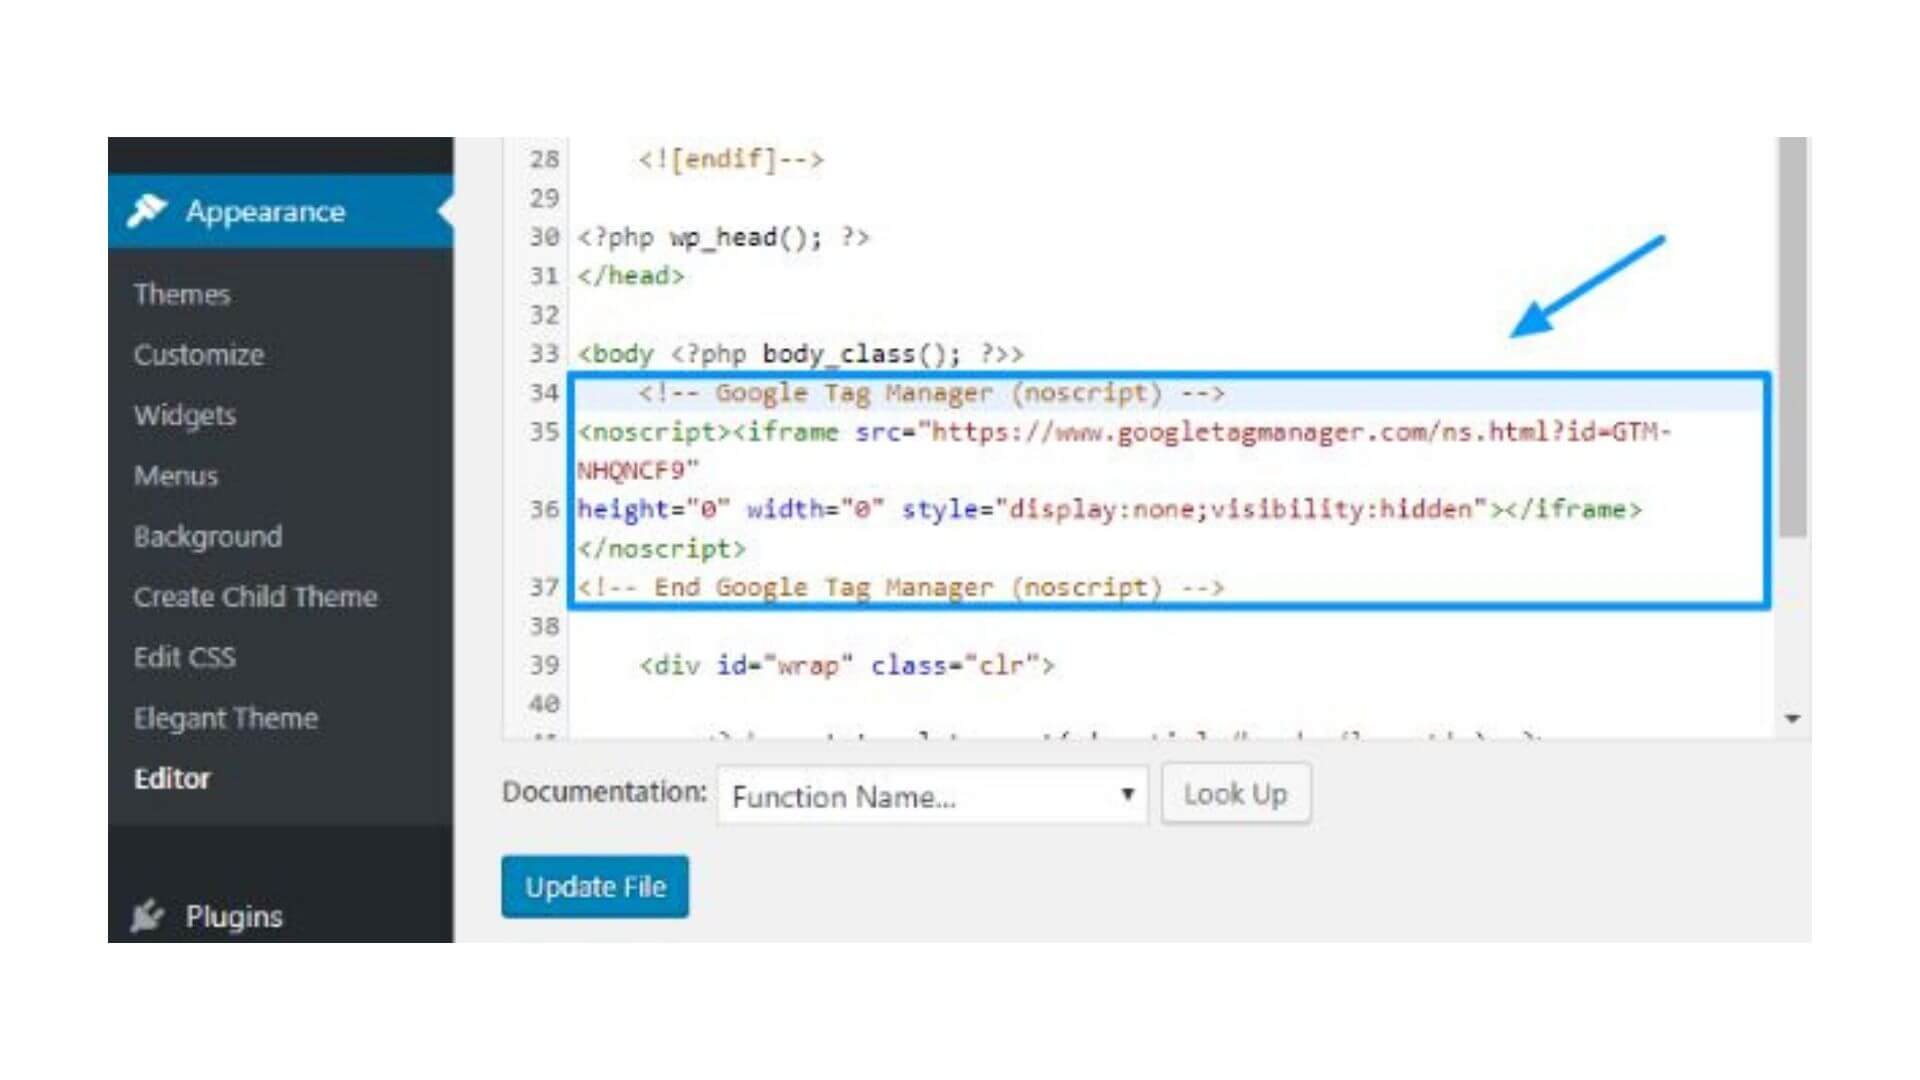
- Finally hit the Update file button.
Option 2. Using a Plugin
You can install GTM on your WordPress site by using a plugin. You can download DuracellTomi’s Google Tag Manager WordPress plugin for free. It has almost 100,000 active installs.
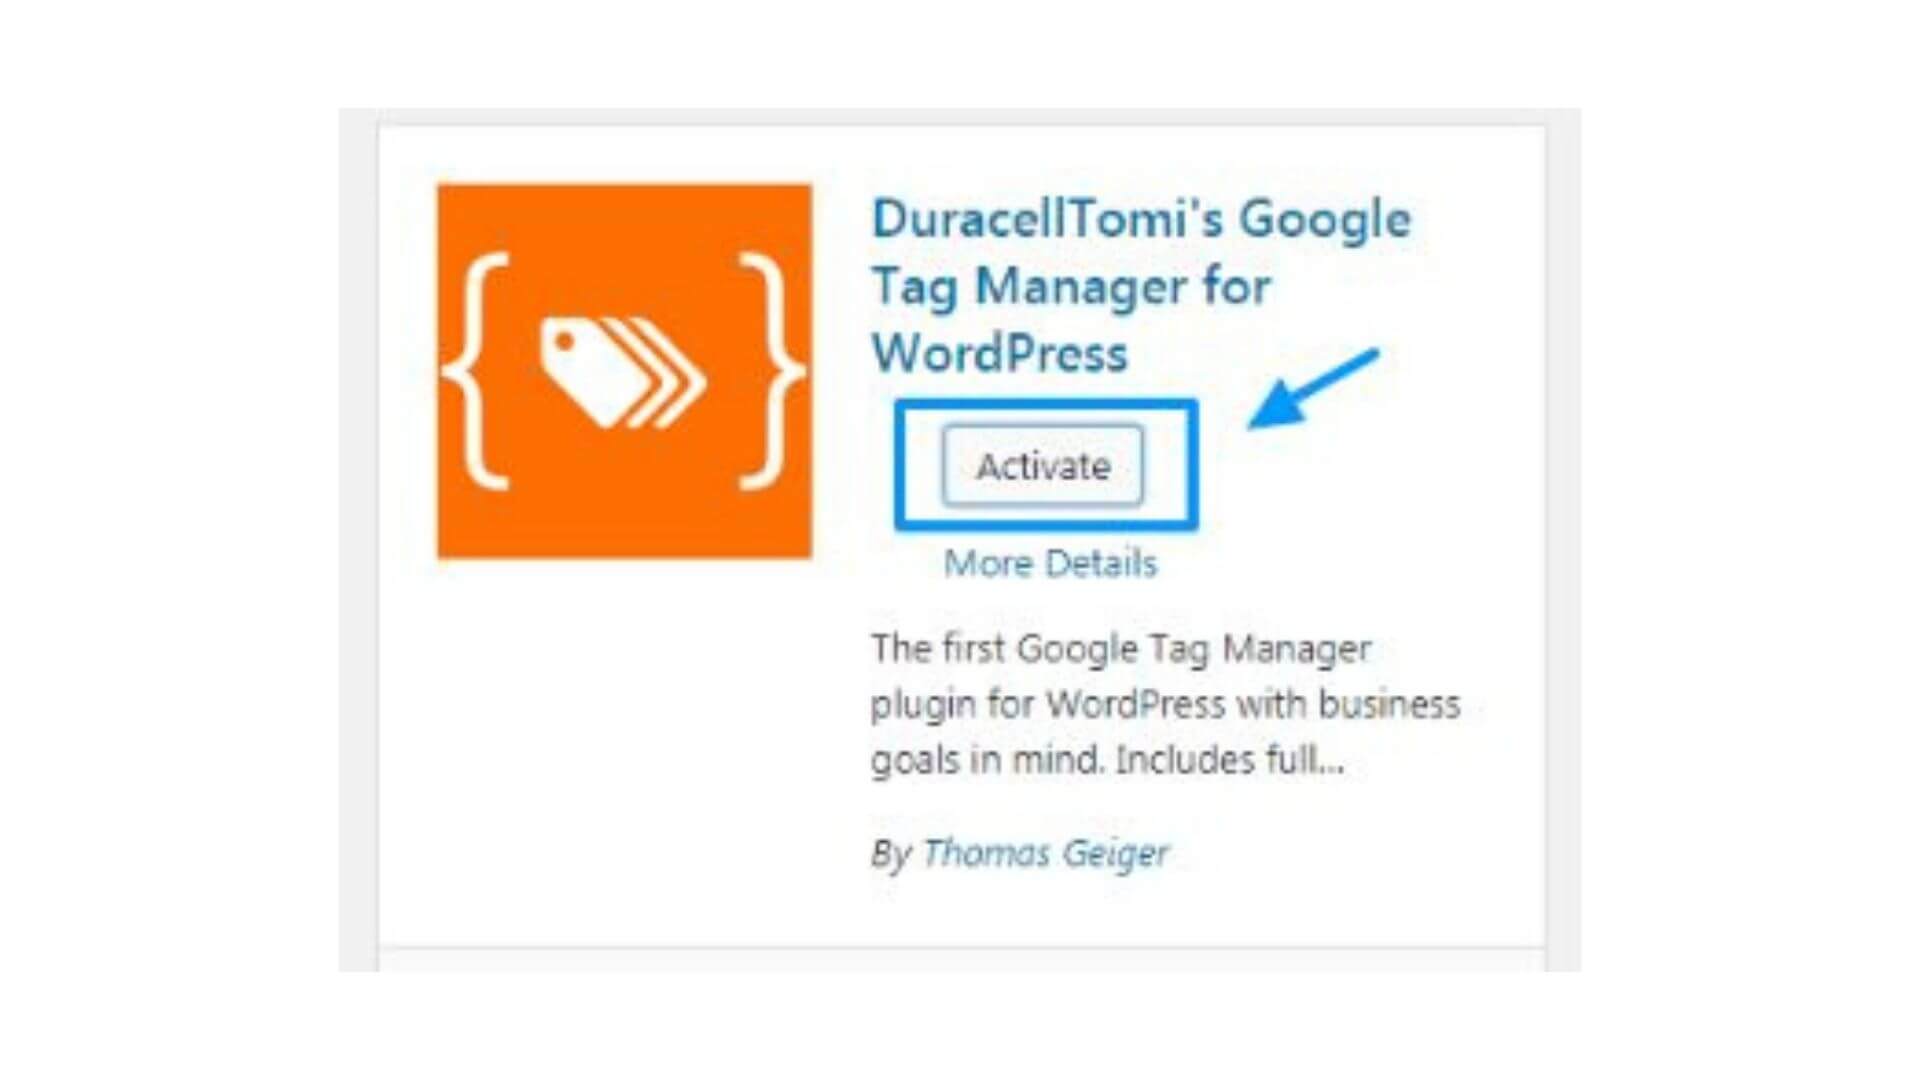
- Download and activate the plugin
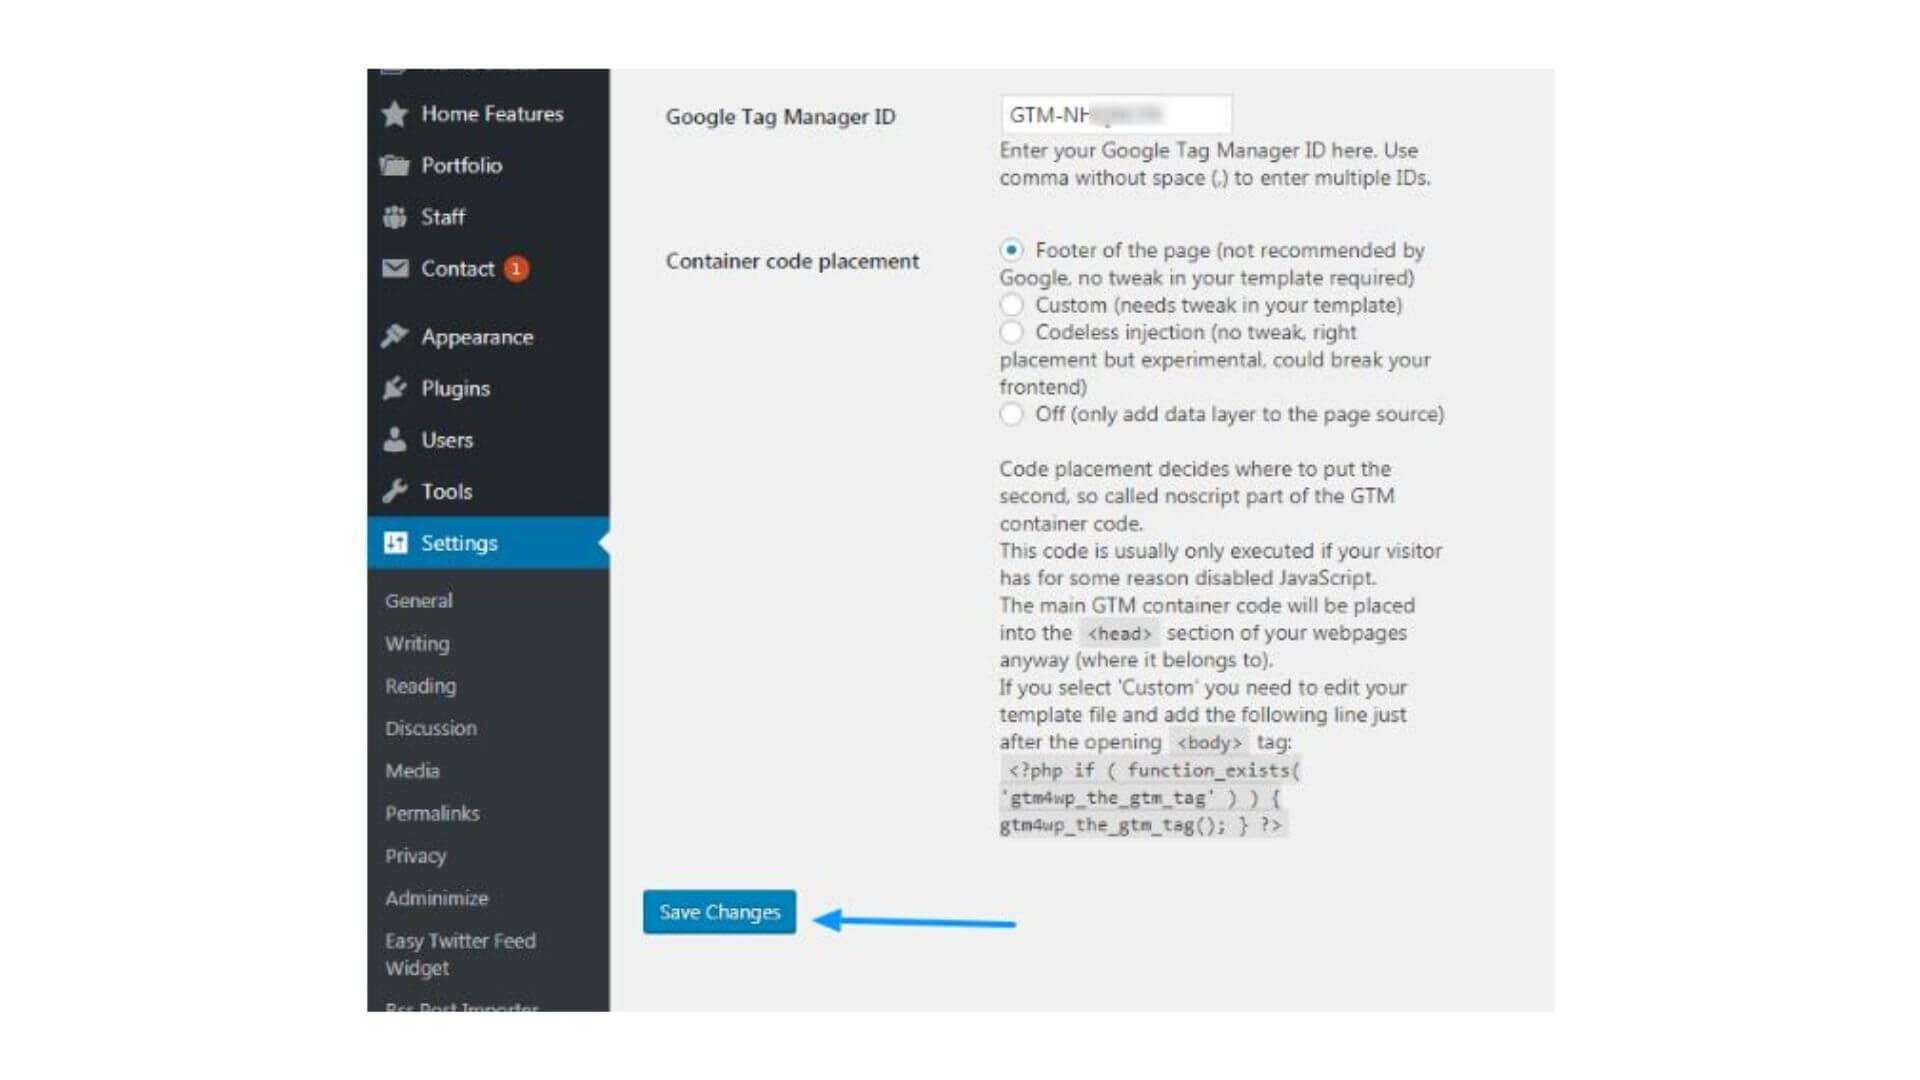
- Sign up for a Google Tag Manager Account and set up Google Analytics.
- Copy the Container ID from the GTM dashboard.
Conclusion
We have mentioned four ways to add Google Analytics to WordPress. You can use any method that’s suitable for you. It’s always recommended that beginners should go for the Plugins. And, if you are familiar with the coding, you are good to go without them. Just make sure that you use the WordPress child theme, otherwise, the tracking code gets overwritten when you update your theme.